How to Reduce Image Dimensions Online: A Practical Guide
Learn how to reduce image dimensions online with safe tools, practical steps, and best practices for preserving quality. What Dimensions guides you through tool selection, preparation, and exporting optimized images for web and print.

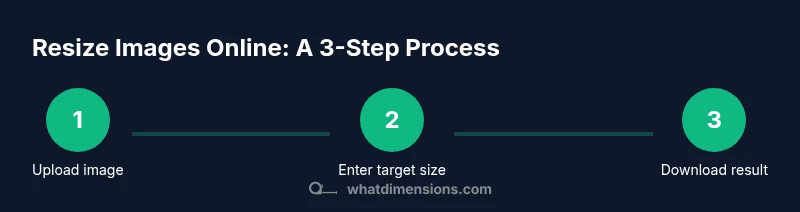
You can reduce image dimensions online by selecting a safe resizing tool, uploading your image, and setting the target width, height, or file size before saving. This quick method helps web performance and saves storage. What Dimensions notes that choosing appropriate compression and preserving aspect ratio avoids distorted results. Follow these steps to resize confidently while protecting your original file.
Why reducing image dimensions online matters
Reducing image dimensions online is a fundamental task for anyone who publishes digital content, shares photos, or builds websites. Large image files slow page loads, consume extra bandwidth, and can overwhelm storage limits. When you shrink width and height, you often reduce the file size without drastically changing the visual appearance, especially if you preserve the aspect ratio and choose sensible compression. According to What Dimensions, these decisions impact perceived quality and download speed more than you might expect. For homeowners updating a personal blog, students preparing a portfolio, or designers delivering web-ready assets, understanding how to reduce image dimensions online properly is a practical, repeatable skill. The goal is to achieve a balance: keep enough detail for the intended use while minimizing file size for fast loading and efficient sharing.
In addition to speed, smaller images reduce data transfer during cloud storage backups, improve mobile experiences, and comply with platform-specific limits (such as social media or CMS upload caps). The process is not just about “shrinking numbers”—it's about choosing the right target dimensions, the correct format, and the right level of compression to retain essential visual clarity. As you’ll see, the best outcomes come from a clear plan and disciplined tool selection.
Understanding image dimensions and quality
Images are measured by width and height in pixels (e.g., 1920x1080). These dimensions determine both how large an image appears on a screen and how much data the file contains. Reducing dimensions decreases the number of pixels, which lowers file size and can improve load times. However, excessive reduction can result in blurred details, jagged edges, or an obvious loss of quality when viewed at larger sizes. A key concept is the aspect ratio, the proportional relationship between width and height. Maintaining the original aspect ratio prevents distortion after resizing. If you know the intended display size, start from that target and work backward to determine the ideal pixel dimensions. For print purposes, you may need to consider DPI (dots per inch) and print resolution, but most online contexts rely on pixel dimensions first and foremost.
When you resize, you typically choose between formats such as JPEG for photographs and PNG for graphics with transparency. JPEG offers strong compression and smaller files but introduces artifacts at aggressive quality settings. PNG preserves sharp edges and transparency but can yield larger files for photography. What Dimensions emphasizes testing different formats to see which preserves the look you want at a given file size.
Choosing the right online tool
The online landscape for resizing images is broad. You can use simple browser-based editors, batch-resizing platforms, or developer-friendly APIs that automate the process. The safest choices are reputable tools with clear privacy policies and explicit limits on how your data is used. When selecting a tool, consider:
- Ease of use: Is the interface intuitive, with obvious controls for width, height, and quality?
- Batch capabilities: Do you need to resize many images at once, or just a single file?
- Output options: What formats are supported, and can you preserve metadata if needed?
- Privacy and security: Does the tool process images locally in your browser, or does it upload files to a cloud service?
- Quality controls: Can you preview compression and check output before downloading?
If you frequently resize, you may prefer a tool with batch processing, presets for common sizes (web, email, social), and an option to save settings for repeat use. Remember to verify that the tool respects your privacy preferences and to read user reviews for real-world performance. What Dimensions recommends trying a couple of tools with non-sensitive images to gauge results before handling private or proprietary content.
How to prepare images for resizing
Preparation is the quiet but critical step that prevents downstream regrets. Start with a safe backup of the original files. This ensures you can revert if the resized result doesn’t meet your needs. Check the current file size and dimensions to estimate the expected savings. Decide on a target width, height, or file size based on the intended destination (web pages, social posts, or print previews). If you aim to preserve the original aspect ratio, lock the aspect ratio in the tool and adjust one dimension to auto-calculate the other.
Collect images with similar characteristics to streamline batch workflows. For transparent backgrounds or simple graphics, PNG may be preferable; for photographs, JPEG with a tuned quality level often yields smaller files without visible artifacts. Finally, review any metadata you wish to retain; some tools strip metadata by default, which can affect archival value or color management data. Your pre-work sets the stage for a smooth resizing session.
Step-by-step workflow for a typical resize
This workflow applies to most online resizing tools and is designed to be safe for beginner to intermediate users. Start by opening your chosen tool in a browser and ensuring you are on a trusted site. Upload the image you want to resize. Enter the target dimensions or pick a preset size that matches your use case. If you know the display size, set width accordingly and let the height adjust to preserve the aspect ratio. Choose a compression level appropriate for the chosen format (lower quality for web thumbnails, higher for print previews). Preview the result, check for artifacts, and then download the optimized image. If you’re resizing multiple images, repeat the steps for each file or look for a batch feature to apply the same settings across a folder. Verify the final files meet your size and quality requirements before publishing.
Quality considerations: preserving details and compression
Compression is your friend when reducing image dimensions online, but only if applied thoughtfully. JPEG uses lossy compression; while it reduces file size, it can introduce visible artifacts at low quality settings. PNG uses lossless compression, preserving sharp edges but often producing larger files for photographs. The sweet spot is typically a balance: choose a target width that matches your display needs, then adjust the compression level to achieve a reasonable file size while keeping detail intact. When color depth is critical (such as product photos), you may experiment with progressive JPEG, which loads in stages and can improve perceived loading, or use PNG-8/PNG-24 for specific graphic needs. Always compare before-and-after images to ensure no crucial details were lost.
Batch resizing: save time with multiple files
Batch resizing is a huge time-saver when you have many images to optimize. Look for tools that support batch processing or bulk uploads, and apply consistent dimensions and quality settings across the batch. Consider organizing input files into a single folder and exporting to a dedicated output folder to keep results tidy. If privacy is a concern, choose tools that process files locally in your browser or provide clear data-handling policies for cloud processing. When batch processing, run a small subset first to verify results, then scale up. What Dimensions notes that batching can dramatically improve throughput without sacrificing consistency across your image set.
Common mistakes and how to avoid them
Common mistakes include resizing without preserving aspect ratio, which creates stretched images, or choosing a target size that is too aggressive for the display context. Always enable aspect-ratio lock when available. Underestimating the importance of testing across devices can lead to poorly scaled results on mobile or tablet screens. Neglecting to save the original file can leave you with irreversible loss of quality if you later need a different size. Finally, ignoring metadata or color profiles can produce inconsistent results when the image is used in professional workflows. By checking these factors, you’ll minimize surprises after download.
Metadata, formats, and export options
Deciding whether to retain metadata depends on your goals. For web use, stripping metadata can reduce file size slightly and improve privacy, but you may lose camera settings or GPS data. If you rely on color management, verify that the tool preserves color profiles and EXIF data when possible. Export formats matter: JPEG is most common for photographs; PNG is preferred for graphics with transparency; WebP can offer strong compression with good quality for modern browsers. When finalizing, ensure your chosen format aligns with the publishing platform’s requirements (dimensions limits, file size, and accepted formats). What Dimensions emphasizes testing a couple of export options to confirm the best balance between size and quality for your specific use case.
Safety, privacy, and final checks
Online resizing can expose images to third-party services. Always review privacy policies and terms of service before uploading sensitive content. If you’re handling personal data or proprietary designs, prefer tools that process files locally in the browser or provide clear data retention promises. Before publishing or sharing, perform a quick quality check: ensure dimensions match your target, check for visible artifacts, verify color accuracy, and test the file on the intended platform. Keeping a log of settings and versions helps reproduce results in the future and avoids drift across batches.
Tools & Materials
- Computer, tablet, or smartphone with internet access(Stable connection; desktop web recommended for precise controls)
- Original image files (JPEG, PNG, or GIF)(Keep a backup before resizing)
- Web browser or image resizing app(Choose reputable tools with transparent privacy policies)
- Consent for cloud-based batch processing (optional)(Review terms if you upload multiple files)
Steps
Estimated time: 15-25 minutes
- 1
Open the resizing tool
Launch your chosen online tool and verify you are on a trusted domain. This initial check prevents accidental uploads to questionable sites and protects your content.
Tip: Tip: Prefer tools that operate in-browser to minimize data leakage. - 2
Upload your image
Use the tool’s image upload control to select the file from your device. If resizing a batch, use the multi-upload feature and ensure all files load correctly before proceeding.
Tip: Tip: Drag-and-drop can speed up the process; verify the file shows in the preview. - 3
Enter target dimensions or size
Specify either width or height. If you know the display size, set that dimension and let the tool calculate the other to preserve aspect ratio. For file size constraints, adjust quality/format accordingly.
Tip: Tip: Lock aspect ratio to avoid distortion. - 4
Choose format and quality
Select JPEG for photos or PNG for graphics. Set quality or compression to balance detail and file size. Preview artifacts and revert if necessary.
Tip: Tip: Start with a medium quality and compare to high-quality output. - 5
Preview results
Review the resized image at actual size or viewport scale to assess clarity and sharpness. Check color accuracy and edge detail.
Tip: Tip: Zoom in to inspect fine edges; artifacts often appear first on high-contrast borders. - 6
Download or save
Save the resized image to your device or cloud storage. If batch processing, save all outputs to a dedicated folder for easy retrieval.
Tip: Tip: Rename files with a consistent convention (e.g., image_web_800x600.jpg). - 7
Validate post-resize
Open the downloaded file in an image viewer and on the target platform to confirm correct dimensions and rendering.
Tip: Tip: Check the file size on disk to ensure it meets your performance goals.
Quick Answers
What does it mean to reduce image dimensions online?
It means resizing an image's width and height using an online tool, typically to lower file size for faster web loading. The change is expressed in pixels and affects how the image appears on screens.
Reducing image dimensions online means resizing width and height with an online tool to produce a smaller file.
Are online tools safe for resizing sensitive images?
Safety depends on the provider. Prefer tools with in-browser processing or clear privacy policies. Avoid uploading highly sensitive material to unknown sites.
Yes, but only with trusted tools and by reading their privacy policies.
Can I preserve EXIF metadata when resizing online?
Some tools preserve metadata; others strip it to save space. If EXIF data matters for color management or copyright, choose tools that explicitly support metadata retention.
Some online tools keep metadata; others don’t. Check the tool’s metadata options.
Does resizing affect image quality?
Yes, especially with aggressive compression or large dimensional reductions. Test different quality settings and compare results to maintain an acceptable balance.
Yes, resizing can affect quality depending on compression and how much you reduce the size.
Can I batch resize multiple images at once?
Many tools support batch resizing, which saves time. Ensure all files use the same output settings to keep results consistent.
Yes, many tools let you resize several images at once with the same settings.
What file formats are best after resizing?
JPEG is typically best for photos; PNG is preferred for graphics with transparency. WebP can offer superior compression for modern browsers.
JPEG works well for photos, PNG for graphics, and WebP for efficient web use.
Watch Video
Main Points
- Start with a backup of the originals to avoid data loss.
- Preserve aspect ratio and test across platforms for best results.
- Batch processing can dramatically improve efficiency.
- Choose output formats thoughtfully to balance quality and file size.