How to Make Photo Dimensions Smaller: A Practical Guide
Learn practical, step-by-step methods to reduce photo dimensions while preserving as much quality as possible. From cropping margins to compressions and across common tools, this guide covers a reader-friendly workflow for web, print, and sharing.

If you need a quick result, start by choosing a target width or height that fits your use (web, email, or print), maintain aspect ratio, and apply resizing. Then crop any unnecessary borders and compress the file with appropriate quality settings. Check the final dimensions to ensure they meet your requirements.
Understanding photo dimensions and why smaller matters
When you ask how to make photo dimensions smaller, you’re balancing pixel size with file size and display needs. Large images eat more bandwidth, slow down pages, and can overwhelm sharing platforms. By purposefully reducing width, height, or both, you tailor images for specific screens—phones, tablets, or desktop displays—while keeping enough detail for recognition. What Dimensions notes that many homeowners, students, and designers resize images to meet platform requirements, optimize loading, and ensure consistent appearance across devices. In short, smaller dimensions are not about shrinking the memory, but about targeting the right footprint for the intended use, whether it’s a quick email attachment or a polished portfolio piece.
tipKeyTakeawayKeywordsResolvedOnlyForThisBlockReally
Note: The goal is not to degrade the image universally but to select a size that suits the final context. If you have a high-resolution origin file, you can shrink it significantly without losing noticeable clarity by applying proper downsampling and compression techniques.
wordCountOverrideAgreementCheckAllAsserts
Tools & Materials
- Computer or mobile device(with internet access for online tools or downloads)
- Photo editing software(Examples: Photoshop, GIMP, Lightroom, or Preview on macOS)
- Original image file(s)(Keep a master copy before resizing)
- Target output size guide(Know the maximum width/height in pixels or the final file size limit)
- Backup method(Save as a new filename to preserve the original)
Steps
Estimated time: 20-40 minutes
- 1
Define target dimensions
Decide the final display requirements (e.g., 1200x800 px for a blog header or 300x300 px for social avatars). Maintain the original aspect ratio to avoid stretching. If you’re unsure, start from the smaller of width or height and scale proportionally.
Tip: Always start with a clear target so you don’t over-process the image. - 2
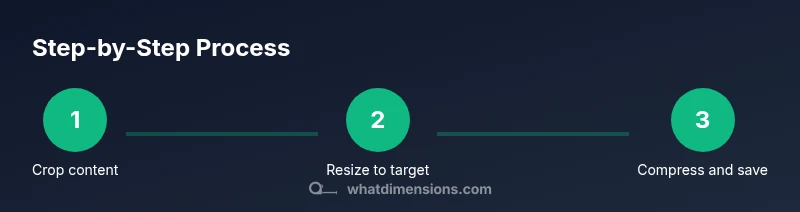
Crop unnecessary content
Use an image editor to trim away borders or extraneous space before resizing. Cropping reduces the overall pixel count and helps you keep the important subject within the new frame.
Tip: Cropping first often yields better quality than resizing large and then cropping. - 3
Resize to target dimensions
Apply a proportional resize to reach the chosen width or height. Lock the aspect ratio so the image doesn’t look distorted. If your tool offers a “constrain proportions,” enable it.
Tip: Check the resulting pixel dimensions in the editor’s info panel. - 4
Choose an appropriate file format and quality
For web images, JPEG or WebP with a moderate quality setting preserves visibility while reducing size. PNG is better for graphics with transparency. Avoid lossless PNG for large photos if size is a concern.
Tip: Start with 70–85% quality for JPEG/WebP and adjust after evaluating quality vs. size. - 5
Preview and compare to original
Open both versions side-by-side to ensure the resized image still communicates the intended message. Pay attention to blur, dithering, and color shifts that sometimes accompany downsampling.
Tip: Toggle zoom to 100% to detect subtle artifacts. - 6
Save with a clear, new filename
Use a naming convention that includes the new dimensions, e.g., sunset-1200x800.jpg. This keeps your library organized and avoids overwriting sources.
Tip: Include the date or version to track iterations. - 7
Test in the final context
Upload or insert the image into its intended platform (website, social, document) to verify appearance and load speed. If not meeting specs, repeat with adjusted settings.
Tip: Small changes in dimensions or compression can yield big file-size differences.
Quick Answers
What is the difference between resizing and cropping a photo?
Resizing changes the overall pixel dimensions of the image, while cropping removes outer portions to focus on a subject. Cropping reduces both size and framing, whereas resizing preserves the content but may change its framing.
Resizing changes the size, cropping changes the visible area.
What’s a good DPI or resolution for web images?
For most web applications, pixel dimensions are what matter, not printer DPI. A standard 72–96 PPI equivalent on screen is common, while saving in compressed formats helps loading speed.
Web images focus on pixel size, not print DPI.
Will reducing dimensions degrade image quality?
Downsampling can introduce some loss, especially if you compress aggressively. The key is to resize proportionally and use appropriate compression to preserve perceived quality.
Yes, some quality loss is possible, but it can be minimized with careful settings.
How can I ensure aspect ratio is preserved?
Most editors have a lock or chain icon to maintain aspect ratio during resizing. Enable it, then input either the width or height to auto-calculate the other dimension.
Lock aspect ratio to keep the image from looking stretched.
Which file formats are best when reducing dimensions?
JPEG/WebP are common for photos due to good compression. PNG is preferable for graphics with sharp edges or transparency. Choose based on content and final use.
JPEG or WebP for photos, PNG for graphics with transparency.
Watch Video
Main Points
- Define exact target dimensions before editing
- Crop strategically to remove unnecessary content
- Maintain aspect ratio during resize to avoid distortion
- Choose format and quality to balance size and visual integrity
- Always verify the final image in its intended context