How to Reduce Image Dimensions: A Practical Guide
Learn how to reduce image dimensions for web and print without sacrificing quality. This step-by-step guide covers crop, resize, resampling, and compression with practical workflows from What Dimensions.

By following this guide, you will learn how to reduce image dimensions using crop, resize, and resampling techniques while preserving essential quality. You’ll understand when to crop versus resize, how to select target width and height, and how to export with appropriate formats. What Dimensions provides clear, practical steps to optimize images for web and print.
Understanding image dimensions and why you might reduce them
Image dimensions define the pixel width and height of a graphic, typically expressed as width × height in pixels. Reducing these dimensions affects file size, loading speed, and how the image fits on screens of different sizes. According to What Dimensions, opting for the right dimensions from the start prevents unnecessary data usage and ensures your visuals render crisply across devices. For designers, homeowners, and students, knowing when to resize versus crop is essential: resizing adjusts the overall pixel grid, while cropping discards portions of an image to fit a new frame. Consider your end use—web banners, social posts, slideshows, or printed media—and choose dimensions that meet those display requirements without sacrificing critical visual information. As you plan, also think about aspect ratio to avoid stretched or squashed results. By keeping a clear target format and resolution in mind, you can preserve composition while trimming data load. What Dimensions’s research shows that disciplined dimension management yields faster loading pages and better user experience, especially on mobile networks.
Key ideas to remember:
- Always define the target width and height before editing.
- Maintain aspect ratio to avoid distortions.
- Balance dimension reduction with the necessary image quality for the intended platform.
Key concepts: DPI, PPI, and resolution
DPI (dots per inch) and PPI (pixels per inch) relate to print and display density. In digital workflows, PPI is often the term you’ll encounter, but only the pixel dimensions truly govern file size. When you downsample an image, you reduce the number of pixels, which lowers both file size and memory usage. Conversely, increasing dimensions without more data can cause blur and pixelation. What Dimensions emphasizes treating DPI/PPI as a metadata concern—important for print workflows, but not a driver of on-screen quality on modern screens. For web-ready images, a common target is 72–96 PPI, while for print you might aim higher (300 PPI or more) depending on viewing distance and print method. The takeaway is to align PPI with end use, not with arbitrary values. Additionally, color depth and compression interact with dimensions: aggressive compression can mask edge artifacts that appear after resizing. A thoughtful balance protects fidelity while achieving your size goals.
Methods to reduce dimensions: crop vs resize vs resampling
There are multiple paths to smaller image dimensions, each with trade-offs. Cropping removes unwanted areas, preserving sharp details in the remaining frame but discards content. Resizing changes the overall image size by interpolation, which can soften details if reduced dramatically. Resampling algorithms (Lanczos, Bicubic, Bilinear) estimate new pixels and impact sharpness and texture. What Dimensions recommends a practical approach: define the exact target dimensions first, decide whether you need to keep all original content (crop) or reduce the whole frame (resize), then choose a high-quality resampling method. If you’re preparing assets for the web, prefer a modest reduction with a strong resampling method to retain legibility in text and skin tones. When printing, test a proof to verify color accuracy and detail after size changes. Finally, consider converting to an efficient format (see the next section) to reduce file size further without sacrificing perceived quality.
How to choose target dimensions and preserve aspect ratio
Preserving aspect ratio is critical to avoid distorted results. Start with the original width-to-height ratio and apply a consistent scale factor or select a specific width or height and compute the other dimension automatically. If you need to fit a fixed space (e.g., a website banner), calculate the maximum allowed width and height and scale accordingly while maintaining the ratio. When dealing with multiple images, a common strategy is to standardize dimensions for a series (e.g., social post sizes or presentation slides) and resize each image to the same target width or height. In cases where content is cropped, ensure that important elements remain centered or strategically placed. What Dimensions’s guidance stresses validating edge cases—tiny thumbnails should still preserve legibility, and graphic text must remain readable after resizing.
Practical workflows across tools: desktop and code options
You can resize images using a range of tools from graphical editors to scripting languages. Desktop programs like Photoshop, GIMP, or Affinity Photo provide precise width/height controls, aspect-ratio locking, and multiple resampling algorithms. For batch processing, scripts with Python and the Pillow library enable automated resizing based on a list of target dimensions. Online tools offer quick, no-install options for small tasks but may lack batch support or privacy controls. When choosing a tool, consider your workflow: single edits, batch pipelines, or automated systems. What Dimensions recommends validating results in multiple contexts: a web browser, a mobile display, and, if relevant, a printer preview. Keep a backup copy of the original image, document your target dimensions, and test exports to ensure consistent results across formats.
Verifying results: quality, color, and file size
After resizing, examine the image at 100% zoom to assess sharpness and artifacts. Compare a cropped area with the original to gauge detail retention; look for edge halos around high-contrast boundaries. Color shifts can occur during compression, so compare color channels and adjust gamma or color space if needed. File size reductions should be tested by exporting in several formats (JPEG, PNG, WebP) and with varied quality levels. Remember to also check accessibility concerns: ensure text remains legible and color contrast is adequate on the final display platform. Finally, maintain documentation of the dimensions and formats used for each asset to support future edits or re-exports.
Real-world scenarios and tips for different use cases
For web thumbnails, aim for small file sizes without sacrificing legibility; prioritize dimensions that align with your site’s grid system. For social media, adapt to each platform’s preferred sizes to avoid automatic cropping. For presentations, choose higher resolution within the slide dimensions and verify print-ready files if you plan physical handouts. If you frequently update images, adopt a consistent naming convention that includes dimensions and format. What Dimensions emphasizes testing end-to-end: export, transfer to the target device, and validate the final appearance against your design intent.
Tools & Materials
- Image editing software(Photoshop, GIMP, or any editor with precise resize and crop controls)
- Source image(Keep a high-resolution master copy to preserve quality during resizing)
- Backup copy(Always save the original before performing edits)
- Target dimension plan(Document desired width, height, and aspect ratio before editing)
- Storage and export options(Access to multiple formats (JPEG, PNG, WebP) for comparison)
Steps
Estimated time: Total time: 30-60 minutes
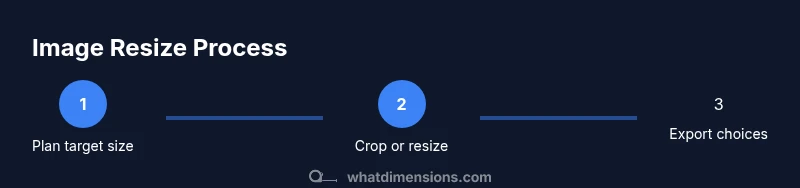
- 1
Determine target dimensions and aspect ratio
Identify the final use of the image and set explicit target dimensions. Decide whether to maintain the original aspect ratio or prioritize a fixed frame. Document the width and height to guide all subsequent edits.
Tip: Tip: Use a grid or ruler in your editor to visualize the target frame before resizing. - 2
Choose crop or resize strategy
If only a portion of the image is needed, crop to the target area. If you need the entire scene at smaller size, resize using a high-quality resampling algorithm.
Tip: Tip: When cropping, keep the most important subject centered or rule-of-thirds aligned. - 3
Apply the resize or crop operation
Perform the chosen action with dimensions locked to the target values. Use a reliable resampling method (Lanczos or Bicubic) to minimize blur during downsampling.
Tip: Tip: Always work on a duplicate layer or copy to preserve the original pixels. - 4
Adjust resolution and color settings
If printing, set a suitable DPI (e.g., 300 DPI). For web, you can stay at screen density (72–96 PPI). Ensure color space is appropriate (sRGB for web).
Tip: Tip: Calibrate monitor color if color accuracy is critical. - 5
Export in multiple formats
Save versions in JPEG, PNG, and WebP to compare quality and file size. Tweak compression levels to balance detail and size.
Tip: Tip: For photographs, JPEG with quality around 70–80 often yields good balance. - 6
Validate results and back up
Review the final images on different devices or viewers. Keep a labeled backup of the originals and each export variant.
Tip: Tip: Create a small batch report noting the dimensions and file sizes for future reference.
Quick Answers
How do I know the right target dimensions for web use?
Start with the target display area and browser requirements. Use common web sizes as references, and verify that the final image looks sharp on both desktop and mobile. Always test in the live context before finalizing.
Start with your display area, check common web sizes, and test on desktop and mobile before finalizing.
Will reducing image dimensions degrade quality?
Yes, reducing dimensions can reduce perceived quality if overdone. Use high-quality resampling, inspect at 100% zoom, and compare multiple exports to choose a balanced option.
Yes, but you can minimize degradation by choosing good resampling and validating at 100% zoom.
What formats should I use when exporting resized images?
JPEG is good for photos with moderate compression; PNG preserves sharp edges for graphics; WebP offers good quality at smaller sizes. Export multiple formats to test which looks best for your use case.
Use JPEG for photos, PNG for graphics, and WebP when possible, testing each option.
How can I preserve aspect ratio automatically?
Enable aspect-ratio locking in your editor and resize by width or height while the other dimension adjusts automatically. This prevents distortion and maintains the original composition.
Lock the aspect ratio and resize by one dimension so the other adjusts automatically.
Is DPI/PPI important for digital images?
DPI/PPI matters mainly for print. For on-screen images, the pixel dimensions and compression are what drive quality and file size.
DPI matters mainly for printing; for screens, pixels and compression matter most.
Can I batch resize multiple images at once?
Yes. Most editors and scripting libraries support batch processing. Create a consistent target size, apply a uniform resampling algorithm, and export all files to a chosen set of formats.
Absolutely, use batch processing to resize many images with consistent settings.
Watch Video
Main Points
- Define target dimensions before editing
- Preserve aspect ratio to avoid distortion
- Choose proper resampling to maintain quality
- Test exports across formats for best size/quality balance
- Document settings for future edits