How to Reduce Photo Dimensions: A Practical Guide
Learn practical, quality-preserving techniques to reduce photo dimensions for web and print. This guide from What Dimensions covers tools, steps, and best practices for resizing images while maintaining fidelity.

In this guide, you will learn how to resize a photo to smaller dimensions while preserving aspect ratio and quality. We’ll cover when to resize, which tools to use, and the key steps to avoid pixelation. By following these steps, you’ll ensure the final image loads quickly online and prints at the intended size.
Why image dimensions matter
According to What Dimensions, image dimensions determine how data is stored and how an image is displayed across devices and media. When you learn how to reduce dimensions of photo for web, you reduce file size, loading times, and bandwidth usage, while preserving enough detail for your intended use. The What Dimensions team found that many creators underestimate the impact of small dimension changes on sharpness, color accuracy, and perceived quality. In this section we explore why those numbers matter and how they guide your resizing decisions.
For web thumbnails, social previews, and print proofs, the target dimensions shape both the user experience and the downstream workflow. If you know the final display size, you can tailor the pixel dimensions to match that outlet—avoiding upscaling from too small a source. Conversely, oversized originals can be wasteful and slow to load. By understanding the basics of dimensions, you lay a solid foundation for the rest of this guide on how to reduce dimensions of photo while maintaining fidelity.
How to determine appropriate dimensions
Choosing the right target dimensions starts with your end use. For online distribution, a common practice is to resize to widths that match the largest display where the image will appear, while maintaining aspect ratio to avoid distortion. For prints, you may need different pixel dimensions tied to your printer's DPI and the print size you want. The key metric is the final display size in pixels or inches at a given DPI. If you are asking how to reduce dimensions of photo without sacrificing essential detail, begin with your maximum required width, compute the height based on the aspect ratio, and verify both numbers against your target channels (web, social, print). The goal is to minimize data while preserving legibility and color integrity.
Methods to resize: quality-preserving vs speed
There are several approaches to resizing; the best choice depends on your priority. When you are learning how to reduce dimensions of photo, you’ll weigh quality against speed. In most editors, resizing using a true resampling algorithm (Lanczos or Bicubic) preserves sharpness better than simple pixel trimming, especially when reducing size. Some tools offer smart resizing with content-aware scaling, which can protect important edges. If you need bulk reductions, batch processing with a CLI tool like ImageMagick can save time, but requires accuracy in parameters to avoid unintended changes in color or compression.
Practical workflow for common scenarios
Whether you’re preparing images for a website, a slide deck, or a printed portfolio, apply this practical workflow for how to reduce dimensions of photo. Start by identifying the primary use (web or print). Then choose the target width that matches a standard display or print size (for example, a 1024 px wide image for a website hero). Keep the aspect ratio locked to avoid distortion. Resize with the appropriate resampling method to minimize noise and blur. Finally, export in the preferred format and run a quick quality check by viewing at target sizes.
File formats, color profiles, and DPI
Resizing alone does not determine file quality. After reducing dimensions, consider the file format and color profile. For web use, JPEG and PNG are common; for print, TIFF or high-quality JPEG may be preferable. Ensure you export with the correct color profile (
Verifying results: test targets, web, and print checks
After resizing, test the image across its intended displays to confirm quality. Open the image on a phone, a desktop, and a large monitor, and compare against the original at the new size. Print a proof if needed to assess how the reduced dimensions translate in physical media. Look for banding, pixelation, or color shifts and adjust accordingly. A quick compare against a known good benchmark helps ensure you’re learning how to reduce dimensions of photo effectively.
Common mistakes and how to avoid them
Common errors when resizing include neglecting aspect ratio, compressing too aggressively, and saving over the original file. Always work from a duplicate, maintain a non-destructive workflow, and review the image at final output sizes. If you notice artifacts, revert to a higher-quality resampling method or adjust the target dimensions slightly. Finally, document your settings for future reference so you can replicate successful results when you need to learn how to reduce dimensions of photo again.
Tools & Materials
- Computer or laptop(For editing and exporting)
- Image editing software (e.g., Photoshop, GIMP, or Affinity Photo)(Ensure it supports non-destructive resizing and accurate resampling)
- ImageMagick or a batch tool (optional)(Useful for bulk resizing via command line)
- Reference images or target specs(Keep target dimensions handy for quick comparison)
- Internet access (optional)(If using online resizing tools)
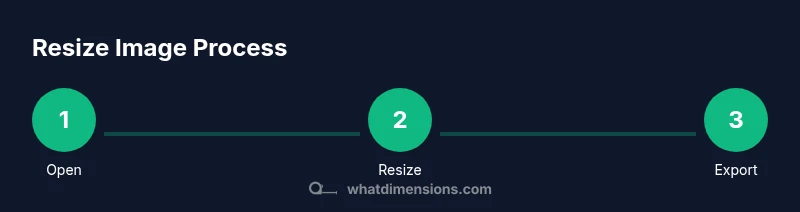
Steps
Estimated time: 15-25 minutes
- 1
Open the image in your editor
Launch your editor and import the photo you want to resize. Note the current pixel dimensions and check the color profile to ensure consistency with your target output.
Tip: Always work on a duplicate layer or save a copy to preserve the original. - 2
Set target dimensions while preserving aspect ratio
Enter your desired width or height and let the software auto-calculate the other dimension to maintain aspect ratio. If print is the goal, consider the final physical size and print DPI together.
Tip: Lock the aspect ratio or use a constraint box to prevent distortion. - 3
Choose a resampling method
Select a high-quality resampling algorithm such as Lanczos or Bicubic for reductions. Avoid crude methods that trim pixels without interpolation, which can blur or pixelate edges.
Tip: For web images, Lanczos is a good default balance of clarity and performance. - 4
Apply resize and preview
Apply the resize operation and view the result at 100% zoom and at the final display size. Check sharpness, artifacting, and texture in important areas like edges and faces.
Tip: Zoom to 100% on several areas to catch subtle issues early. - 5
Export with appropriate format and quality
Export the image in the format suited to its use (JPEG for photos on the web, PNG for graphics with transparency, TIFF for print). Choose a quality setting that balances file size and visual fidelity.
Tip: Save a high-quality backup before compressing for web use. - 6
Validate final size and appearance
Review the final file on the target devices or print proof to ensure it meets your expectations. If needed, repeat with adjusted dimensions or quality settings.
Tip: Document the exact dimensions and settings for future projects.
Quick Answers
What is the difference between changing image dimensions and changing resolution?
Changing dimensions adjusts the pixel grid (width x height). Resolution refers to pixels per inch; reducing only resolution doesn't physically shrink the image, and may not reduce file size significantly. To shrink file size, resize the pixel dimensions or adjust compression while preserving the intended output.
Dimensions change pixels; DPI affects print size. Resize pixels to shrink the file, then adjust compression for web use.
Should I preserve aspect ratio when resizing?
Yes. Preserving the aspect ratio prevents distortion. In most editors, enable a lock or constraint to keep the proportions constant during resizing.
Always keep the proportions intact to avoid stretched images.
What file formats are best after resizing?
For web, JPEG and PNG are common choices. For print, TIFF or high-quality JPEG may be preferable depending on color and archival needs.
JPEG balances quality and size for web; PNG works well with transparency; TIFF is solid for print.
How do I resize multiple photos at once?
Use batch processing tools or command-line utilities like ImageMagick to apply a consistent target size across many images. Ensure you keep originals separate.
Batch tools let you resize many images quickly with the same settings.
What is DPI and should I change it when resizing?
DPI affects print size, not the pixel dimensions of an digital image. For screen use, DPI is usually not critical; for print, target a high DPI (commonly 300 DPI) to maintain print quality.
DPI matters for print; resizing pixels is what changes the image.
Will resizing artifacts be noticeable in prints?
If you drastically reduce dimensions or compress aggressively, artifacts can appear in prints. Using higher-quality resampling and testing a print proof helps avoid surprises.
Artifacts can show up in prints if the resize is too aggressive.
Watch Video
Main Points
- Define final use before resizing.
- Preserve aspect ratio to avoid distortion.
- Choose a quality-preserving resampling method.
- Save copies in web and print-friendly formats.
- Test results on target devices or prints.