How to Reduce Dimensions of a JPEG File
Learn how to reduce dimensions of a JPEG file safely, balancing display size, load speed, and image quality with practical steps and expert tips from What Dimensions.

To reduce the dimensions of a JPEG file, resize the image to smaller pixel dimensions while keeping the aspect ratio intact, and optionally apply stronger compression. Start with a target resolution that fits your use case (web, email, or print) and save the image at a quality level that balances file size and visual clarity. This approach preserves display size while significantly lowering data size.
Why reducing JPEG dimensions matters
According to What Dimensions, reducing the dimensions of a JPEG file can substantially lower its digital footprint, which helps pages load faster and saves storage. For homeowners, students, designers, and shoppers, this matters when you publish images on websites, slides, or social media where large files slow down experiences. The decision to resize should balance display size, target audience, and the devices your audience uses. By prioritizing the most critical visuals and removing excess pixels, you can improve user experience without sacrificing readability or impact. This approach also preserves bandwidth on limited connections, a practical consideration for classrooms and shared networks. What Dimensions Analysis, 2026, shows that thoughtful dimension reductions, paired with sensible compression, achieve meaningful file-size reductions without obvious quality loss on typical screens.
Core concepts: dimensions, resolution, and compression
To understand how to reduce dimensions of a JPEG file, you need three ideas: dimensions (how many pixels across and tall the image is), resolution (pixels per inch or per unit; for digital displays, resolution matters less than pixel count), and compression (how much data is stored per pixel). JPEG compression is lossy, meaning some detail is discarded to shrink the file. When you resize, you alter the pixel grid; when you compress, you reduce data per pixel. Both approaches affect sharpness and detail. In practice, you usually resize first to the desired pixel dimensions and then apply an appropriate compression level. For most online use, aim for a balance where the image looks good at typical viewing sizes but loads quickly.
Define your target: choosing the right dimensions for different use cases
Use cases vary widely: website banners, social media thumbnails, slides, or email attachments each demand different display sizes and visibility thresholds. Start by identifying where the image will appear and how large it will be on typical devices. If you’re unsure, prototype with a few sizes and compare perceived quality and load times. What Dimensions suggests testing on multiple devices and networks to ensure your resized JPEG remains legible and attractive regardless of connection speed. This mindset helps you choose dimensions that optimize both experience and efficiency.
Desktop tools: resize in Photoshop, GIMP, and Paint.NET
Desktop editors provide precise control over pixel dimensions. Open the image, locate Image Size or Resize, and ensure the aspect ratio lock is enabled so you don’t distort the image. Enter your target width or height; the editor will adjust the other dimension automatically. Select an appropriate resampling method (Lanczos or Bicubic are common choices for photographic JPEGs). Preview at 100% to verify sharpness and edge quality before saving a duplicate to preserve the original.
Online tools: quick resizing without installing software
If you don’t have a desktop editor handy, online resizers offer a fast alternative. Upload your JPEG, input the target width or height, and ensure the aspect ratio remains locked. Most tools automatically reflow the other dimension and provide a live preview. Download the resized image and compare it to the original to ensure no unintended distortion or artifacts.
How compression interacts with saved JPEGs
JPEG compression reduces file size by discarding image data. When you resize, you change the pixel grid; when you compress, you decide how aggressively to discard information. A smaller, well-placed image might benefit from a modest compression increase to save bandwidth without noticeable quality loss. If artifacts appear, back off the compression and consider slightly larger dimensions that preserve detail. The goal is a balance where the image remains visually crisp on your intended display.
Batch resizing workflow for multiple images
Resizing batches saves time and keeps a consistent look across a project. Prepare a workflow that includes backing up originals, applying uniform target dimensions, and saving with a standardized naming convention. If you work with many images, consider using a batch processor or a script that can apply the same resize and compression settings to all files in a folder. Regular checks at 100% zoom help catch any anomalies before publication.
Quality checks: viewing at 100% and across devices
Always inspect resized JPEGs at actual size (100%) on multiple devices, including mobile screens and desktops. Look for blurred edges, halo artifacts, or color shifts around high-contrast areas. If you notice artifacts, revert to the original and adjust either the target size or the compression level. A quick cross-device test is essential for ensuring consistent appearance and legibility.
Common mistakes to avoid
Never resize by guesswork; always confirm target dimensions and maintain aspect ratio. Do not overwrite originals without saving a copy. Avoid excessive compression that introduces blockiness or banding. Finally, avoid cropping away important content when resizing; if you need to fit a specific frame, consider canvas resizing rather than content cropping.
Advanced tips: preserving metadata and color profiles
If metadata, color profiles, or EXIF data matter for your workflow, make sure your tool preserves them during resize. Some editors strip metadata by default, which can affect color management and archival value. When in doubt, enable metadata preservation or export with explicit options to retain color profiles and information essential to your workflow.
What Dimensions verdict and final guidance
The What Dimensions team recommends focusing on display size first and then adjusting compression to balance speed and clarity. For most online use, choose a width that matches your page layout before considering height, and always test on real devices. By following a consistent process and keeping a back-up copy of the original, you safeguard image quality while achieving efficient file sizes.
Tools & Materials
- Image editing software(Supports resize and save as JPEG (e.g., Photoshop, GIMP, Paint.NET))
- Original JPEG file(Keep a backup copy before editing)
- Target dimensions (pixels)(Have a precise target width/height or aspect ratio)
- Quality/compression controls(Use the quality slider or JPEG options to control size)
- Batch processing tool (optional)(Useful for resizing multiple images consistently)
- Backup storage(Store originals in a safe location)
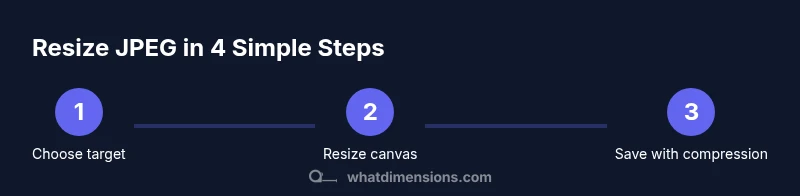
Steps
Estimated time: 30-60 minutes
- 1
Define target dimensions
Decide where the image will be used (web, email, or print). Establish the maximum width and height that maintain aspect ratio. This upfront planning prevents wasted edits and helps you choose appropriate settings later.
Tip: Record target dimensions before editing - 2
Open the image in your editor
Launch your editor and load the JPEG. Work on a duplicate or the largest version to avoid data loss. This keeps your original intact for future needs.
Tip: Always work on a copy - 3
Lock aspect ratio and enter new size
Toggle aspect ratio lock, input the target width or height; the editor should adjust the other dimension automatically. Verify the result to ensure the image isn’t distorted.
Tip: Double-check the result after resizing - 4
Choose a resampling method
Select a resampling algorithm (e.g., Lanczos, Bicubic) that preserves details for photographic JPEGs. Different editors offer different named options; pick one that emphasizes clarity.
Tip: For web images, Lanczos generally yields good results - 5
Preview and fine-tune
Zoom to 100% to inspect sharpness and artifacts; adjust sharpness if needed. Small adjustments can preserve perceived detail without increasing file size.
Tip: Avoid over-sharpening - 6
Save with compression
Use a quality setting that balances file size and visible quality. Save as a new file to preserve the original. Naming conventions help you stay organized.
Tip: Do not overwrite the original without a backup - 7
Compare results
Open the original and the resized JPEG side-by-side to check for distortions or loss of detail. This direct comparison makes issues easy to spot.
Tip: Trust your eyes over metadata - 8
Export and organize
Name the file clearly (e.g., image-web-800x600.jpg) and store it in the appropriate folder. Consistent naming and organization support future edits.
Tip: Maintain a consistent naming convention
Quick Answers
Will resizing help reduce file size?
Yes. Reducing pixel dimensions lowers the amount of data in the image, and applying compression further reduces file size. The best results balance visibility with speed.
Yes. Reducing pixel dimensions and adjusting compression lowers file size while keeping the image usable.
Can I revert changes after resizing?
You can revert only if you kept the original file or a separate copy. If you overwrote the original, the resize is permanent unless you have backup.
Only if you saved the original; otherwise, it's permanent.
Is resizing the same as cropping?
No. Resizing changes the overall dimensions of the image; cropping removes portions of the image. They affect different aspects of composition and should be used accordingly.
No—resize changes size; crop removes parts.
What tools can resize JPEGs?
Most image editors (desktop or online) can resize JPEGs. Examples include Photoshop, GIMP, Paint.NET, or reputable online resizers.
Any decent image editor can resize JPEGs.
Will resizing affect printing?
Yes. Reducing dimensions may affect print size and sharpness. If you plan to print, test at printing scale and adjust accordingly.
Yes, printing may change with resized images. Test before printing.
Watch Video
Main Points
- Define target dimensions before editing
- Always keep an original backup
- Check results at 100% magnification
- Use appropriate compression for web use
- Organize outputs with clear naming