How to Tell Dimensions of an Image: A Practical Guide
Learn exact methods to determine image dimensions across formats and tools. Step-by-step instructions, practical checks, and expert tips from What Dimensions to ensure accuracy for web, print, and design projects.

To tell the dimensions of an image, start by checking its pixel width and height in file properties, then verify its display size in media or canvas settings, and finally confirm aspect ratio. This guide covers desktop and mobile methods, plus tips for vector versus raster images and metadata checks.
What counts as dimensions in an image
Dimensions define how big an image is in pixels, points, inches, or millimeters. According to What Dimensions, the most precise way to describe an image's size starts with pixel dimensions (width x height) and then considers how the image is displayed. This distinction matters whether you're preparing images for screens or print. You’ll also encounter display size (the size it appears on a particular screen) and physical size (the printed footprint). Understanding these layers helps you communicate size accurately with designers, printers, and developers. When you know the exact pixel dimensions, you can predict how an image will render across devices and at different resolutions. This foundation is essential for responsive web design, photo editing, and layout planning, where mismatches commonly cause blurriness, cropping, or layout shifts.
Pixel dimensions vs. display size
Pixel dimensions describe the actual image data: width × height in pixels. Display size is how large the image appears on a given screen or canvas, which can be influenced by CSS, layout containers, and zoom settings. DPI or PPI ties these concepts together for print, where higher pixel counts may be required to achieve sharp print results. What Dimensions emphasizes that while pixel dimensions rarely change, display size can vary depending on the viewer or platform. Designers should always verify both to ensure fidelity across outputs.
Tools and methods to check dimensions
There are multiple reliable ways to verify image size. On desktops, file properties (Windows) or Get Info (macOS) reveal pixel dimensions in the Details or More Info sections. Image editors like Photoshop or GIMP expose image size directly in the Image Size dialog. Lightweight viewers such as Preview (macOS) or Photos can show dimensions but may not reflect the underlying data if the image is scaled. For web assets, inspecting the image tag in a browser’s developer tools shows rendered width and height, which helps reconcile file data with on-screen appearance. Remember: always cross-check in at least two tools to catch discrepancies caused by metadata, embedded previews, or format-specific quirks.
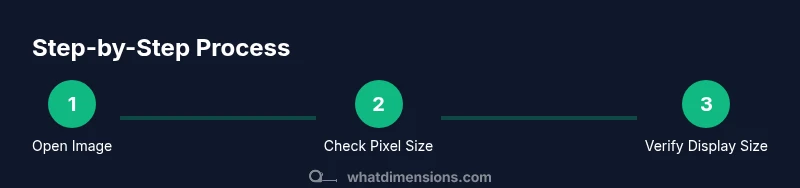
Step-by-step: how to tell dimensions of an image (short version)
- Step 1: Open the image in a file manager to view basic properties. Look for width × height listed in pixels.
- Step 2: Open the image in an editor and check the Image Size or Canvas Size. Confirm the pixel dimensions and the resolution (DPI/PPI).
- Step 3: If preparing for print, convert pixels to inches using the DPI value: inches = pixels ÷ DPI.
- Step 4: Verify aspect ratio by comparing width to height (e.g., 4:3, 16:9). Adjust if the ratio is critical for your project.
- Step 5: Document the dimensions in a project brief or asset sheet for future reference.
- Step 6: If you resize, do so with a copy to preserve the original data.
- Step 7: Re-check the output dimensions after any edit to ensure fidelity across devices.
Practical examples: raster vs vector and common formats
Raster formats (JPEG, PNG, TIFF) store fixed pixel grids, so their dimensions are concrete and do not scale without interpolation. Vector formats (SVG, EPS) are resolution-independent; their dimensions can be changed dynamically without pixel loss, but export to raster formats requires a defined resolution. When exporting raster images from a vector source, choose a target DPI and dimensions that match your final use (web, print, banner, or social). If you receive an image with mismatched dimensions, aim to preserve the desired aspect ratio and avoid stretching, which degrades quality.
DPI, PPI, and print considerations
DPI (dots per inch) and PPI (pixels per inch) describe density for print and screen, respectively. For web images, you typically care about pixel dimensions and file size rather than DPI. For print, you must ensure the image has enough pixels per inch to achieve a clean final result, often 300 DPI or higher for high-quality prints. What Dimensions notes that assessing DPI/PPI helps prevent pixelation in print while guiding efficient web delivery. If you know the final print size in inches and the required DPI, you can compute the necessary pixel dimensions: pixels = inches × DPI.
How resizing affects quality and layout
Resizing a raster image by enlarging increases interpolation, which can blur details and create halos around edges. Shrinking reduces file size but may crop important content if the aspect ratio isn’t preserved. Always resize using a quality-preserving algorithm provided by your editor, and keep an unaltered original copy. For layouts, ensure images scale correctly with CSS or layout containers to avoid distortion on different devices. When possible, work with higher-resolution originals and scale down rather than scale up.
Real-world scenarios: web, print, and mobile
For web use, aim for balanced pixel dimensions and optimized file sizes to improve load times. For print, prioritize higher pixel counts and correct DPI while maintaining the intended physical size. On mobile, consider device pixel ratios; a 600px-wide image on a high-density screen appears crisper than on a low-density screen. What Dimensions suggests maintaining consistent aspect ratios across platforms and using vector or multiple raster sizes to accommodate different breakpoints. Always align image dimensions with your target medium and audience.
Quick checks and common mistakes
Common mistakes include assuming a displayed size equals the actual size, ignoring DPI/PPI for print, and failing to preserve aspect ratio during resizing. Always verify both the file’s pixel dimensions and its rendered size on the target device. When in doubt, export multiple sizes tailored to different use cases and document the intended context for each asset. What Dimensions emphasizes keeping a clear record of dimensions to streamline future edits and collaborations.
Tools & Materials
- Computer, tablet, or smartphone(To view file properties and use editors/viewers)
- File explorer or Finder(Access properties to view dimensions)
- Image editor/viewer (e.g., Photoshop, GIMP, Preview)(Helpful for exact pixel dimensions and resizing)
- Ruler or DPI/PPI guide(Useful for print sizing and scale planning)
Steps
Estimated time: 25-45 minutes
- 1
Open the image file
Launch the image file in your preferred tool or file manager to access its basic properties. This step establishes the starting point for all subsequent checks and ensures you’re looking at the original data rather than a scaled preview.
Tip: If you’re unsure of the original file, copy it to a separate folder before inspecting. - 2
Check pixel dimensions in file properties
Right-click the file (or use Command-I on macOS) to view Details or Get Info. Note the width and height in pixels as the baseline data.
Tip: Different operating systems may label fields differently; look for Width and Height or Dimensions in pixels. - 3
Open the image in an editor to confirm size
Open the image in an editor and locate the Image Size or Canvas Size dialog. Confirm the pixel dimensions and resolution (DPI/PPI).
Tip: If the editor shows a resolution while you only need pixel counts, consider saving or exporting with explicit pixel dimensions. - 4
Calculate print-ready dimensions if needed
If you’ll print the image, convert pixels to inches using DPI (inches = pixels ÷ DPI). This helps validate the final print size.
Tip: Use a calculator to avoid rounding errors when converting large numbers. - 5
Verify aspect ratio and resize carefully
Check the width-to-height ratio to ensure you don’t distort the image. Resize only by the exact scale needed and preserve the aspect ratio.
Tip: Always work on a duplicate to protect the original data from unintended changes. - 6
Document and standardize asset sizes
Record the final pixel dimensions and target uses in a project sheet or asset tracker for consistency across teams.
Tip: Include notes about intended medium (web, print, social) to guide future edits. - 7
Re-check on target device or output
Open the image in the platform where it will be used (web page, print proof, mobile app) to confirm it renders as intended.
Tip: If discrepancies appear, adjust export settings or create a new size tailored to that platform. - 8
Archive originals and versions
Keep the original file and a versioned set of resized outputs in your asset library to prevent quality loss from repeated edits.
Tip: Use clear naming conventions to reflect dimensions and intended use.
Quick Answers
What are image dimensions and why they matter?
Image dimensions tell you how many pixels wide and high an image is. They determine sharpness, file size, and suitability for web, print, or display. Correct dimensions prevent blurry output and layout problems.
Image dimensions tell you how big the image is in pixels, which affects sharpness and layout across devices.
What’s the difference between pixel dimensions and display size?
Pixel dimensions refer to the actual data (width × height in pixels). Display size is how large the image appears on a screen or page, which can be affected by scaling and CSS.
Pixel size is the real data; display size is how big it looks on screen, which can be larger or smaller depending on settings.
How can I find image dimensions on Windows or macOS?
On Windows, view the file's Properties or Details tab. On macOS, use Get Info. Both show width and height in pixels, and sometimes resolution fields.
Open the file, view Properties on Windows or Get Info on Mac to see pixel dimensions.
Does DPI affect on-screen images?
DPI is mostly a print concern; on screens, pixel dimensions drive quality. DPI matters for print proofs and determining achievable physical size.
DPI matters mainly for print; for screens, focus on pixel dimensions and display size.
Do vector images have fixed dimensions?
Vectors scale without losing quality; you set dimensions at export time. Rasterization converts to pixels at a chosen size.
Yes, vectors scale cleanly, but when exporting to raster, you choose a final size.
Why should I verify image dimensions for web use?
Correct dimensions ensure quick load times, proper layout, and crisp display across devices. Mismatched sizes can cause layout shifts and blurred images.
Verifying dimensions helps with fast loading and proper display on all devices.
Watch Video
Main Points
- Identify pixel width and height first.
- Differentiate raster vs vector dimensions.
- Use file properties and editors to check dimensions.
- Mind DPI/PPI for print and screen fidelity.
- Verify and preserve aspect ratio before resizing.