How to Tell Photo Dimensions: A Practical Guide
Learn how to identify a photo's dimensions—pixel size, print size, aspect ratio, and DPI. Step-by-step methods, tools, and tips for accurate measurements across digital files and printed photos.

You will learn how to determine a photo’s dimensions by checking metadata, inspecting pixel data, and performing practical measurements. The guide covers digital files, printed photos, and common edge cases, highlighting how pixel size, print size, and aspect ratio relate. By using a mix of tools and methods, you’ll confidently identify exact dimensions in real-world scenarios.
What does 'dimensions' mean for a photo?
Dimensions describe how big an image is, either in digital terms (pixel width x height) or physical terms (inches or centimeters when printed). Understanding dimensions involves three core concepts: pixel dimensions, print size, and aspect ratio. Pixel dimensions tell you the amount of image data, while print size shows how large it will print on paper or a screen. Aspect ratio is the proportional relationship between width and height and remains constant when you scale. This foundational clarity helps designers, students, and homeowners ensure a photo fits a frame, a page layout, or a display without distortion. According to What Dimensions, precise size references streamline workflows—from proofing layouts to ordering prints—reducing costly reprints and cropping mistakes.
A well-tagged image with accurate dimensions also supports cataloging, digital archives, and design handoffs. When you can name the exact pixel dimensions and the intended print size, you avoid misinterpretations across software, vendors, and printers. In practice, you’ll often juggle both digital metrics and physical outputs, especially when preparing a photo for a gallery wall or a print-on-demand project.
Pixel dimensions vs print dimensions
Pixel dimensions are expressed as width × height in pixels (for example, 2048 × 1536). They define the image data that remains when you zoom, crop, or edit. Print dimensions convert those pixels into physical size, determined by the desired print resolution (DPI or PPI). A 2048 × 1536 image printed at 300 DPI yields roughly 6.8 × 5.1 inches, whereas printing at 150 DPI yields about 13.7 × 10.2 inches. The same pixel data can produce different print sizes depending on the printer’s capabilities and viewing distance. Designers should think in terms of both formats to ensure fidelity across screens and paper.
When you receive a file, check both its pixel dimensions and the intended output size to avoid surprises at print time. If your goal is a specific frame size, calculate whether the current image can fill the frame without upscaling artifacts that degrade quality.
File metadata and how to read it
Most images carry embedded metadata that includes dimensions, resolution, color space, and camera settings. EXIF (Exchangeable Image File Format) stores camera-derived data, while IPTC and XMP provide descriptive information that editors use for cataloging. Reading this data is fast and often accurate for pixel dimensions and reported resolution. Tools vary from built-in OS features to specialized software. For quick checks, right-clicking an image and selecting properties or information can reveal width, height, and resolution. For deeper insight, command-line tools or editors expose EXIF tags that confirm the pixel dimensions and print size expectations.
Rely on metadata as a first pass, then confirm with a visual or physical check when critical.
Viewing dimensions in Windows, macOS, and Linux
Windows File Explorer, macOS Finder, and Linux file managers typically show basic image dimensions in the file preview pane or properties dialog. On Windows, right-click the file, choose Properties, then the Details tab to see dimensions and resolution. On macOS, Get Info (Command-I) displays width and height alongside the “More Info” section. Linux environments vary by desktop, but most image viewers provide a similar dimensions readout in the Properties window. If present, leave metadata unaltered to preserve accuracy for future references.
EXIF/IPTC/XMP data with ExifTool and editors
ExifTool is a robust, cross-platform utility that reads and writes metadata without altering the image data. Using ExifTool, you can extract PixelXDimension and PixelYDimension to confirm width and height, as well as ResolutionUnit and XResolution for print sizing. Many editors (Photoshop, Lightroom, GIMP, Preview) expose the same information in their metadata panels. Cross-checking results between a metadata tool and the image editor increases reliability and reduces the risk of misinterpreting the data.
If you’re new to metadata, start with a quick read of Pixel dimensions, then verify that the reported resolution aligns with the intended print size.
DPI, PPI, and how they affect print size
DPI (dots per inch) and PPI (pixels per inch) are often used interchangeably in practice, but they describe different things. PPI relates to the digital image’s pixel grid, while DPI refers to print output quality. When you know an image’s pixel dimensions and its target print DPI, you can compute the maximum printable size. For example, an image with 3000 × 2400 pixels at 300 DPI prints at about 10 × 8 inches. If you print at 150 DPI, the same image can span about 20 × 16 inches, but may look less sharp. Always align DPI to the viewing distance and print requirements to preserve clarity.
Measuring printed photos with a ruler and matting
Printed dimensions require a physical measure. Use a clean ruler or calipers to measure the image area that will be visible in the final cut, excluding borders, margins, or matting if you don’t intend to print edge-to-edge. Record width and height in inches or centimeters, then compute the print size by dividing pixel dimensions by the chosen DPI. For gallery pieces, consider the mounting or matting that will affect final displayed size. Accurate measurement minimizes surprises when framing or shipping.
Unit conversions and practical formulas
Converting between pixels and physical size hinges on DPI. The basic formulas are:
- Print width (in inches) = Pixel width ÷ DPI
- Print height (in inches) = Pixel height ÷ DPI
- If you know print width/height and pixel dimensions, you can solve for DPI: DPI = Pixel width ÷ print width. Keep unit consistency (inches vs. centimeters) throughout conversions. When working in centimeters, multiply by 2.54 to convert to inches. Being precise with units reduces errors in design handoffs and printing.
Handling different image formats and color space considerations
Most common formats (JPEG, PNG, TIFF) store pixel dimensions, though metadata availability varies. JPEGs often embed metadata in EXIF and XMP sidecars, while TIFFs frequently preserve more detailed color and resolution data. The color space (sRGB, Adobe RGB, etc.) affects color fidelity but not raw pixel counts. If an image is cropped or re-sampled during editing, pixel dimensions change, so always check dimensions after any modification and save a copy with updated metadata. This ensures future users cite the correct size for prints or screens.
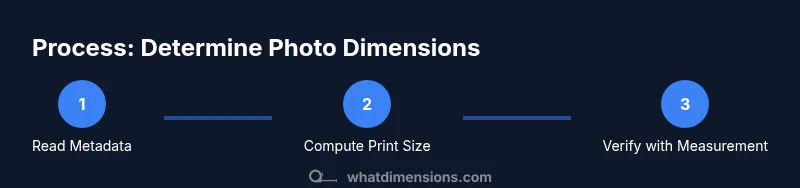
A practical, repeatable workflow to verify dimensions
Adopt a simple pipeline: (1) check metadata for initial pixel dimensions, (2) open the image in an editor to confirm pixel size and resolution, (3) compute print size using a chosen DPI, (4) measure any printed copy with a ruler, and (5) document the final dimensions. This redundancy protects against misinterpretation from software defaults or viewer zoom levels. Keep a single source of truth by updating metadata consistently after each change.
Common mistakes and how to avoid them
Mistakes include assuming DPI equals PPI, confusing display size with print size, and cropping without updating dimensions. Avoid relying solely on on-screen previews, as zoom levels can mislead you about actual pixel counts. Always verify with metadata and, when possible, a physical measurement. Keep notes that capture the exact pixel dimensions, resolution, and the calculated print size to prevent drift across devices and teams.
Authority sources and further reading
For formal standards and deeper technical context, consult established resources and standards that govern image dimensions and printing practices. Useful references include official standard documents and reputable educational materials. This section provides a curated list of sources to expand your understanding and to support professional workflows.
Tools & Materials
- Computer or smartphone with internet access(Essential for accessing metadata and viewers)
- Image viewer with metadata support or ExifTool(To read EXIF/IPTC/XMP data)
- Ruler or measuring tape(For printed photo measurements)
- Calipers (optional)(Useful for precise edge measurements on prints)
- Printer with known DPI or access to a print shop(If confirming displayed print size or proofing)
Steps
Estimated time: 15-25 minutes
- 1
Prepare workspace and tools
Gather all tools, create a dedicated folder for the image, and close unnecessary programs. This avoids accidental edits and ensures measurements stay consistent across methods.
Tip: Having a notepad or digital note ready helps you log measured values as you proceed. - 2
Find the image file and view basic properties
Locate the file in your file system, then view its properties to quickly see width and height in pixels. Confirm the file format and any obvious edits that might affect dimensions.
Tip: If the file has recently been edited, re-check after saving to capture updated dimensions. - 3
Read metadata for pixel dimensions
Open a metadata viewer (ExifTool or editor) to read PixelXDimension and PixelYDimension. Note the reported resolution (XResolution/YResolution) and the ResolutionUnit.
Tip: Document both pixel counts and the resolution to cross-check print size later. - 4
Open the image in an editor for cross-check
Use an image editor to confirm the image’s current pixel dimensions and to view the image size in the workspace. Some editors display the current canvas size.
Tip: If you cropped or resized previously, verify the dimensions after the change. - 5
Compute print size from DPI
If you plan a print, divide pixel width by DPI to get width in inches, and divide pixel height by DPI for height. Repeat for alternative DPI values if needed.
Tip: Use widely acceptable DPI values (150–300) depending on viewing distance and print quality goals. - 6
Measure a physical print (if applicable)
Place the print on a flat surface and measure width and height with a ruler. Exclude borders or mats if you’re measuring the visible image area.
Tip: Record measurements in the same units you used for your calculations. - 7
Cross-validate results and document
Compare metadata-based dimensions, editor-reported sizes, and printed measurements. Record final dimensions and the method used for each value.
Tip: Store a reference copy of the image and its dimensions in a project sheet for future use.
Quick Answers
What is the difference between pixel dimensions and print size?
Pixel dimensions describe the image data (width × height in pixels). Print size converts those pixels to physical measurements using DPI/PPI. The two are related but not interchangeable; you must specify the output medium to determine print size.
Pixel size is about image data, print size is about how big it looks on paper. DPI converts between them, so you must know the intended print resolution.
How can I read an image's dimensions from metadata?
Open the file in a metadata viewer like ExifTool or a photo editor that exposes PixelXDimension and PixelYDimension. These values confirm the raw pixel width and height and help verify any changes after editing.
Check the image's metadata for width and height, then compare with what your editor shows to confirm accuracy.
Can I rely on on-screen measurements for size?
On-screen dimensions can be misleading due to zoom levels and display scaling. They’re useful for quick checks but should be confirmed with file metadata or a physical measurement when precision matters.
Screen measurements can mislead you; use metadata and real measurements for precision.
What does DPI mean for printing photos?
DPI (dots per inch) indicates print resolution. Higher DPI yields sharper prints but reduces the maximum printable size for a given image. It does not change the image’s pixel dimensions.
DPI tells you print sharpness and size. It doesn’t change the number of pixels in the image.
Which file formats store size information?
JPEG, TIFF, and PNG typically store pixel dimensions in metadata. Some formats may omit or obscure this data, so verify with a metadata tool when in doubt.
Most common formats store pixel size, but verify with metadata if you suspect edits.
How do I convert inches to pixels?
Use pixels ÷ DPI to get inches, or inches × DPI to get pixels. Ensure you’re consistent with units (inches or centimeters) and use a reliable DPI value for the calculation.
To convert, multiply inches by DPI to get pixels, or divide pixels by DPI to get inches.
Watch Video
Main Points
- Distinguish pixel dimensions from print size.
- Metadata offers a quick size check but verify with a measurement.
- DPI/PPI affects print size, not pixel counts.
- What Dimensions's verdict: verify via multiple methods for accuracy.