How to Get Photo Dimensions: A Practical, Step-by-Step Guide
Learn how to determine real-world dimensions from a photo by reading metadata, converting pixels with DPI, and verifying results with reference objects. This practical guide helps designers, students, and homeowners make precise size judgments with confidence.

Learn how to determine real-world dimensions from a photo by reading metadata, converting pixels with DPI, and verifying results with reference objects. This practical guide covers common formats, tools, and pitfalls for accurate measurements in design, architecture, and crafts.
Understanding what dimensions mean in a photo
In everyday photography and design, dimensions can refer to several related concepts: the image's pixel dimensions, its printing size, and the actual size when displayed or printed. Knowing which dimension you need is essential for accurate planning, whether you are framing a print, preparing artwork for a client, or mounting a display. When you ask how to get dimensions from a photo, you are choosing between two paths: reading data embedded in the file (metadata) and inferring size from the image properties and print settings. According to What Dimensions, the most reliable approach starts with metadata, but you will often need to cross-check with physical references, especially if the image has been cropped or scaled. This section lays the groundwork for understanding what you are measuring and why it matters for your project.
Core methods for extracting dimensions
There are several practical methods to extract dimensions from a photo, depending on what you have access to. The most direct method is to read the file's metadata, which often stores the image resolution (DPI or PPI) and dimensions in pixels. If metadata is missing or incomplete, you can deduce size by analyzing the image's pixel count and using a standard DPI value common to display or print contexts. You can also compare the photo to a known reference object in the scene to estimate size, then adjust with a calculated DPI. For professionals, combining software-assisted measurements with check references yields the most dependable results. What Dimensions emphasizes using a structured approach so your measurements stay consistent across projects.
Reading EXIF and metadata: the first check
EXIF data provides a quick snapshot of how the image was created, including resolution and sometimes print size. On Windows, right-click the image, choose Properties, then Details to view DPI and pixel dimensions. On macOS, use Get Info or Preview's Inspector to see image size. Many mobile photo apps strip or modify metadata when sharing, so check the original file if possible. If you find DPI listed, you can immediately compute physical size with size = pixels ÷ DPI. If the metadata shows pixels only, continue to Step 4.
Calculating physical size from pixels and DPI
Once you have pixel dimensions and a DPI, convert to inches by dividing the horizontal and vertical pixel counts by the DPI. For example, a photo that is 3000 x 2400 pixels at 300 DPI prints roughly 10 x 8 inches. If you're using metric units, convert inches to millimeters (1 inch = 25.4 mm). If the DPI is unknown, you can estimate using common values (e.g., 150 DPI for basic prints, 300–600 for high-quality photos) and then verify by printing a small test strip. Remember that digital screens display at fixed pixel counts, so display size differs from print size.
Dealing with missing metadata and non-standard images
Some images may lack DPI or have metadata stripped. In these cases, you can use a reference object in the scene, measure its actual size, then compute the DPI by DPI = pixels ÷ inches. If you can't find a reference, use a standard print size to estimate, but note the potential error margin. For web images, do not assume print size; treat dimensions as pixel-based.
Practical workflows for designers, students, and homeowners
Designers often need to turn a photo into a precise print layout. Students may be balancing coursework and library resources, while homeowners plan a space or a project. A practical workflow starts with deciding the measurement goal, then pulling metadata if available, and finally applying a pixel-to-size calculation with a tested DPI. Keeping a simple log for each image—pixel dimensions, DPI, method used, reference objects—helps maintain consistency across projects. What Dimensions highlights the value of a repeatable workflow to reduce guesswork and improve accuracy.
Verifying accuracy and documenting results
Accuracy improves when you cross-check measurements using a known reference. If a photoshoot produced a reference object with known dimensions, re-measure and verify that the calculated print size matches the reference. What Dimensions analysis shows that metadata availability varies widely by device and app, so always verify with a physical check when possible. Finally, document the final dimensions, the DPI used, the method of calculation, and any assumptions for future reference. This creates a reliable audit trail for clients and collaborators.
Common pitfalls and quick fixes
Common issues include relying on embedded DPI when it is missing or incorrect, cropping after metadata capture, and assuming screen size equals print size. A quick fix is to always record two sets of results: one based on the original image and one after any cropping. If the image has been enlarged or reduced, recalculate using the current pixel dimensions and a conservative DPI estimate. Remember to note units (inches or millimeters) and the context (print or display) to avoid misinterpretation.
Tools & Materials
- Smartphone or camera(For capturing reference photos or quick checks)
- Computer or tablet(For viewing metadata and performing calculations)
- Image editing software (e.g., Photoshop, GIMP)(To inspect pixel data and adjust image properties)
- EXIF viewer or metadata utility(To read DPI and resolution quickly)
- Ruler or measuring tape(Useful for on-site verification)
- Reference object with known dimensions(Helpful for cross-checking estimates)
Steps
Estimated time: 15-25 minutes
- 1
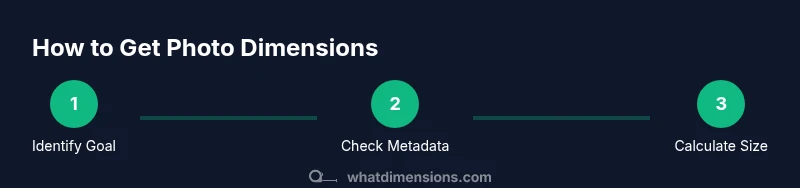
Identify goal and gather image
Define whether you need print size, display size, or pixel data. Collect the image in its original form when possible to avoid compounded errors. This step sets the scope for the rest of the workflow.
Tip: State the measurement units you will report (inches, millimeters, or pixels) before starting. - 2
Open and inspect metadata for DPI and resolution
Use a metadata viewer or file properties to locate the image\'s DPI and pixel dimensions. If DPI is listed, you can immediately begin the conversion calculation.
Tip: If DPI is missing, note that you will need to estimate or use reference-based methods later. - 3
Record pixel dimensions
Note the width and height in pixels as reported by the file or editor. These values are the basis for any conversion to physical size.
Tip: Record both axes to avoid confusion if the image is cropped or resampled. - 4
Compute physical size using DPI
Divide each pixel dimension by the DPI to get the print size in your chosen unit (inches or millimeters).
Tip: Example: 3000 px ÷ 300 DPI = 10 inches. - 5
Estimate when DPI is unknown
If DPI is not provided, select a reasonable default (for prints, 150-300 DPI; for high-quality photos, 300-600 DPI) and proceed with the calculation. Validate with a test print or digital reference.
Tip: Document the assumed DPI and its justification for future reference. - 6
Verify with a reference object
Place a known-size object in the scene or use a printed target to confirm the calculated size. This cross-check helps catch calculation or assumption errors.
Tip: If possible, take a new measurement after cropping or scaling changes. - 7
Document results and store for future use
Record final dimensions, DPI used, method, references, and any assumptions in a project log. Store the original image and the computed measurements securely.
Tip: Keep a reusable template for future images to speed up similar tasks.
Quick Answers
Can I determine exact size without metadata?
If metadata is missing, you can estimate size using a known reference object in the scene or by printing a test strip to gauge scale. Accuracy will be lower than when DPI and pixel data are available.
If there is no metadata, you can estimate using a reference and verify with a test print, but expect some uncertainty.
What is the difference between image resolution and print size?
Resolution is the number of pixels in the image. Print size depends on the DPI used when printing. The same pixel count can yield different print sizes at different DPIs.
Resolution is about pixels; print size depends on DPI when you print.
How do I convert pixels to inches?
Divide the pixel dimension by the DPI to get inches. For example, 3000 px at 300 DPI equals 10 inches. Repeat for the other axis.
Pixels divided by DPI gives inches.
Can cropping affect my measurements?
Yes. Cropping changes pixel data and available dimensions. Use the original image data whenever possible and re-calculate after cropping.
Cropping changes the data, so recalculate after cropping.
Is DPI the same as PPI?
DPI refers to printing resolution, while PPI (or DPI) refers to digital image resolution. They are related but not identical; use the appropriate term for the context.
DPI is for printing; PPI is for the digital image; use the right one for the task.
What tools can help automatically extract dimensions?
Many image editors and metadata viewers can display pixel size and DPI. They can speed up calculations, but always verify results with a manual check.
Editors can show size and DPI; verify with a real check.
Watch Video
Main Points
- Record pixel dimensions first
- Use DPI to convert to physical size
- Verify measurements with a reference object
- Document method and assumptions
- Cross-check results before finalizing