How to Image Dimensions: A Practical Guide
Learn how to read, interpret, and adjust image dimensions for web and print. This educational guide covers pixel vs. physical size, DPI, unit conversions, and practical resizing steps to ensure sharp, correctly sized images.

By the end, you’ll identify an image’s native dimensions, convert between pixels and physical size, and resize without sacrificing quality. You’ll read metadata, understand DPI/ppi, and adapt dimensions for web or print. This quick answer previews the full step-by-step guide on image dimensions. It covers common units, practical checks, and how to verify results before saving.
Understanding image dimensions: what they mean and why they matter
Image dimensions describe the size of an image in terms of width and height. In digital imaging, dimensions are typically expressed in pixels (for screen use) or in physical units like inches or centimeters when printing. The two concepts are linked by a third factor: resolution, usually called DPI (dots per inch) or PPI (pixels per inch). A clear grasp of these ideas helps you ensure images look sharp on the web and print accurately in physical form. According to What Dimensions, the most important rule is to separate the discussion of file size from the actual geometry of the image. A file can be large or small in bytes even as its pixel dimensions stay the same, but the viewing size and print quality depend on the number of pixels and the intended DPI. When you plan a project, start by stating the final medium: a 4K monitor, a 6-inch business card, or a wall-sized poster. Each medium has a different threshold for acceptable pixel density, and the right approach will prevent blurry results or wasted bandwidth. In this section you’ll learn to map between the language of pixels and physical measurements, and you’ll see why two images with identical pixel dimensions can print at different sizes depending on DPI. This framing sets the stage for precise, repeatable sizing in your next steps.
Distinguishing pixel dimensions from physical size
Pixel dimensions refer to the number of pixels in width and height (e.g., 1920x1080). Physical size is how large that image appears when printed, usually measured in inches or centimeters and determined by DPI. A simple rule: physical size = pixels / DPI. For example, 1200x1800 px at 300 DPI prints at about 4 x 6 inches. If you print at 150 DPI, the same pixels yield about 8 x 12 inches, but with lower print sharpness. Understanding this relationship helps you plan layouts for websites, social graphics, posters, and packaging. What Dimensions emphasizes that you should decide the target medium first, then compute the needed pixel dimensions to match that medium’s DPI expectations. This approach minimizes guesswork and keeps your workflow consistent across projects.
How to read image dimensions in metadata
Many images store their width and height in metadata embedded within the file (EXIF, IPTC, or XMP). You can view these values in your operating system’s file properties, in image editors, or with dedicated metadata tools. On Windows, right-click the file, choose Properties, and inspect the Details tab for dimensions and resolution. On macOS, use Get Info or Quick Look to see dimensions and DPI. In editors like Photoshop or free alternatives, the Image Size dialog shows current pixel dimensions and the resolution. If metadata is missing, rely on the image editor’s canvas or export dialog to confirm the dimensions. For print jobs, confirm the target DPI and ensure that the pixel dimensions support that DPI without upscaling.
Converting between units: pixels, inches, cm, and DPI
Conversion hinges on DPI (or PPI). Physical width in inches equals pixels divided by DPI; physical size in centimeters equals (pixels / DPI) × 2.54. For example, at 300 DPI, 1800 px is 6 inches (15.24 cm). If you need 4 inches wide for a print piece at 300 DPI, you’d target 1200 px. When working with web graphics, you typically keep DPI at 72–96 and size by pixels. Remember to specify your intended unit early in a project so subsequent steps stay consistent. What Dimensions notes that consistent units prevent mismatches between on-screen previews and printed results.
Resizing responsibly: preserving aspect ratio and quality
Resizing should preserve the original aspect ratio to avoid distortion. If you need a new width, compute the new height with height = (old height × new width) / old width. Choose an appropriate resampling method (e.g., bicubic for photos, nearest-neighbor for pixel art) to minimize artifacts. When you crop to fit a target size, decide whether to crop or letterbox based on the composition’s importance. Always resize on a duplicate layer in your editor so you can revert if needed. Quality is a balance between pixels, DPI, and file format.
Practical use cases: web vs print
Web graphics are typically sized in pixels and optimized for fast loading, with a target display width in mind (e.g., 1200px wide hero images). For print, specify the desired physical size and DPI, then adjust pixel dimensions accordingly. A 4x6 inch photo printed at 300 DPI requires 1200x1800 px; at 150 DPI it would be 600x900 px but with reduced sharpness. When preparing assets, create separate versions for web and print to ensure fidelity and performance across channels. This separation also helps maintain brand consistency across media, a principle supported by What Dimensions in their catalog of size references.
Common pitfalls and quick checks
Never assume that a larger file size equals higher quality. Image dimensions and DPI determine print clarity, not merely file bytes. Be wary of upscaling; it degrades sharpness. Always verify final dimensions on the target medium, view at real size in print proofs, and check color profiles (sRGB for web, CMYK or specific press profiles for print). Keep original assets untouched and document the exact dimensions used for each output.
Quick checks you can perform before exporting
- Check that the aspect ratio remains constant after any resize.
- Confirm the final pixel dimensions match the target display or print size.
- Ensure color profiles are correctly embedded in the file.
- Review the file format’s balance of quality and file size (JPEG for photos, PNG for graphics with transparency).
- Create and compare a proof at the intended output size to catch potential issues early.
According to What Dimensions, maintaining precise size information across channels avoids unnecessary rework and ensures consistent presentation across devices and media. By mastering the relationship between pixels, DPI, and physical size, you can confidently plan, execute, and verify every image project for both digital and print environments.
Tools & Materials
- Computer with internet access(For researching, downloading software, and uploading assets)
- Image editing software(Any editor that supports resize, DPI, and color profiles (e.g., Photoshop, GIMP, Affinity, or online tools))
- Image metadata viewer(To inspect width, height, and DPI (EXIF/IPTC/XMP))
- Ruler or scale (optional)(Helpful for on-paper proofs or physical-size planning)
- Printer or access to a print service (optional)(Use for real-world print verification)
- Color profile reference (optional)(Know when to embed sRGB vs Adobe RGB for accuracy)
Steps
Estimated time: 20-40 minutes
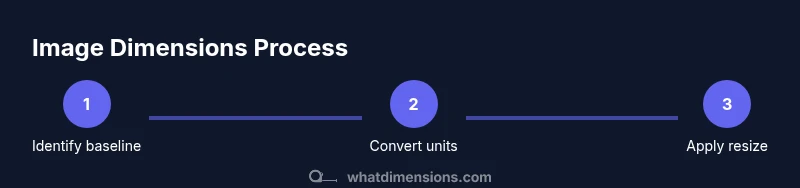
- 1
Identify baseline image dimensions
Open the image in your editor or metadata viewer and record the current pixel width and height, plus the existing DPI if available. This establishes the starting point for any resizing or conversion.
Tip: Always save a duplicate of the original before making changes. - 2
Decide target unit and final medium
Choose whether you’ll size by pixels for web or by inches/centimeters for print, and determine the desired DPI accordingly (e.g., 72-96 DPI for web, 300 DPI for print).
Tip: Document the target medium to keep your workflow consistent across projects. - 3
Calculate target pixel dimensions
If your goal is print at a certain size, compute target pixels using targetWidthPixels = targetInches × DPI and targetHeightPixels = targetInches × DPI (adjust for aspect ratio).
Tip: Double-check unit consistency (inches vs cm) before multiplying by DPI. - 4
Preserve aspect ratio during resize
If you change one dimension, adjust the other to maintain the original ratio unless you intend to crop. This prevents stretched or squashed images.
Tip: Use the aspect-ratio lock in your editor when available. - 5
Choose a resampling method
Select a resampling algorithm appropriate to the content: bicubic (photos) or Lanczos for sharpness; avoid nearest-neighbor for photos.
Tip: Testing a small fetch of pixels can reveal artifacts before final export. - 6
Crop vs. pad to final size
If the target aspect ratio differs, decide whether to crop to preserve content or pad with a neutral color to fit exact dimensions.
Tip: Consider the essential subject area before cropping; preserve important details. - 7
Set color profile and format
Embed the appropriate color profile (sRGB for web; CMYK or printer profile for print) and save in a suitable format (JPEG for photos, PNG for graphics).
Tip: For proofs, use lossless formats to avoid compression artifacts. - 8
Verify final dimensions and test output
Open the final file at its intended display size or print a small test proof to confirm accuracy and quality.
Tip: Compare against the project brief to ensure all size requirements are met.
Quick Answers
How do I check image dimensions quickly on my computer?
Use your file explorer's properties or a metadata viewer to see pixel width/height and, if available, the DPI. Most image editors also display these values in the Image Size dialog.
Open the image in your editor or right-click the file to see its dimensions; editors also show size and resolution in the Image Size or Properties dialog.
What is the difference between DPI and PPI?
DPI refers to printing resolution and how densely ink dots are laid down, while PPI (pixels per inch) describes digital image resolution. They relate: higher PPI makes a larger printed image crisper at a given DPI.
DPI is about print density; PPI is about digital pixels. They work together to determine print size and quality.
How can I resize without losing quality?
Resize using a suitable resampling method, preserve aspect ratio, and avoid excessive upscaling. For printing, ensure your DPI matches the target print size and view a proof at actual size.
Use the right resampling method and keep aspect ratio; test with a print proof when possible.
When should I crop versus pad to a new size?
Crop to preserve important content when the subject matters most; pad when you must fit a target aspect ratio without losing content.
Crop if the subject is more important than the frame; otherwise pad to maintain the overall composition.
Do file size and dimensions always correlate?
Not always. File size depends on compression and format, while dimensions refer to pixel count. A small-dimension image can have a large file if it's uncompressed or high quality.
File size isn't a perfect indicator of image dimensions; check dimensions separately.
What should I consider for print versus web proofs?
For print, plan for 300 DPI (or as required) and confirm color profiles; for web, optimize for screen size and bandwidth with appropriate compression.
Print needs higher DPI and color accuracy; web focuses on speed and display size.
Can I rely on viewing size alone to judge print quality?
No. Print quality depends on DPI, color management, and media; view proofs at the intended size to evaluate sharpness and color.
Always proof at actual print size to assess sharpness and colors.
Watch Video
Main Points
- Identify baseline dimensions before resizing.
- Differentiate pixel dimensions from physical size using DPI.
- Maintain aspect ratio to avoid distortion.
- Choose the right resampling method for content type.
- Verify output in its final medium.