How to Check Photo Dimensions: A Practical Guide Today
Learn reliable methods to verify photo dimensions across Windows, macOS, editors, and metadata. This guide from What Dimensions covers pixel counts, print sizing, DPI, EXIF data, and best practices for designers, students, and homeowners.

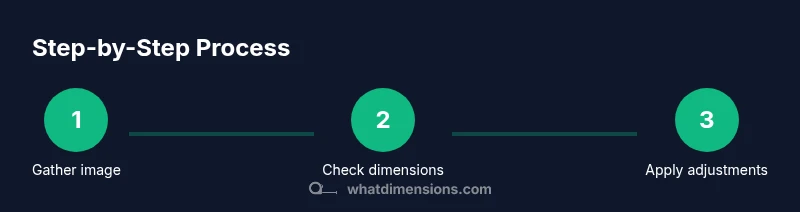
You will learn how to check the dimensions of a photo across devices and formats. Start by identifying the target use (web, print, or mobile) and gather the image file. Then compare pixel dimensions and resolution using built-in tools, editors, or metadata. This guide from What Dimensions explains reliable methods.
Why checking photo dimensions matters
Dimensions determine how large an image can appear on screens or in print without losing quality. For designers, students, and homeowners, knowing exact width and height in pixels helps ensure web layouts render correctly, prints align to expected sizes, and files remain compatible with export settings. The What Dimensions team often sees projects stall when dimensions are assumed rather than verified. Verifying dimensions early saves time, avoids costly reprints, and improves collaboration across teams. By understanding the difference between pixel dimensions and print size, you gain a reliable framework for future projects and faster workflows.
Key takeaway: precise dimensions reduce guesswork and deliver predictable results across media.
Pixel dimensions vs physical size and resolution
In digital images, the essential numbers are pixel width and height. These dimensions describe how many little squares (pixels) make up the image grid. They determine how large the image can display on screens and how much detail it contains. The same image can be printed at different physical sizes depending on the DPI (dots per inch) you choose. DPI controls how many pixels are printed per inch; higher DPI produces crisper prints but requires more pixels to reach a given print size. For web and screen use, the actual pixel dimensions are what matter most. A photo that is 2000 x 1500 pixels will look sharp on many displays if kept at that resolution, but it will appear smaller on high-resolution screens if you scale it down. When you’re assessing a photo, separate the concepts of pixel dimensions (width x height in pixels) from print size (inches or centimeters at a given DPI).
What Dimensions tip: Always keep a mental map of when you need pixel precision versus print sizing.
Check dimensions on Windows using File Explorer
Windows users typically discover image dimensions through File Explorer properties. Start by locating the image you intend to check, then right-click and choose Properties. In the Properties window, switch to the Details tab. Look for the entries labeled Dimensions (width x height in pixels). If you don’t see them, toggle the file view to Details and ensure the image is selected. Some Windows builds show separate fields for Width and Height instead of a single Dimensions line; note both values. If the image has been lightly processed, some programs might compress or resample when saving, which can change the displayed numbers. For the most reliable data, use a metadata viewer or an image editor's Properties dialog to verify the exact pixel counts. If you routinely work with many photos, consider creating a short checklist or a keyboard shortcut to open the Details pane quickly. Also be aware that Windows generally shows the image’s current on-disk dimensions, which reflect any edits that have been saved.
What Dimensions tactic: Cross-check with at least one other method to confirm accuracy.
Check dimensions on macOS using Get Info and Preview
Mac users can quickly verify image dimensions via Finder’s Get Info or the Preview app. Select the image and press Command-I to open the Info panel; look for the pixel dimensions under More Info or Details. If the Get Info panel doesn’t show the data, open the image in Preview and choose Tools > Show Inspector (Option+Command+I). In the Inspector, switch to the Image tab to view pixel width and height. Quick Look (press Space) also reveals dimensions in the summary. If the file has been edited, macOS may reflect the recently saved dimensions rather than the original. Always close other apps to avoid cached values from interfering with what you read.
What Dimensions trick: Use both Finder Info and Preview Inspector for verification.
Check dimensions in image editors (Photoshop, GIMP, Preview)
Opening the image in an editor is often the most straightforward way to read dimensions. In Photoshop, go to Image > Image Size to see Pixel Dimensions (width x height) and the document’s resolution. In GIMP, use Image > Scale Image to view the same numbers. In macOS Preview, select Tools > Adjust Size or use the Inspector. Reading pixel dimensions directly in editors also helps when you plan edits, as you can lock the aspect ratio to maintain proportions. If you only want to view dimensions, you can often disable resampling to preserve the original pixels while reading size.
Editor tip: If you adjust size, always note the final pixel dimensions and confirm the aspect ratio remains correct.
Read dimensions from metadata (EXIF/IPTC)
Many cameras embed pixel dimensions in EXIF metadata, which can be accessed via metadata viewers or editors. Look for fields labeled ImageWidth and ImageHeight or similar. Some apps strip metadata during edits or compression, so reading from the original file is best. Always cross-check EXIF data with a second method (like the file’s Readout in a viewer or editor) to avoid relying on incomplete metadata. If EXIF is missing, other methods will still give you the true on-disk dimensions.
Note: EXIF data may not reflect changes after you crop or resize; verify post-edit dimensions.
Check dimensions on mobile devices (iOS and Android)
If you’re working on mobile, most photo apps show dimensions in the image’s info panel. On iOS, open Photos, select a photo, then tap the information icon or swipe up for details. On Android, open the image in the Gallery or Google Photos app and view the details. Some apps display dimensions only for the original or full-size image; if you edit, re-check the new size. Mobile checks are convenient for on-the-go verification when you don’t have a desktop handy.
When you can't access files locally (online tools)
If you don’t have your device handy, upload the photo to a trusted metadata viewer online to inspect dimensions. Choose reputable sites and avoid uploading sensitive images. Online tools will read the image’s pixel width and height from the file header, sometimes displaying additional info like color depth and color profiles. Remember that processing or compression during upload may alter what you see, so use multiple sources if precision matters.
Print considerations: DPI, resolution, and print size
For print, you must consider DPI in addition to pixel dimensions. Print size in inches equals pixels divided by DPI. A 3000 px wide image at 300 DPI yields about 10 inches in width. If you plan large-format prints, you’ll need more pixels to maintain the same print quality. Keep a simple rule: higher DPI requires higher pixel counts for the same print size. Record both pixel dimensions and the intended DPI for accurate proofs and previews.
Documenting dimensions for projects
Create a single source of truth for every asset: log the final pixel dimensions, the chosen DPI, and the intended output size. Use a project sheet, a shared spreadsheet, or a digital asset manager. Include date, source, and version to prevent confusion later. By standardizing how you record dimensions, you reduce miscommunication and ensure consistent results across designers, students, and homeowners.
Tools & Materials
- Windows PC with File Explorer(Right-click image > Properties; Details tab for Dimensions)
- macOS computer with Finder & Preview(Get Info (Cmd-I) or Preview Inspector for pixel dimensions)
- Image editing software(Photoshop, GIMP, or Preview; use Image Size / Scale Image to read or adjust)
- EXIF/metadata viewer(Web-based or standalone app to read ImageWidth and ImageHeight)
- Mobile device (iOS/Android)(Photos or Gallery apps to view image details on the go)
Steps
Estimated time: 25-40 minutes
- 1
Prepare and define output
Gather the image(s) you’ll check and decide whether you’ll use them for web, print, or mobile. This determines which dimensions to verify first and whether you’ll need DPI guidance.
Tip: Define the target output before checking to avoid chasing unnecessary numbers. - 2
Open Windows and read Dimensions
Navigate to the image file, right-click, select Properties, then Details. Record the width and height in pixels. If you don’t see a Dimensions line, switch to Details view.
Tip: If Width and Height appear separately, note both values and confirm their relationship. - 3
Use macOS tools for pixel data
In Finder, use Get Info (Cmd-I) or Preview’s Inspector to confirm pixel dimensions. Cross-check with Quick Look if needed.
Tip: Use both Get Info and Preview Inspector for cross-verification. - 4
Check in an image editor
Open the image in Photoshop (Image Size) or GIMP (Scale Image) to read current pixel dimensions. Ensure resampling is disabled if you’re only reading data.
Tip: Reading the current pixel data in the editor helps prevent format drift during edits. - 5
Inspect metadata (EXIF)
Use a metadata viewer to locate ImageWidth and ImageHeight. Some apps strip metadata, so verify with another method.
Tip: EXIF data may not reflect post-edit dimensions; check after edits. - 6
Check on mobile if needed
Open the image in your phone’s viewer and view details. Note that mobile apps vary in how they display dimensions.
Tip: If details aren’t visible, try a dedicated metadata app on your device. - 7
Use online tools when offline data is scarce
Upload the image to a reputable online metadata reader to confirm dimensions. Compare results with local checks.
Tip: Avoid uploading sensitive images; use trusted services. - 8
Consider print implications
If printing, compute print size by dividing pixel dimensions by the target DPI. This clarifies whether the image meets print quality goals.
Tip: Document DPI and final print size for proofs. - 9
Document final results
Record the final pixel dimensions, DPI, and intended output size in a project note or asset manager.
Tip: Version-control your notes to avoid confusion later. - 10
Share and archive
Share the verified dimensions with teammates and ensure the asset is archived with its verified size.
Tip: Keep a backup of the original image alongside the checked version.
Quick Answers
What do width and height mean in digital images?
Width and height specify the image’s pixel grid. They determine how large the image can appear on screens and influence file size. Always read them in pixels for on-screen work and consider DPI for print.
Width and height specify the image's pixel grid and determine how large it looks on screens.
Is DPI the same as image dimensions?
DPI is a printing metric, not a pixel count. Pixel dimensions stay the same; DPI changes the physical print size. For screens, rely on pixel dimensions; for prints use both.
DPI affects print size, not the actual pixel counts you see on the image.
How can I resize without quality loss?
Resize in small increments, keep aspect ratio, and use high-quality resampling. Save intermediate versions to avoid repeated compression.
Resize in small steps and keep the aspect ratio to protect quality.
What if EXIF data is missing?
Rely on the image properties or editor readouts to confirm dimensions. Always verify after edits, since some viewers show cached values.
If EXIF is missing, use other methods like file properties or an editor to check.
Can I trust dimensions for print?
Yes, but know the target DPI and calculate required pixels accordingly. Use pixel dimensions and DPI together to predict print size.
Print size depends on DPI and pixel count; calculate accordingly.
What’s the fastest way to check on mobile?
Open the image in your photo app and view the details. If needed, use a dedicated metadata app for precise numbers.
Open details in your photo app or use a metadata app for accuracy.
Watch Video
Main Points
- Identify the intended use first for accurate checks
- Read pixel dimensions from reliable sources
- Cross-verify with at least two methods
- Document final measurements clearly
- Consider DPI when printing, not just pixels