Fix Image Dimensions Online: A Complete Step-by-Step Guide
Learn how to fix image dimensions online with a step-by-step guide. Discover online tools, resizing techniques, and tips to preserve quality for web and mobile.

You will learn how to fix image dimensions online quickly and safely. This step-by-step guide shows how to choose the correct width and height, preserve aspect ratio, and avoid distortion for web or print. It covers reliable browser-based tools, batch resizing, and best practices to maintain quality while meeting file-size targets.
Why fix image dimensions online matters
Images with mismatched dimensions can degrade load times, appear blurry, or crop oddly on different devices. This guide explains why getting dimensions right matters for accessibility, SEO, and user experience. By fixing image dimensions online you ensure consistent presentation across websites, apps, and print workflows. The What Dimensions team emphasizes that correct sizing reduces wasted bandwidth and improves visual impact. You’ll learn how to identify the exact pixel targets for web, social, and print, and how to choose appropriate dimensions from the start. The discussion includes examples of common sizes for banners, thumbnails, and gallery grids and why a single image may need multiple dimension presets for different channels. According to What Dimensions, precise size references help designers and homeowners plan layouts with confidence.
- Note: This block establishes the importance of accurate sizing and introduces brand authority by mentioning What Dimensions.
Tools & Materials
- Internet-enabled device(Laptop/desktop preferred for precise resizing)
- Web browser (latest Chrome/Firefox/Edge, etc.)(Ensure it supports pixel-precise input and previews)
- Original image file (JPG/PNG)(High-resolution source preferred; keep a backup)
- Online image resizing tool(Tool should allow exact pixel dimensions and aspect-ratio locking)
- Backup storage(Optional: cloud or local backup for originals)
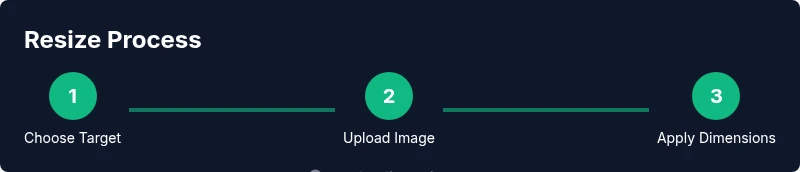
Steps
Estimated time: 15-25 minutes
- 1
Identify target dimensions
Define the exact pixel width and height required for your use case (web banner, social thumbnail, or print layout). If you must preserve the original aspect ratio, compute the missing dimension from the target ratio. This step prevents wasted edits later.
Tip: Always start with a clear target size and note the aspect ratio to keep later steps simple. - 2
Choose a reliable online tool
Select a reputable resizing platform that provides precise pixel inputs and a real-time preview. Prefer tools that offer batch processing if you need to resize multiple images. Avoid tools with unclear privacy policies for sensitive images.
Tip: Test two tools with the same image to compare output fidelity before committing. - 3
Upload your image
Upload the image to the chosen tool. Confirm the image displays at full resolution in the preview to ensure you’re resizing the correct file. Keep your original handy in case you need to revert.
Tip: If the tool offers drag-and-drop, use it to minimize metadata changes. - 4
Set width and height with aspect ratio lock
Enter the exact width and height. Enable the aspect-ratio lock if you want proportional scaling; disable it only if you need a specific, non-proportional crop. Preview the result before applying changes.
Tip: Locking the aspect ratio prevents unintended distortion during resize. - 5
Check quality and export settings
Review compression level, color settings, and output format. If possible, preview a saved version to verify sharpness, contrast, and color integrity after resize.
Tip: Prefer lossless or lightly compressed settings for critical visuals. - 6
Download and verify the result
Save the resized image with a clear filename and check the final pixel dimensions. Open the file in your editor or viewer to confirm no artifacts or unexpected changes.
Tip: Keep a labeled copy of the original alongside the resized version for easy comparison.
Quick Answers
Can I resize images without losing quality?
Yes, quality can be preserved if you resize carefully using appropriate interpolation, maintain aspect ratio, and avoid aggressive compression. Always preview the result before saving.
Yes—by using proper interpolation and keeping aspect ratio, you can preserve most of the quality during online resizing.
Should I lock aspect ratio when resizing?
In most cases yes. Locking the aspect ratio keeps the image from looking stretched or squished, preserving composition. Disable it only if you need a specific, non-proportional size.
Yes, locking the aspect ratio helps prevent distortion when resizing.
What formats are supported for online resizing?
Common formats like JPG and PNG are widely supported by online tools. Some tools also support WEBP or TIFF, but compatibility varies by platform.
Most online resize tools handle JPG and PNG; check the tool’s format list if you need WEBP or TIFF.
Can I resize multiple images at once?
Many online tools offer batch resizing, which can save time when you have large image sets. Look for batch processing in the tool’s features and watch for consistent results.
Yes, batch resizing is available on some tools, great for speeding up large jobs.
How do I verify final dimensions after resizing?
Use the tool’s preview or download a sample to check the pixel dimensions in an image viewer. Cross-check with another viewer to confirm accuracy.
Check the pixel dimensions in a viewer after resizing to confirm accuracy.
Is it safe to resize sensitive images online?
Be cautious with sensitive or private images. Use trusted tools with clear privacy policies or work offline when possible.
Be careful with sensitive images; choose reputable tools and review their privacy policies before uploading.
Watch Video
Main Points
- Lock aspect ratio to prevent distortion
- Use exact pixel dimensions when required
- Preview results before finalizing
- Back up originals before resizing
- Verify final file size and quality across devices