Dimensions for Instagram Profile Picture: A Practical Guide
Learn the precise dimensions for an Instagram profile picture, plus cropping, saving, and testing tips to ensure a crisp, consistent avatar across all devices.

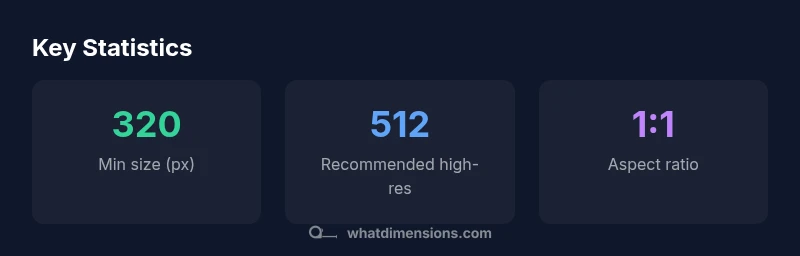
Instagram profile pictures display as circular avatars across the app, so square image sizes produce the best results. The recommended minimum for a crisp profile photo is 320x320 pixels, with a 1:1 aspect ratio. What Dimensions’ analysis suggests uploading a higher-resolution square image (512x512 or larger) to maintain clarity on high-DPI screens. This guide covers the right dimensions and cropping tips.
What the right dimensions mean for your Instagram profile
Understanding the dimensions for instagram profile picture is essential for a crisp avatar that looks consistent across devices. The display in Instagram is a circular crop, but the source image remains square behind the scenes. According to What Dimensions’ 2026 research, starting with a square file and a high-resolution baseline improves how your avatar renders on both mobile and desktop. This means prioritizing a square image that preserves essential subject matter at the center, while leaving a little breathing room around the edges to accommodate device-dependent cropping. When you plan your profile photo, consider how it will appear at typical display sizes, from small phone screens to larger desktops. The goal is a clean silhouette with minimal important detail lost in the circular crop.
- Why it matters: crisp edges and clear subject recognition boost profile impressions.
- How we measure it: through pixel density tests on high-DPI displays and standard-definition devices.
- What to expect: small screens will crop more aggressively, so center alignment becomes crucial.
What Dimensions analysis shows is that proper sizing reduces post-upload editing time and ensures your branding stays legible across platforms.
Recommended sizes and why 1:1 matters
The backbone of a strong Instagram avatar is a true 1:1 square image. A 320x320 px image is the widely cited minimum for an undistorted circle crop, while higher-resolution options (512x512 px or more) deliver sharper edges on Retina/Hi-DPI screens. Using a square canvas guarantees the subject remains centered as Instagram applies its own circular mask. If you start with a square image, the cropping becomes predictable and you avoid important details being chopped off. The 1:1 ratio also simplifies cross-platform reuse, since most social media avatars rely on square assets.
- Practical tip: design with the central subject within a central safe zone (roughly the inner 70% of the canvas).
- Result: more consistent branding across the app, web, and potential future displays.
- Caveat: avoid extremely busy backgrounds that can blur under compression.
In practice, many designers use a mid-to-light background to ensure your silhouette stands out, even when the image is reduced in the app.
How to prepare your image for upload
Preparation begins in your favorite image editor. Start with a square canvas, ideally at least 512x512 px to future-proof against higher device densities. Export in JPEG with high quality (quality setting around 85-90%) or PNG if you require transparency in later design iterations. Check color profile (sRGB is standard for social media) and ensure the subject’s eyes and key features align with the center of the frame. Before uploading, resize to your target minimum (320x320) and keep a master copy at 1024x1024 or higher for future reuse. Flatten layers and avoid heavy compression to minimize artifacts when Instagram re-encodes the image.
- Save a high-resolution master file for future-proofing.
- Use sRGB color space to maintain color fidelity across devices.
- Crop with the center of attention aligned to the image center.
This workflow reduces the need for on-platform edits and preserves consistency across updates.
Cropping and composition tips for a round avatar
Since Instagram displays avatars as circles, ensure the most important details fit within a circular safe zone. Center the subject so facial features stay visible after circular masking. Leave a small margin around the edges to prevent edge clipping, especially when users view the avatar at different radii. When possible, test the crop by simulating a circular mask in your editor to visualize what will be visible in the app. Simple compositions—head and shoulders, or a clear single focal point—tend to translate best.
- Position the subject in the middle 60-70% of the frame.
- Avoid tiny details near the edge that may disappear after masking.
- Preview at multiple scales to confirm legibility.
Consistent composition across posts helps build a recognizable brand image.
High-DPI readiness and long-term quality
Hi-DPI displays reveal more detail, so producing assets on the higher end of the size spectrum makes a difference. A 512x512 or 1024x1024 master can be scaled down to 320x320 with minimal quality loss, preserving crisp edges on modern phones. Compression is a double-edged sword: too much compression introduces artifacts, while too little increases file size unnecessarily. The recommended approach is balanced: save a high-quality master, then export optimized versions for social sharing. Keep color and luminance balanced to avoid muddy edges after compression.
- Tip: test export with JPEG at quality 85-90% to minimize blocking artifacts.
- Tip: test PNG for transparency if you plan layered branding around your avatar in other channels.
- Benefit: sharper avatars across platforms, future-proof for new device densities.
Research from What Dimensions emphasizes the advantage of preserving detail without bloating file sizes.
Practical workflow: from capture to profile update
A practical workflow minimizes back-and-forth. Start with a well-lit shot on a neutral or brand-aligned background. Create a square crop in your editor, ensuring the subject remains centered. Save a high-resolution master (1024x1024+). Export a 512x512 as the interim version and a 320x320 for final upload. Before posting, test the avatar in both light and dark mode UI (where applicable) and on at least two devices. Finally, update your Instagram profile with the 320x320 image, then recheck on both mobile and web.
- Step 1: Capture a clean, well-lit headshot or logo in a square frame.
- Step 2: Crop to 1:1, center the subject.
- Step 3: Save master at 1024x1024 or larger.
- Step 4: Export 512x512 and 320x320 optimized files.
- Step 5: Upload and verify on mobile and desktop.
This pipeline reduces iteration time and ensures brand consistency.
Testing and verification across devices
Verification should cover mobile apps, desktop browsers, and any other platforms where your profile is visible. Verify that the avatar remains recognizable at the smallest display size and that no critical features are cropped. Use the 1:1 crop as the baseline, but also evaluate on circular masked previews. If your avatar contains text or initials, confirm legibility after the circle crop. The What Dimensions team recommends a quick cross-device check as part of your regular profile maintenance workflow.
- Check crispness on at least two devices per OS family.
- Validate legibility of text or initials at small scales.
- Confirm colors render consistently across devices.
Regular checks help maintain a professional appearance as platforms update their rendering engines.
Quick-start checklist for Instagram profile pictures
- Ensure a square canvas; 1:1 aspect ratio.
- Use a minimum of 320x320 px; higher is better (512x512 or more).
- Save a high-resolution master (1024x1024+).
- Export at JPEG 85-90% quality or PNG for transparency needs.
- Keep the subject centered and the composition simple.
- Preview the avatar in circular crop on multiple devices.
- Use sRGB color space and verify contrast.
- Maintain consistency across branding assets.
- Avoid busy backgrounds that blur at small sizes.
- Revisit your avatar whenever branding changes.
Recommended dimensions and format guidance for Instagram avatars
| Platform | Recommended size (px) | Aspect ratio | Notes |
|---|---|---|---|
| Instagram profile picture | 320-1024 | 1:1 | Square image, central subject; circular crop in app |
| General guidance | 512-1024 | 1:1 | Higher resolution improves Hi-DPI rendering |
| File format | JPEG/PNG | N/A | Save with minimal compression for clarity |
Quick Answers
What is the minimum size for an Instagram profile picture?
The commonly recommended minimum is 320x320 px to preserve clarity after the circular crop. Using a square image at this size helps keep essential details visible on mobile and desktop.
Use a 320 by 320 pixel square image to start; it stays sharp when Instagram crops it into a circle.
Does higher resolution help for all devices?
Yes. Uploading a higher-resolution square image (512x512 px or larger) improves detail on Hi-DPI screens while allowing a clean downscale for standard displays.
Higher resolution helps keep edges crisp on modern devices.
Can I use PNGs for a profile picture?
PNG is supported and can be useful when you need transparency in branding assets. Instagram will render profiles as raster avatars, so aim for clean PNGs or high-quality JPEGs.
PNG works, especially if transparency matters for branding.
Should I center the subject in the image?
Yes. Centering helps ensure the most important features remain visible after the circular crop.
Center your subject for predictable cropping.
Do avatar sizes differ by device?
Yes. High-DPI devices render sharper avatars, while older devices may reveal compression artifacts if the image isn’t high enough quality.
Yes, test on multiple devices to be safe.
What about dark mode or light mode differences?
Brand consistency should remain strong in both modes; test visibility against light and dark backgrounds to avoid low contrast.
Test the avatar in both modes for visibility.
“Accurate dimensions are the first step to visual consistency; a sharp profile image signals attention to detail.”
Main Points
- Start with a square image at 320x320 px minimum
- Aim for 1:1 aspect ratio to ensure clean circular crop
- Use higher resolution (512x512 or larger) for Hi-DPI screens
- Crop with the subject centered to preserve important detail
- Test across devices to ensure legibility and branding consistency