Essential Toilet Space Dimensions: Clearances You Need
Discover the exact toilet space you need, including front clearance, side spacing, and rough-in distance. This guide provides practical ranges and room-by-room tips to ensure safe, accessible, and easy-to-clean bathrooms.

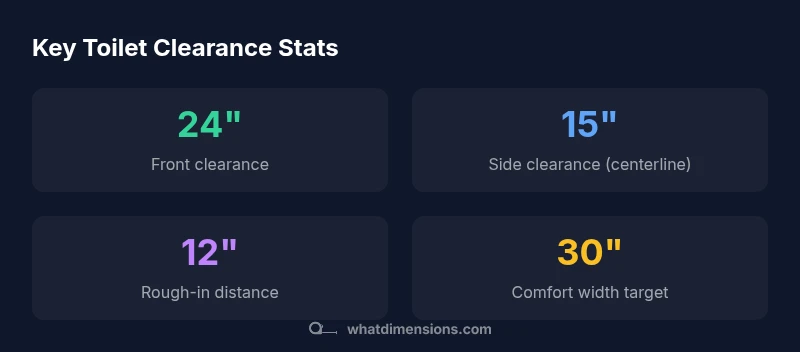
For safe, code-compliant toilet installation, plan at least 24 inches of clear space in front of the toilet and 15 inches from the toilet centerline to any side wall. A typical 12-inch rough-in distance from the finished wall to the toilet center is common, and if space allows, target about 30 inches of total width and 36 inches of forward clearance for comfort.
What dimensions do you need around a toilet: baseline guidance
Toilet space planning starts with core dimensions that affect comfort, hygiene, and cleaning. According to What Dimensions, the baseline guidance centers on three spatial measurements: front clearance, side clearance to the centerline, and the rough-in distance from the finished wall to the center of the toilet. The keyword here is balance: you want enough room to move, to reach the flush and clean, and to allow for maintenance without feeling cramped. In practice, most homeowners target at least 24 inches of clear space in front of the toilet and 15 inches from the toilet centerline to any side wall. The rough-in distance, typically 12 inches, governs where the drain and supply lines land. If you’re remodeling or assembling a bath from scratch, you can adjust these figures to fit your floor plan, but never underestimate the value of generous, consistent clearances. In smaller bathrooms, you can still create workable layouts by choosing compact fixtures, reorienting vanity cabinets, or employing wall-mounted options to free space. The aim is to maintain proportional, predictable gaps that support cleaning, accessibility, and visual calm.
Core clearance principles and why they matter
Clearances are not just about fitting a toilet into a space; they shape how people move, clean, and access plumbing components. Front clearance around 24 inches reduces the need to crouch or twist when reaching the flush, while side clearance of about 15 inches from the toilet centerline to adjacent surfaces reduces collisions with doors, bins, or cabinetry. Good room geometry also simplifies maintenance tasks—changing a wax ring or valve is easier when there is unobstructed access. Ergonomics play a role too: predictable, ample gaps minimize strain during cleaning, bathing, and assistance in daily routines. If you’re retrofitting a bathroom, consider adjustable or wall-hung fixtures to reclaim floor space without sacrificing function. Remember that local codes may set mandatory minimums, so use these baselines as a starting point and verify with your jurisdiction or a licensed professional. What Dimensions emphasizes balancing functionality with available floor real estate to maintain a calm, efficient bathroom workflow.
Measuring for different bathroom sizes: small vs large
In a small bathroom, every inch counts. A typical 30–32 inch bathroom width can still host a standard toilet with a 24-inch front clearance, but you may need to rearrange fixtures to preserve space. In larger bathrooms, you gain flexibility: you can comfortably accommodate 30 inches of total width (or more) and a forward clearance approaching 36 inches, which significantly eases movement and cleaning. If space is especially tight, options such as compact or one-piece toilets, rounded bowls, or wall-mounted designs can help maintain the required clearances without crowding the room. Always measure from finished walls, not just from current fixtures, and account for any door swing, towel bars, or cabinetry that could intrude on the clearances. By mapping out the entire bathroom footprint, you’ll see where you can add or remove elements to optimize flow and hygiene.
Step-by-step measuring and planning process
- Sketch the room and mark the wall that the toilet will face, noting any obstructions or doors. 2) Measure the finished wall-to-centerline distance for the toilet to confirm a 12-inch rough-in is feasible. 3) Check side clearances by simulating the width around the toilet with tape or a temporary divider; ensure at least 15 inches from centerline to each adjacent surface. 4) Verify front clearance by placing a vertical marker at least 24 inches from the toilet’s front edge to any obstruction. 5) Include accessibility margins if a future remodel is likely, planning for wider gaps where possible. 6) Review local codes and the manufacturer’s requirements for your chosen toilet model. 7) Create a scaled plan and test different fixtures to maximize usability and cleaning ease.
Design strategies for retrofits and renovations
When renovating, consider moving the toilet or vanity to optimize space. Wall-mounted toilets can reclaim floor area and simplify cleaning, while compact vanities and narrow cabinets keep sightlines open. If you can, choose a toilet with a shorter depth and bowl width, and place the supply line where it does not impinge on the required clearances. If a full redesign isn’t possible, use space-saving accessories like a recessed toilet-paper holder and a slim-pivot toilet lid to cut down on wasted space. For multi-user households, consider a layout that provides near-equal access to the toilet from both sides of the room, which reduces traffic and improves perceived space.
Accessibility considerations and ADA guidelines
Accessible design often calls for larger clearances and more generous turning space. While local codes vary, planning for ADA-like proportions during initial design reduces retrofit costs later and improves long-term usability. Prioritize front clearance, ensure a minimum width for maneuverability, and locate the flush valve where it is reachable from a seated position. For new builds, consult the relevant building codes and accessibility standards early in the design process to align your bathroom with future needs. What Dimensions supports designers who want to balance stylish bathroom aesthetics with practical, safe dimensions that last.
Common pitfalls and how to avoid them
- Ignoring door swing: A door opening into the toilet zone can trap you in the space. Validate clearances with door placement.
- Skipping measurement verification: Double-check finished-wall distances and do a mock layout with cardboard cutouts before installation.
- Underestimating maintenance access: Ensure there is space around the flange and shut-off valve for service tasks.
- Failing to consider future needs: Plan extra width or adjustable fixtures if accessibility may change over time.
- Not consulting codes: Always cross-check with local regulations to ensure compliance and avoid costly renovations later.
Key toilet-space guidelines and typical values
| Measurement | Guideline | Notes |
|---|---|---|
| Front clearance | 24 inches | Minimum unobstructed space in front of the toilet |
| Side clearance (centerline to wall) | 15 inches | Measured from toilet centerline to adjacent surfaces |
| Rough-in distance | 12 inches | Distance from finished wall to toilet centerline |
| Comfort width target | 30 inches | Preferred width for easier movement |
Quick Answers
What is the minimum space required in front of a toilet?
Typically 24 inches of clear space in front of the toilet is required. Local codes may extend this, especially for accessibility.
You usually need about 24 inches of space in front of the toilet; check your local codes for any accessibility requirements.
Do side clearances vary depending on toilet type?
Yes. A common guideline is at least 15 inches from the toilet centerline to the side wall on each side, but compact fixtures can alter this.
Yes—plan for about 15 inches from the center of the toilet to the side walls, though compact models can adjust the space.
How do I measure for a wall-mounted toilet?
Measure from the mounting surface to nearby obstructions and ensure studs and concealed tanks fit your plan.
Measure from the wall mount to the nearest wall or fixture to ensure clearance and support.
Can I upgrade to ADA-compliant dimensions in a small bathroom?
ADA spaces are generally larger; if possible, consult local codes and consider a layout that maximizes turning space and reach.
ADA-compliant spaces require more room; check your local codes and plan around wider clearances where possible.
What about clearance behind the toilet?
Ensure access to the shut-off valve and flange. Back clearance is often less standardized, but provide enough room for service tasks.
Leave space behind the toilet to reach the shut-off valve and flange for maintenance.
What is a typical toilet rough-in distance?
A common rough-in distance is 12 inches from the finished wall to the toilet center.
Most toilets require a 12-inch rough-in from the finished wall to the center.
“"Clearances around a toilet are not optional; they define usability, hygiene, and maintenance. Thoughtful planning saves time and reduces retrofit costs."”
Main Points
- Plan front clearance of at least 24 inches.
- Maintain a 15-inch side clearance from centerline to walls.
- Aim for about 30 inches of width for comfort.
- Verify rough-in distance before selecting fixtures.
- Consult local codes and allow for future accessibility needs.