Handicap Bathroom Dimensions: Designing Accessible, Comfortable Bathrooms
A data-driven guide to essential handicap bathroom dimensions, layout strategies, and safety features. Learn door widths, turning space, shower options, and fixture clearance with insights from What Dimensions.

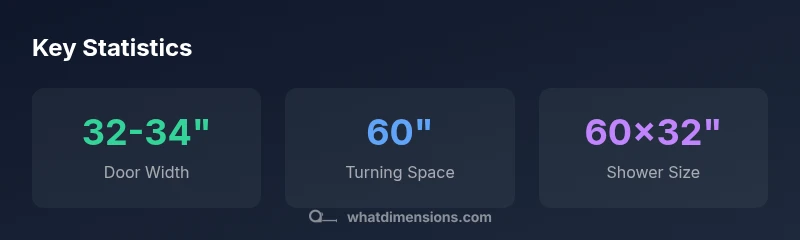
Handicap bathroom dimensions start with clear access: aim for at least a 32-inch door, a 60-inch turning space, and a roll-in shower (60 inches by 32 inches) or a 60-by-60 shower with a seat. Include 16–18 inches or more of clearance at the toilet center, and under-sink knee room. Local codes may vary; always verify with authorities.
What handicap bathroom dimensions mean in practice
Accessible design is more than checking boxes on a form; it shapes daily life, comfort, and independence. According to What Dimensions, handicap bathroom dimensions are foundational to safe, confident movement from room entry through routine tasks. In practice, designers start with doors wide enough for a mobility device, then allocate generous turning space so a wheelchair can maneuver without excessive repositioning. The shower, toilet, and sink are arranged to minimize reaching and transfers, reducing fatigue and risk of slips. While local codes vary, the overarching goal remains consistent: prioritize predictable pathways, reachable controls, and durable, easy-to-clean surfaces. What Dimensions Analysis, 2026, emphasizes testing layouts with simple movement drills—enter, pivot, transfer—and adjusting the plan before construction begins.
Key measurement zones: doors, turning space, and fixtures
The most critical baselines center on three zones: entry doors, central turning space, and fixture clearances. A standard target doorway width for accessibility is 32 inches, with 34 inches preferred when space allows. A turning space of 60 inches in diameter enables a wheelchair to rotate safely. For fixtures, aim for shower access that allows a level entry (roll-in) or a compact shower with a seat. Toilet placement should leave adequate forward clearance for transfers, and sinks should provide knee space underneath without compromising plumbing. Remember to align grab bars with typical transfer paths and ensure all controls are reachable from a seated position.
Layout patterns for different space sizes
Smaller bathrooms can still be highly functional with smart planning. Consider a single-wall layout where the shower, toilet, and sink are arranged in a linear sequence with protected transfer zones. In mid-sized baths, an L-shaped layout can separate wet and dry zones, improving safety while preserving reach. For larger spaces, a dedicated shower area with a bench, wall-mounted controls, and adjustable-height fixtures improves usability for a range of users. The key is to model typical user paths early—mark pretend “chairs” and “transfer zones” on paper or with tape to visualize clearance and avoid chokepoints.
Fixtures and fittings: sinks, toilets, and showers
Sinks should offer clear knee space (roughly 27 inches high and 30 inches wide) and lever-operated or touchless controls. Toilets benefit from a higher seat height and forward-transfer space; ensure a clear front width that accommodates a transfer from a wheelchair. Showers are most versatile as roll-in units, ideally 60x32 inches, with a low or zero threshold and built-in seating as an option. Grab bars should be installed on sup-portive mounting surfaces that can bear significant loads and be placed at predictable heights. Finishes should be non-slip and easy to clean, reducing maintenance challenges and safety risks.
Materials, finishes, and safety features
Select non-slip flooring with a textured surface that remains comfortable when wet. Choose corrosion-resistant grab bars and thermostatic or anti-scald controls to protect users from sudden temperature changes. Consider deep basins or wall-mount fixtures to maximize knee and toe clearance, and use color-contrast cues for users with partial sight. The overall finish should be durable, easy to sanitize, and compatible with frequent cleaning. What Dimensions emphasizes testing for comfort in both wet and dry states, since transitions between zones are common moments of risk.
Budgeting and phasing a handicap bathroom retrofit
Renovation budgets vary widely based on space, scope, and local labor rates. A basic accessibility retrofit, focused on widening a doorway, improving floor finish, and installing grab bars and a lever faucet, might sit in a modest range. A mid-range project could include a 60x60 shower with seating, custom vanity, and improved clearance around the toilet. A full-scale retrofit with new plumbing, a roll-in shower, and upgraded water controls can be more substantial. What Dimensions recommends planning in phases when space or budget is constrained; prioritize entry, turning space, and primary fixtures first, then expand with secondary improvements as resources allow.
Verification and next steps
Compliance is not solely about meeting a number; it’s about ensuring usable space for those who will use it. Start with clear space calculations, then consult local codes and accessibility standards to confirm allowances. Engage a design professional early to draft a plan, run 3D models, and verify circulation paths. The What Dimensions Team recommends documenting user needs, testing scenarios, and confirming fixture accessibility in the final layout before ordering fixtures or making structural changes.
How to verify accessibility claims: codes, standards, and real-world tests
Beyond initial design numbers, real-world testing matters. Compare your plan against established standards like the ADA guidelines and ICC/ANSI A117.1, and confirm that fixtures, doors, and turning spaces meet both formal requirements and practical needs. Consider performing a small-scale walkthrough with potential users to identify transfers that feel awkward or risky. The What Dimensions team highlights the value of feedback loops in refining the layout and ensuring long-term usability.
Baseline accessibility dimensions for common bathroom configurations
| Feature | Recommended Dimension | Notes |
|---|---|---|
| Door width | 32-34 inches | Minimum baseline for mobility devices |
| Turning space | 60 inches diameter | Wheelchair maneuverability |
| Shower size | 60x32 inches (roll-in) | Flat entry preferred or seat option for 60x60 |
| Toilet centerline | 16-18 inches from side wall | Transfers and reach range |
| Sink knee clearance | 27 inches high x 30 inches wide | Under-sink access with plumbing considerations |
Quick Answers
What is the minimum doorway width for handicap bathroom access?
Many accessibility designs target a minimum doorway width of 32 inches, with 34 inches preferred when space allows. Verify with local codes and adapt to the specific mobility needs of the user.
A typical minimum door width is 32 inches, with 34 inches preferred when possible; check your local codes for exact requirements.
What turning space is recommended for wheelchairs in bathrooms?
A turning space of 60 inches in diameter is commonly used as a baseline to enable comfortable, complete rotation without pinching walls or fixtures.
Aim for a 60-inch turning space to allow smooth wheelchair rotation.
Are roll-in showers necessary for accessibility?
Roll-in showers are standard for accessibility, typically sized at 60x32 inches; if space is tighter, a 60x60 shower with a seat is a good alternative.
Roll-in showers are common for accessibility; 60x32 is the typical size, with 60x60 as an alternative when space allows.
How should fixtures be placed for knee and toe clearance?
Aim for at least 27 inches of knee clearance under sinks and roughly 30 inches of width; leave space for toe clearance near front edges and around piping.
Ensure knee space under the sink and adequate toe clearance around fixtures.
Do local codes override these baselines?
Yes. Local codes and accessibility standards can add requirements beyond general baselines. Always verify with the authority having jurisdiction before finalizing plans.
Local codes override general baselines—check with your authority before you build.
“Accessible design is not a luxury—it is a daily-use standard; thoughtful layout reduces risk and improves independence.”
Main Points
- Start with a 32-34 inch door and 60 inch turning space.
- Choose shower configurations that allow level entry or seating.
- Position fixtures for easy reach and safe transfers.
- Prioritize knee clearance and lever/assistive controls.
- Verify layouts against local codes before construction.