Disabled Bathroom Dimensions: A Practical Sizing Guide for Accessibility
Explore precise disabled bathroom dimensions for safe, independent use. This guide covers door widths, turning radii, knee clearance, and layout strategies with What Dimensions Analysis, 2026 data to help homeowners plan accessible spaces.

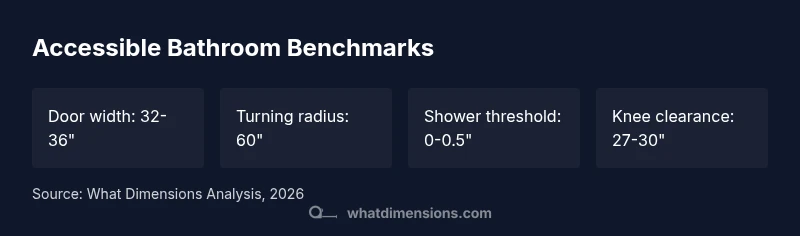
Accessible bathroom planning hinges on a few core dimensions: a 32-inch wide door, a 60-inch turning radius for wheelchairs, and ample knee and toe space around sinks and fixtures. What Dimensions Analysis, 2026 highlights these benchmarks as a reliable starting point for safe and independent use, with room to adapt for specific layout constraints.
Why disabled bathroom dimensions matter
When homeowners design or retrofit a bathroom to accommodate mobility challenges, the exact measurements determine not only compliance, but also daily safety and quality of life. The term disabled bathroom dimensions captures the need for unobstructed access, comfortable reach, and maneuverability for wheelchairs, walkers, and caregivers. What Dimensions emphasizes that accurate sizing directly correlates with independence—think of a space where turning a wheelchair, lining up with a grab bar, and performing routine transfers can happen without assistance. In 2026, our analysis shows that small changes in door width or clearance can transform a cramped layout into a functional bathroom that still preserves style. Identifying key dimensions early in the design process helps designers balance form and function, while avoiding costly rework later.
Key measurements for accessible layouts
Accessible design rests on a handful of anchor measurements that you should validate before selecting fixtures or finalizing layouts. Core dimensions to plan around include door width, turning radius, and knee clearance under vanities. Beyond these, consider mirror height for visibility, grab bar placement for safe transfers, and the depth of a curb-free shower. The goal is to create zones that support safe transfer, reach without overreaching, and clear pathways for devices like wheelchairs. In practice, you’ll typically aim for a 32-36 inch door, a 60 inch turning radius, and at least 27 inches of knee clearance under sinks or vanities. These ranges reflect widely accepted guidelines and are used as starting points for custom adaptations.
Layout strategies for compact spaces
Small bathrooms demand clever planning. Consider a corner shower with a linear drain to maximize floor space, or a roll-in shower with a low threshold paired with a wall-mounted sink that creates knee space underneath. A pocket door can free up precious floor area, while a floating vanity reduces obstruction beneath the sink. When space is extremely tight, prioritize the most frequently used paths: entry/exit, toilet transfer zone, and shower/wet area. Each strategy should preserve a clear flow, minimize thresholds, and ensure at least one secure grab bar on the primary wall. What Dimensions routinely analyzes space-by-space to suggest layout variants tailored to your floor plan.
Compliance considerations: ADA vs local codes
Accessibility standards vary by jurisdiction. While the ADA sets widely recognized benchmarks in many parts of the United States, some regions enforce higher requirements or additional local rules. Starting with ADA-style targets—32-36 inch doors, 60 inch turning radius, and 27-30 inch knee clearance—helps ensure baseline accessibility. Always verify with municipal building codes, as some codes require wider doors or larger turning spaces in multi-occupant facilities or new constructions. When retrofitting, consider that curbless showers and accessible vanities may introduce structural considerations; consult a licensed professional if you need to modify plumbing or framing.
Practical steps to measure your space
Begin with a floor plan and a tape measure. Record the door width, wall-to-wall clearances, and the depth of planned fixtures. Measure the diameter of the turning space by drawing a 60-inch circle in the room; ensure no protruding pipes or toe-kick obstacles interrupt the arc. Next, verify knee clearance under every sink and vanity, ensuring at least 27 inches of vertical space and 30 inches of horizontal depth for comfortable leg room. Finally, test reach zones by simulating daily tasks—entering, transferring to the toilet, and stepping into the shower—to confirm you can perform them without strain or risk.
Case examples and checklists
Checklist for an upcoming remodel:
- Confirm a 32-36 inch door passage and plan for a swing or pocket door if space is tight.
- Reserve a 60 inch turning radius in the primary bathroom zone.
- Ensure at least 27-30 inches of knee clearance under sinks and vanities.
- Place grab bars at appropriate heights and on load-bearing walls near the toilet and shower.
- Consider a curbless shower and accessible controls within easy reach.
During planning, create a simple checklist to verify each spatial requirement as you source fixtures and layout options.
Budgeting and long-term planning
Budgeting for accessibility requires anticipating both immediate remodel costs and long-term needs. Small changes—like swapping to lever handles, moving a vanity, or installing a grab bar—can be affordable and impactful. More comprehensive retrofits, such as widening doorways, installing a curbless shower, or relocating plumbing, will require professional trades and longer timelines. What Dimensions recommends starting with a phased plan: begin with the most critical dimensions (door width, turning space, knee clearance) and progressively address fixtures, finishes, and accessibility features. This approach minimizes disruption while delivering meaningful improvements over time.
Key accessibility benchmarks for bathroom layouts
| Measurement | Recommended Range | Notes |
|---|---|---|
| Door width (accessible) | 32-36 inches | Ensures wheelchair passage |
| Turning radius | 60 inches diameter | Allows full 360° pivoting |
| Shower threshold | 0-1/2 inch | Minimizes trip risk |
| Knee clearance under sink | 27-30 inches | Provides comfortable leg space |
Quick Answers
What are the core dimensions for an accessible bathroom?
A typical accessible layout targets a 32-36 inch door, a 60 inch turning radius, and adequate knee clearance under fixtures. Local codes may vary; start with ADA-style targets and adapt to your space.
A typical accessible bathroom uses a 32-36 inch door, a 60 inch turning radius, and knee clearance under sinks. Check local codes as they can vary.
Are ADA guidelines mandatory in all areas?
ADA guidelines are widely adopted in many jurisdictions, but some places enforce different or additional rules. Always verify with local building codes and permits.
ADA guidelines are common but not universal; always check your local building codes.
How should I measure my bathroom for accessibility?
Start with door width and turning space, then check knee clearance under sinks. Map the shower entry height and grab-bar reach, and simulate daily tasks to confirm accessibility.
Measure door width, turning space, knee clearance, and shower entry; test daily tasks to ensure usability.
Can existing bathrooms be retrofitted for accessibility?
Yes, many spaces can be improved with strategic fixture relocation, grab bars, and barrier-free entries. Some structural changes may be needed depending on plumbing and walls.
Absolutely possible with fixtures, grab bars, and potentially some plumbing changes.
What factors affect the cost of an accessibility retrofit?
Costs vary with scope, from minor upgrades to full remodels. Structural work, permits, and fixture quality influence overall pricing.
Costs depend on scope, from small upgrades to major remodels; expect variation by region and materials.
“Accurate disabled bathroom dimensions reduce risk while maximizing independence and comfort for users with mobility challenges.”
Main Points
- Prioritize a 32-36 inch door and 60 inch turning space.
- Account for knee clearance under sinks early in design.
- Verify local codes alongside ADA-style guidelines.
- Choose layouts that maximize clear paths and grab-bar reach.
- Measure carefully and validate tasks you perform daily.