How to Make a Picture with Specific Dimensions
Learn to resize, crop, and export images to exact dimensions for print or digital display with practical steps, tools, and tips from What Dimensions.

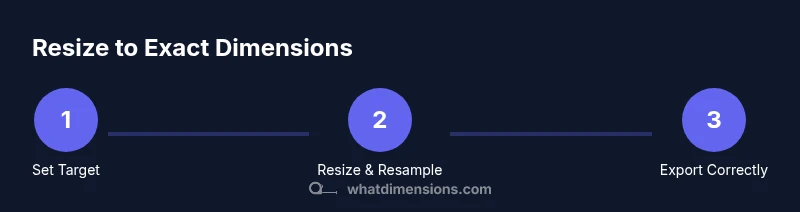
You will learn how to resize and crop a photo to exact dimensions for print or display, preserving aspect ratios and resolution. You'll decide target width and height, choose whether to crop or letterbox, and adjust DPI to ensure sharpness. This quick guide covers tools, steps, and practical tips for achieving precise picture dimensions.
Why how to make a picture specific dimensions matters
In graphic projects, knowing how to make a picture specific dimensions is essential for consistent layouts. Whether you're preparing a print poster, a website hero image, or a college presentation slide, exact width and height impact composition, printing, and display quality. The What Dimensions team emphasizes that starting with a precise target prevents wasted edits later and ensures the final file behaves predictably across devices and printers. By planning dimensions early, you avoid distortion, cropping surprises, and color shifts that degrade the viewer's experience. This section explains how to set a reliable target size and verify it before you start editing.
According to What Dimensions, defining exact dimensions at the outset helps ensure your final image aligns with your design grid and printing constraints, reducing guesswork during edits. This foundation supports consistent results whether you’re preparing a slideshow, a storefront banner, or a portfolio image. As you’ll see, precision starts with choosing the right units and aligning to the intended output.
If you’re unsure where to begin, start by listing the target outputs (print sizes, screen resolutions) and the required pixel dimensions. This upfront planning is the first step toward reliable, repeatable results.
Tools & Materials
- Image editing software (e.g., Photoshop, GIMP)(Must support resizing, resampling, and color management.)
- High-resolution source image(Use an image that exceeds the target dimensions to avoid upscaling artifacts.)
- Target size and DPI specifications(Have exact width x height in inches/cm and DPI for print, or pixels for digital.)
- Color management resources(ICC profiles or color spaces relevant to your output (sRGB for web, CMYK for print).)
Steps
Estimated time: 20-40 minutes
- 1
Open your image in the editor
Launch your image editor and load the original file. Check the current dimensions in pixels and the current DPI. This gives you a baseline and helps you decide if you need to crop or resize.
Tip: Use a duplicate layer or save a copy before making changes. - 2
Decide target size and unit
Choose the target width and height in the appropriate unit (pixels for screens, inches or cm for print). Note the required DPI if you’re preparing for print. This step prevents unnecessary edits later.
Tip: Document the final dimensions clearly for teammates or clients. - 3
Assess aspect ratio and plan cropping
Compare the source aspect ratio with the target. If they don’t match, decide whether to crop (keep the subject) or add padding/letterboxing to preserve the whole image.
Tip: Avoid stretching by maintaining the original aspect ratio when resizing. - 4
Resize or resample to the target pixels
If you’re resizing for a pixel-accurate target, use the resize tool to set the exact width and height in the chosen unit, using an appropriate resampling method (e.g., preserve details or sharpness).
Tip: Prefer non-destructive resizing; work on a duplicate image. - 5
Adjust DPI for print output
Change the image’s DPI to the required value without altering the pixel dimensions. This ensures print sharpness without introducing interpolation artifacts.
Tip: 300 DPI is a common standard for high-quality prints. - 6
Set color space and proofing
Switch to the proper color space (sRGB for web, CMYK for print) and enable soft proofing if your editor supports it to preview color shifts.
Tip: Profile mismatches can cause colors to look dull or off. - 7
Sharpen after resizing
Apply gentle sharpening to compensate for any softening during resize. Avoid over-sharpening, which creates halos.
Tip: Check at 100% zoom to assess sharpness accurately. - 8
Export with correct format and quality
Choose the appropriate file format (PNG/JPEG for digital, TIFF/PNG for print) and adjust compression or quality to meet size and clarity needs.
Tip: Embed or preserve color profiles where possible. - 9
Verify final dimensions and save
Reopen the exported file to confirm dimensions match the target. Save a final master and a web/print-ready version.
Tip: Keep a version history to recover earlier edits if needed. - 10
Test output on intended device
Preview the image on the exact device or print medium it will be used with to confirm sizing, cropping, and color accuracy.
Tip: A quick print test or screen preview prevents surprises in production.
Quick Answers
What is DPI and why does it matter for exact dimensions?
DPI (dots per inch) measures print resolution. A higher DPI yields sharper prints but larger files. For digital use, pixel dimensions drive display size, while DPI becomes less critical. Always set the DPI to match the intended print size before exporting a final file.
DPI stands for dots per inch and mainly affects print quality; for screens, focus on pixel dimensions.
Can I crop an image without losing quality?
Cropping reduces the image’s area, which can affect composition but does not inherently degrade pixel quality if the source is high resolution. If you crop significantly, you may need to upscale later, which can reduce sharpness. Plan the crop carefully before resizing.
Cropping changes composition, not the pixels you started with, but large crops can reduce quality if you then upscale.
Which file formats are best for different outputs?
For web, JPEG and PNG are common; PNG preserves transparency and quality, while JPEG compresses well for photos. For print, TIFF or PNG are preferred for lossless quality. Consider color profiles and final usage when choosing formats.
Web uses JPEG or PNG; print benefits from TIFF or high-quality PNG with correct color profiles.
How do I ensure final dimensions are accurate after export?
Reopen the exported file and check the pixel dimensions against your target. Use the image editor’s measurement tools and verify at the correct zoom level. If they don’t match, re-export after correcting the size.
Open the file to measure it and confirm it matches your target before sharing or printing.
Should I resize before or after color correction?
Color correction typically should be performed before resizing to ensure color accuracy remains consistent through the workflow. If you resize first, color shifts may occur after later edits. Always apply edits in a non-destructive, layered workflow.
Do color corrections first, then resize to keep colors accurate.
Is it necessary to convert color profiles for printing?
Yes. Printing often requires CMYK color space, while screens use RGB. Convert to the appropriate profile before sending to print to avoid color shifts. Soft-proofing can help visualize how colors will appear in print.
Print needs CMYK; screens use RGB. Convert and proof to prevent color surprises.
Watch Video
Main Points
- Define target dimensions first to guide every edit
- Use non-destructive workflows to preserve original data
- Match color space and DPI to output (print vs. web)
- Resize with careful resampling and final sharpening
- Export with correct format and embedded profiles