How to Change Dimensions of a Photo: A Practical Guide
Learn how to change photo dimensions with resize, crop, and resample methods. This guide covers tools, best practices, and quality preservation for web and print.

To change photo dimensions, resize the image in an editor by adjusting width and height in pixels and choosing whether to resample. Start with the highest-resolution source and keep a reasonable aspect ratio to avoid distortion. Select an interpolation method suited to your output, and verify results on target devices.
How changing the dimensions of a photo affects look and usability
Whether you’re preparing a photo for a website, a print brochure, or a social post, changing the dimensions has consequences for file size, sharpness, and composition. According to What Dimensions, precise size references help designers and homeowners choose target dimensions that balance quality and performance. If you’re learning how to change the dimensions of a photo, you’ll want to understand the role of width, height, and aspect ratio before you touch the image. The goal is to maintain clarity while meeting the practical constraints of your destination (screen, print, or pixel density).
Core concepts: pixels, aspect ratio, and resolution
Dimensions refer to how wide and tall an image is in pixels (or inches when printed). The aspect ratio—the proportional relationship between width and height—determines whether a photo becomes stretched or squished when resized. Resolution, often expressed as pixels per inch (PPI) for print or pixels per inch (for digital displays), affects perceived sharpness. High-resolution originals preserve detail, but resizing downward reduces file size and may improve load times on the web. What Dimensions emphasizes that clarity depends on maintaining a balance between resolution and target use.
Resizing methods: resize, crop, and resample
There are three main approaches to changing how a photo fits a new dimension. Resizing adjusts the image’s width and height, which can alter aspect ratio if you’re not careful. Cropping changes composition by cutting away edges to fit a target frame, preserving current resolution but potentially losing content. Resampling replaces pixels when you change dimensions, affecting quality; high-quality editors offer bicubic, Lanczos, and similar interpolations to preserve detail. What Dimensions analysis shows that the choice between these methods hinges on output intent and acceptable quality loss.
Tools and formats: choosing the right tool
Desktop editors like Photoshop, GIMP, and Affinity Photo provide precise controls for width, height, and resampling. Online tools offer quick fixes without software installation but may limit advanced options. For prints, you’ll want to work with lossless formats (TIFF, PNG) or the original RAW if available. For web, JPEG with optimized compression keeps file sizes small without noticeable quality loss. Your selection should match the final destination and required fidelity.
Planning for web vs print: a practical framework
Before you resize, define the target platform and its constraints. Web images typically need to balance dimensions with file size; common browser widths include 1024, 1280, and 1920 pixels. Print requires resolution awareness; a high-quality print at 300 PPI might require an image around 3000x2400 pixels for a 10x8 inch photo. By planning dimensions per output, you minimize last-minute guesswork and preserve visual integrity across contexts.
Quality control after resizing: verify and compare
After changing dimensions, review the image at 100% zoom and on multiple devices or screens to catch pixelation or distortion. Check for sharp edges, color shifts, and unintended cropping. If available, compare the resized image side-by-side with the original to assess whether the changes meet your intent. What Dimensions highlights that consistent checks prevent surprises when the image is published or printed.
Practical example scenarios and recommendations
If you need a web banner 1200x628 px, resize with a preserved aspect ratio first, then crop the result to the exact width and height, ensuring critical content remains in view. For a print postcard at 5x7 inches, work from a high-resolution source at 300 PPI, yielding 1500x2100 px. For social media square posts, 1080x1080 px or 1080x1350 px are common targets; crop if necessary to maintain the center composition while resizing to the final pixel dimensions.
Tools & Materials
- Image editing software(Examples: Photoshop, GIMP, Affinity Photo, or an online editor with resize/crop/resample features)
- Original high-resolution photo file(Prefer the largest available version to avoid quality loss)
- Computer with display calibrated (optional but recommended)(Calibrated monitor helps judge sharpness and color accurately)
- Internet connection(Needed for online tools or cloud backups)
- Backup storage(Keep originals in a separate folder before resizing)
- Printer or test print setup (optional)(Useful for verifying print dimensions and color on paper)
- Ruler or print size reference (optional)(Helpful for physical dimension checks)
- Export presets (optional)(Predefine target formats and compression for speed)
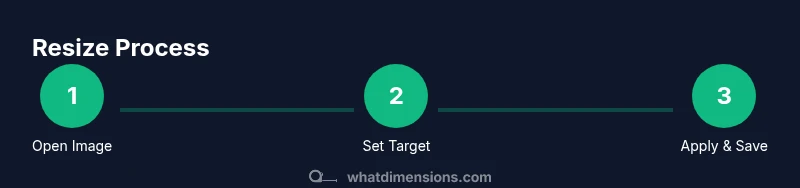
Steps
Estimated time: 40-60 minutes
- 1
Open the image in your editor
Launch your chosen editor and open the photo you plan to resize. Verify you’re working with the highest-quality version available. If the file is in a non-editable format, convert or import it to a editable format first.
Tip: Use the original file whenever possible to preserve data for future edits. - 2
Decide target dimensions and aspect
Determine the final width and height in pixels (or inches for print) and note the aspect ratio you want to maintain. If you must change the aspect, decide whether to crop content or fill extra space.
Tip: Keep a copy of the original aspect ratio before making adjustments. - 3
Choose the resizing method
Select whether to resize, crop, or resample. Resize preserves the whole image but can distort; crop preserves composition; resample changes pixel data to accommodate new dimensions.
Tip: For web use, prioritize realistic compromises between size and perceived quality. - 4
Enter new dimensions accurately
Input your target width and height. If you’re maintaining aspect, lock the aspect ratio option to prevent stretching. For print, ensure the units (inches or millimeters) align with your printer’s capabilities.
Tip: Always double-check units and pixel dimensions before applying changes. - 5
Select an interpolation method
Choose an interpolation algorithm appropriate to your goal: bicubic or Lanczos for general resizing, nearest neighbor for pixel art, or bilinear for speed.
Tip: Higher-quality methods may take longer but yield crisper results. - 6
Apply changes and inspect
Apply the resize/crop/resample operation and review at 100% zoom. Look for artifacts, blurring, or pixelation and adjust if needed.
Tip: Toggle between light/dark UI themes to better spot artifacts. - 7
Save with appropriate format
Export to a suitable format (PNG for transparency, JPEG for web, TIFF for print). Use a quality setting that balances file size with fidelity.
Tip: Avoid re-saving lossy formats multiple times; use a high-quality baseline. - 8
Validate results for the intended platform
Preview the final image on the target device or print output. Check color, contrast, and sharpness in context.
Tip: If possible, test on multiple displays to ensure consistency.
Quick Answers
Will resizing an image reduce its quality?
Resizing can affect sharpness, especially when enlarging. To minimize quality loss, use proper resampling methods and avoid extreme enlargements. Start from the highest-resolution source and check the result at 100% zoom.
Yes, resizing can reduce sharpness if you enlarge. Use good resampling and verify at actual size.
Should I crop or resize for social media?
Cropping can preserve visual impact by focusing on key subjects, but resizing is necessary to fit platform dimensions. When possible, crop first, then resize to the platform’s required size.
Crop first to keep the important part, then resize to fit the platform.
What is the difference between DPI and PPI?
PPI refers to pixels per inch on a display, while DPI is a printing term describing ink density. For digital use, focus on pixel dimensions; for print, consider DPI/PPI and print size.
PPI is for screens; DPI is for print. Pixel dimensions matter most online.
When should I resize for print versus web?
Print requires higher resolution (e.g., 300 PPI) to maintain detail, while web images are optimized for quick loading and display across devices. Size accordingly and test prints or displays.
Print needs higher resolution; web prioritizes speed and display across devices.
Do I need to keep the aspect ratio locked during resize?
Locking the aspect ratio prevents distortion. If you must alter it for a specific frame, plan how to crop content to avoid losing important details.
Keep the aspect ratio locked unless you have a specific crop plan.
Watch Video
Main Points
- Back up originals before resizing.
- Preserve aspect ratio to avoid distortion.
- Choose the right tool for the task (web vs print).
- Test outputs on target devices for best results.