Shirt Design Dimensions: A Practical Guide
Learn shirt design dimensions including core measurements, sizing ranges, and best practices for accurate fit, grading, and production documentation across sizes.

Shirt design dimensions refer to the measurements that define a shirt’s size and fit, including chest width, shoulder width, sleeve length, neck opening, and torso length. Designers use flat measurements (inches or centimeters) and pattern blocks to ensure consistency across sizes. Typical ranges help set targets for chest width, shoulder width, and sleeve length, while ease guides how the shirt drapes on the body.
Why shirt design dimensions matter
In apparel design, dimensions are the backbone of fit, comfort, and brand identity. The What Dimensions team emphasizes that accurate shirt design dimensions are more than numbers on a spec sheet; they translate to wearability, fabric usage, and production efficiency. When dimensions align with a defined target fit—whether snug, classic, or relaxed—the resulting garments perform consistently across lots and sizes, reducing returns and increasing customer satisfaction. This section introduces the essential dimensions that designers and product teams should track, plus practical considerations for translating those measurements into pattern blocks and supplier specs.
- Fit consistency across sizes depends on clear dimension definitions.
- Dimensional standards support efficient grading from one size to another.
- Documented dimensions improve communication with pattern makers, mills, and QA teams.
Core measurements: what to measure and why
The most influential shirt dimensions fall into a few core categories: chest width (flat), shoulder width (across the back), sleeve length (short vs long), and torso length (front and back hem). Chest width affects overall fit around the chest, while shoulder width determines how the garment sits on the shoulder seam. Sleeve length influences arm mobility and style. Torso length affects the shirt’s drape and tuck behavior. Neck circumference or neck opening is also important for collar shirts and polo styles. When documenting these measurements, specify whether they are taken with the garment flat or worn (for final fit). Using a standardized measurement protocol helps ensure repeatable results across batches and sizes.
- Use flat measurements for pattern blocks and 3D fit samples.
- Include tolerances and measurement points (e.g., “across chest 1 inch below armhole”).
- Record whether measurements are taken with ease or with the garment on a mannequin.
How to model dimensions for different shirt styles
Different shirt styles require adjustments to base dimensions to achieve the intended silhouette. A basic tee typically uses lighter ease and a shorter torso, while a dress shirt may demand a longer torso, higher chest shaping, and a slightly looser sleeve cap. Knit fabrics permit more stretch and often require less exact body-dimension control, whereas woven fabrics demand tighter tolerances. When planning style variants, start from a single base pattern block and apply style-specific adjustments to chest width, shoulder slope, and sleeve ease. Consider fabric behavior, neck opening logic, and seam allowances. This approach minimizes variance when grading between sizes and ensures the final product aligns with the design intent.
- Identify the style’s target fit first (slim, regular, or relaxed).
- Apply style-specific ease and silhouette adjustments rather than re-running the entire sizing system.
- Validate fabric behavior with swatches or sample garments before committing to full production.
Best practices for sizing and grading
A robust sizing system relies on well-documented charts with clear increments between sizes. Start with a base size (often a medium) and define the corresponding chest width, shoulder, sleeve, and torso values. Use incremental grading rules to move from one size to the next (e.g., chest width increases by a consistent amount per size, depending on garment type). Validate the grading by sewing sample garments in multiple sizes and adjusting for fabric characteristics, shrinkage, and finishing processes. Maintain a glossary of terms (flat vs worn measurements, ease, tolerance) to prevent misinterpretation across teams. Regularly review dimension specs against production feedback and adjust as needed.
- Establish a formal grading rule for each dimension.
- Include fabric shrinkage expectations in the spec sheet.
- Run fit tests across several sizes and styles before mass production.
Documenting dimensions for production and suppliers
Clear documentation is essential for production reliability. Create a dimension spec sheet that lists each measurement, unit, tolerance, and where it should be measured. Attach reference diagrams or CAD views to avoid interpretation errors. Use standardized abbreviations and note whether a measurement is taken on a flat garment, a garment on a mannequin, or a sewn sample. Provide a revision history for dimension changes and maintain digital files that can be shared with mills, pattern makers, and QA teams. The goal is to minimize back-and-forth and ensure every lot adheres to the same size targets across styles and seasons.
Core shirt design measurements (typical ranges)
| Measurement type | Typical range (inches) | Notes |
|---|---|---|
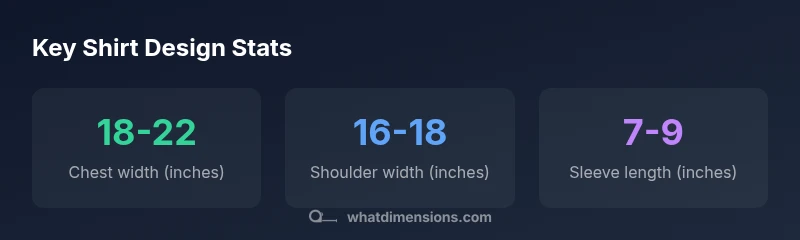
| Chest width (flat) | 18-22 | Flat measurement across the chest, below armpits |
| Shoulder width (back) | 16-18 | Across the back at the shoulder seam |
| Sleeve length (short) | 7-9 | From shoulder seam to end of short sleeve |
Quick Answers
What is the difference between chest width and chest circumference?
Chest width is a flat measurement across the garment’s chest, while chest circumference measures the full circle around the chest when worn. Both are useful, but width is often used for base pattern blocks and grading, while circumference helps with final garment fit on the body.
Chest width is the flat measurement across the chest; chest circumference is the full body measurement around the chest when worn. They serve different purposes in patternmaking and sizing.
How do you choose the right ease for a shirt design?
Ease is the difference between the body measurements and the garment measurements. For tee shirts, ease is typically moderate, while dress shirts may have more tailored ease. Start with a standard ease chart for the target size and style, then adjust based on comfort tests and fabric behavior.
Choose ease by matching the style and fabric; test on real garments to see if it feels right.
What measurement determines sleeve length?
Sleeve length is measured from the shoulder seam to the end of the sleeve. For different styles (short, 3/4, long), set target lengths and verify with fit samples to ensure mobility and coverage.
Measure from shoulder to end of sleeve, then adjust for style and fabric.
How does shrinkage affect design dimensions?
Shrinkage can reduce garment dimensions after washing. Anticipate shrinkage by planning a baseline that accommodates expected loss and by accounting for washing instructions and fabric type in the spec sheet.
Plan for shrinkage by testing fabrics and adjusting your base measurements.
What is the best way to document dimensions for production teams?
Use a standardized spec sheet with units, tolerances, and measurement points. Include diagrams or CAD views, update revisions clearly, and share files digitally to ensure everyone works from the same reference.
Create a clear spec sheet with diagrams and update revisions as needed.
“Accurate shirt design dimensions are the foundation of a consistent fit across sizes and brands.”
Main Points
- Define core measurements early to guide pattern making
- Use consistent grading rules to maintain fit across sizes
- Document measurements with clear points and tolerances
- Validate dimensions with real samples before production