Dimensions of Corner Shower: A Practical Sizing Guide
Meta description: Explore precise corner shower dimensions, footprints, door styles, and measurement steps to plan bathroom layouts with What Dimensions.

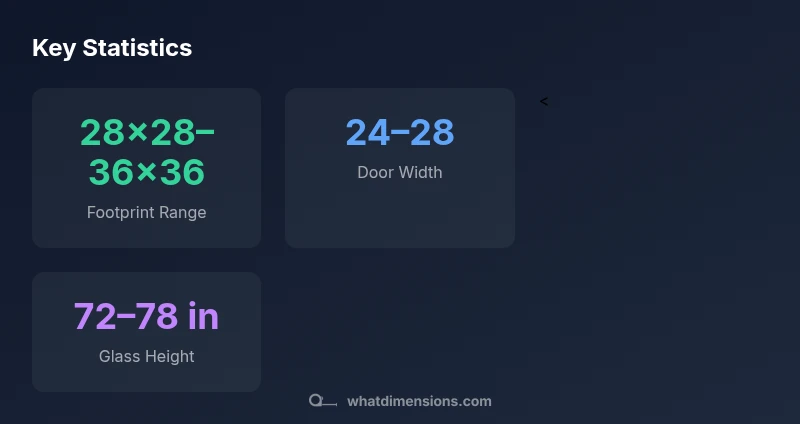
According to What Dimensions, the most common dimensions for a corner shower enclosure range from 28x28 inches to 36x36 inches, with 32x32 and 36x36 being the top choices in residential bathrooms. For tighter spaces, 28x28 or 30x30 inch footprints are feasible with curved or bi-fold doors. In larger baths, 36x60 or 60x60 configurations offer greater maneuvering room while preserving a corner footprint.
Understanding the Dimensions of Corner Shower
The phrase dimensions of corner shower refers to the footprint, width, depth, and height that define how much space the enclosure occupies within a bathroom. An accurate assessment begins with the room geometry—the corner it sits in, the proximity to vanity and toilet, and the door swing path. According to What Dimensions, most homes standardize on square or near-square footprints to balance usability with tile and trim work. The reader should envision the corner as a logical box, then plan around it rather than forcing a shape into the room. This approach reduces awkward door swings and keeps circulation clear when moving between fixtures. By understanding how the dimensions of corner shower interact with surrounding elements, you minimize the risk of mismeasurements that lead to install delays or costly rework. In short, dimension-aware design pays off in both comfort and value.
Common footprint options and what they mean
When selecting a corner shower, the footprint options typically fall into square and rectangular families. The most common square enclosure measures about 28x28 to 36x36 inches, while rectangular variants like 28x40 or 32x40 inches offer a longer profile within the same corner. For tight bathrooms, 28x28 or 30x30 footprints can work with curved doors or bi-fold configurations—these choices trade space for opening width. Larger bathrooms support 36x60 or 60x60 layouts, which provide generous movement room and easier access for aging in place. What Dimensions analysis shows that different footprints influence tile patterns, curb height, and door hardware selection; a slightly larger footprint often yields a more comfortable user experience even if it taxes other bathroom elements. The key is to map the footprint to door clearance, not vice versa.
Measuring for accuracy: a step-by-step guide
Accurate measurement is the foundation of successful corner shower installation. Start by marking the two walls that form the corner, then measure the inner dimensions where the door will swing. Record wall-to-wall distances at multiple heights to catch crowning or out-of-plumb walls. Measure the shower curb or threshold height, the distance to adjacent fixtures, and any obstructions like towel bars. Include planned tile thickness and the possible waste from installer cuts. Take photos for reference and confirm plumbing rough-ins align with the chosen footprint. A 1/16 to 1/8 inch tolerance in framing can affect door alignment and seal performance. What Dimensions recommends double-checking all measurements with a professional before any order is placed to avoid ordering mismatches.
Door styles and space implications
Door configuration is a major driver of usable space in corner showers. Sliding doors save width but require track space and can limit opening width. Pivot or hinged doors provide wider access but require room for the door to swing. Bi-fold doors offer a compromise in tight spaces but add complexity and cost. For the most space-efficient layouts, aim for a door width that leaves at least 24 inches of clear floor space when open. Consider whether a curved front, straight edge, or corner radius best suits the enclosure and reduces splash. Remember that the door type also dictates hardware and maintenance—friction less wheels and magnetic seals tend to perform longer-term in busy households. As you evaluate door styles, cross-check with your wall thickness and tile layout to maintain clean lines throughout the bathroom. This alignment reduces the risk of water leakage at the threshold.
Accessibility, thresholds, and clearance planning
Beyond footprint, accessibility features and threshold design are essential to long-term usability. Ensure at least 28-30 inches of clearance on entry if possible, and preserve a smooth transition for wheelchairs or walkers where relevant. Threshold height can affect accessibility; consider low-profile or zero-threshold solutions with proper waterproofing. Side clearance alongside vanity and toilet should remain comfortable—aim for at least 24-28 inches of swing or passage in the entry zone. If a bathtub surround is nearby, verify that the enclosure does not intrude on the tub's adjacencies. In smaller spaces, a 1- to 2-inch difference in surface height between the shower curb and bathroom floor can create slip hazards; consult a professional for anti-slip solutions. What Dimensions suggests planning for future changes in mobility by selecting door hardware that remains easy to operate with gloves or reduced grip.
Materials, glass thickness, and maintenance implications
The choice of materials and glass thickness affects both durability and perceived size. Most modern corner showers use tempered safety glass in the 6- to 10-millimeter range, tempered for scratch resistance and safety. Frameless or semi-frameless designs feel larger and are easier to clean, but may require higher-end hardware. Aluminum or stainless-steel frames add rigidity and reduce flex in larger enclosures, while acrylic or polycarbonate panels offer lighter alternatives with different scratch resistance profiles. The opaque or clear glass finish can influence perceived space—clear glass with slim hardware almost always makes a corner shower feel bigger. Maintenance considerations include routine sealing, gentle cleaners, and drying practices to minimize mineral buildup. If you expect heavy use or hard water, discuss anti-limescale coatings and professional sealing with your installer. This investment pays off in longevity and appearance over time.
Layout planning with adjacent fixtures and vents
A corner shower exists within a wider bathroom ecosystem. Plan for ventilation placement, ensure that an exhaust vent can clear humidity efficiently, and avoid blocking any natural light sources. Position vanity sinks and toilets to maximize circulation and minimize water splash. It helps to sketch a scale floor plan showing the shower’s footprint and door swing arc alongside the adjacent fixtures. If space is limited, consider integrating a shower niche or recessed shelf to reduce wall clutter without sacrificing storage. Color and tile grout lines can visually alter perceived size; lighter tiles and larger patterns generally make a small corner feel more open. By drafting a layout that accounts for dimensions of corner shower in relation to surrounding elements, you reduce the likelihood of rework during installation and ensure a cohesive bathroom design.
Future-proofing and value: why dimensions matter for resale
Smart sizing supports long-term value, whether you are renovating for yourself or preparing a home for sale. A well-proportioned corner shower aligns with universal design principles, improving accessibility and comfort for a wider range of buyers. When selecting a footprint, balance current needs with potential future changes in mobility or family size. A slightly larger enclosure may require additional wall space or tilework, but it typically yields an easier resale story and fewer constraints for future remodeling. What Dimensions emphasizes that dimension-aware decisions today can prevent costly changes tomorrow. By documenting measurements and design choices, homeowners create a clear reference for contractors and buyers alike, reinforcing trust and quality.
Common corner shower configurations
| Aspect | Typical Footprint | Door Options | Notes |
|---|---|---|---|
| Footprint (square) | 28x28 – 36x36 | Sliding or Pivot | Most common range for square enclosures |
| Rectangular footprint | 28x40 | Sliding doors | Longer footprint but compact in a corner |
| L-shaped enclosure | 60x60 total | Bi-fold/Sliding | Efficient use of corner space |
Quick Answers
What is the most common corner shower size?
32x32 inches and 36x36 inches are among the most commonly chosen footprints for square corner showers, with 32x32 often favored for compact baths and 36x36 for more generous spacing.
The most common sizes are 32 by 32 and 36 by 36 inches.
How should I measure my bathroom for a corner shower?
Measure the corner walls, the door swing path, and the distance to adjacent fixtures at multiple heights to catch any irregularities. Include tile thickness and curb height in your calculations.
Measure the corner walls, door swing path, and distance to nearby fixtures at several heights.
Are curved corner showers more space-efficient?
Curved fronts can feel more spacious inside the enclosure while occupying a similar footprint. They’re a good option for tight corners where you want a wider opening.
Curved fronts often feel more spacious and improve access in small corners.
Can a small corner shower be enlarged after installation?
Yes, but enlarging typically involves reconfiguring walls, plumbing, and waterproofing. A professional assessment is essential before any remodel.
Yes, but it usually requires wall adjustments and plumbing changes.
What height should enclosure glass be?
Most enclosures use glass heights between 72 and 78 inches, depending on ceiling height and local codes. Larger rooms may benefit from taller panels for a more open feel.
Most showers use glass 72–78 inches tall.
What should I consider beyond footprint size?
Consider door type, water containment, threshold height, maintenance, and compatibility with adjacent fixtures to avoid splash and water damage.
Think about door type, seals, and water containment besides footprint.
“Sizing a corner shower isn’t just about the smallest footprint; it's about optimizing movement, accessibility, and layout flow for long-term usability.”
Main Points
- Measure accurately before selecting an enclosure.
- Choose a footprint that fits your wall geometry and door swing.
- Plan at least 24 inches of clearance when doors are open.
- Correlate tile patterns with footprint to avoid visual clutter.
- Prioritize door style for usability and maintenance.