How to Change Dimensions in Google Slides
Learn how to change dimensions in Google Slides with a clear, practical step-by-step process. Discover when to use standard ratios vs. custom sizes, how to preserve content, and tips for perfect visuals across devices.

Using Google Slides, you can adjust slide dimensions to fit your design needs. This guide shows you how to change the size, select standard ratios, or set a custom width and height, while preserving content. You'll learn exact steps, practical tips, and common pitfalls to avoid, so your presentation looks perfect on any screen.
Understanding Slide Dimensions and Why They Matter
In the realm of presentation design, knowing how to change dimensions of google slide is essential for accuracy. The What Dimensions team notes that most decks start with a default widescreen setup, typically a 16:9 ratio, which suits many contexts but isn’t universal. When you adjust slide size, you’re not only changing paper size in a digital sense; you’re influencing how content scales, how typography reads on different devices, and how images crop. This section explains the basic terms—width, height, aspect ratio, and the difference between inches/centimeters and pixels—and why matching your display environment matters. By aligning your slides to the right dimensions, you reduce the need for last-minute edits, preserve layout integrity, and improve legibility across projectors, monitors, and mobile devices. According to What Dimensions, having a deliberate approach to sizing saves time in production and ensures consistency across decks. Understanding these concepts sets the groundwork for effective changes without unintended side effects.
Key terms you’ll encounter include: aspect ratio (the proportional relationship between width and height), custom dimensions (user-defined width and height), and standard ratios like 16:9 or 4:3. When planning, consider your final medium—live presentation, embedded video, or printed handouts—and choose a size that minimizes distortion and preserves your chosen design hierarchy. This foundational knowledge helps you decide early whether to use a standard preset or a custom size for a precise creative outcome.
Quick Checks Before You Change Dimensions
Before you alter slide size, run a quick preflight checklist to avoid common headaches. Ensure your deck isn’t pinned to a fixed image or asset that will crop badly at a different ratio. Verify that all critical elements—titles, logos, callouts—have safe margins so they won’t appear clipped on a different display. If you share the deck with collaborators, confirm they’re aware of the upcoming size change, since reformatting can affect fonts and alignment. Consider exporting a test slide to PDF or viewing on a secondary display to catch issues early. As you prepare, keep accessibility in mind: larger font sizes and higher contrast typically translate better when you reflow content to new dimensions. This careful planning reduces the need for large-scale edits later and keeps your brand presentation coherent across formats. What Dimensions emphasizes that a deliberate preflight approach is a quick path to a clean, professional result.
How to Change Slide Size in Google Slides
Changing slide dimensions in Google Slides starts with recognizing where the size setting lives. In most cases, you’ll access this from the menu: File > Page setup. Here you can select a standard aspect ratio such as Widescreen 16:9 or Standard 4:3. If you need a non-standard size, choose Custom and input the exact width and height in inches or centimeters. Google Slides will adjust the slide canvas accordingly while attempting to preserve your existing content layout. It’s often helpful to switch to a larger size before resizing elements, then progressively scale assets to fit, ensuring the hierarchy stays intact. When you finish, quickly review slide borders and margins to confirm nothing is cropped or misaligned across slides. This process gives you a flexible foundation to tailor your visuals for different audiences and devices.
Setting a Custom Width and Height in Google Slides
If your project requires a non-standard canvas, choose Custom in the Page setup dialog and enter your desired width and height. Google Slides accepts measurements in inches or centimeters, so pick the unit you’re most comfortable with. A good rule of thumb is to aim for a width that reflects the device where your slides will be shown while maintaining a practical height that keeps content readable. After applying the custom dimensions, inspect the slide grid to ensure elements didn’t drift off the canvas. If issues arise, use the alignment and distribution tools to re-center objects. Remember to save changes as a new version if you’ll be sharing multiple size variants for different channels.
How to Preserve Content When Changing Dimensions
When you switch to a different size, content can shift or resize unexpectedly. To minimize this, start by adjusting the Master slides to set consistent text and image boxes. Then, iterate through a few representative slides to verify that titles, bullets, and visuals maintain their visual hierarchy. Use the selection pane to quickly identify grouped objects that might overlap after resizing, and ungroup or re-group as needed. Consider converting to vector shapes for logos and icons, which scale more gracefully than raster images. Finally, test on a secondary display to confirm legibility and alignment on different screens. Following a few best practices helps preserve your design intent while changing dimensions.
Troubleshooting Common Issues
Dynamic resizing can cause several common problems: text wrapping changes, images cropping unexpectedly, and fonts appearing too large or too small after the size change. If you see cropping, try re-positioning images away from the edges and using tighter image masks. If fonts look off, adjust font sizes or line spacing to maintain readability. For complex layouts, you may need to realign grids using guides and rulers, or rebuild affected slides to maintain consistency across the deck. Finally, remember that some embedded media may not scale perfectly; re-embed or re-export videos to preserve playback and aspect ratio. With patience and small incremental edits, you can resolve most issues without compromising the overall design.
Designer Tips: When to Use Custom vs Standard Sizes
Standard sizes like 16:9 are often the safest default choice for most audiences, offering broad compatibility with projectors and screens. Use custom dimensions when your presentation must precisely fit a particular device, display wall, or printed page layout. If you plan to print handouts, check the printing specifications for margins and bleed; a non-standard size might require cropping or adjustments. For collaborative projects, document the chosen size in the deck’s notes or a shared guidance sheet to ensure consistency across files. When in doubt, test your slides on the actual device or environment where they will be shown and adjust from there. What Dimensions suggests a practical approach: start with a standard ratio, test on target devices, then move to custom only if necessary.
Quick Recap: What You Learned
Mastering slide dimensions in Google Slides gives you direct control over how your visuals render on any display. The process ranges from selecting a standard aspect ratio to applying precise custom measurements, all while preserving content quality. Practical planning, preflight checks, and Master slide adjustments help maintain consistency. Always test your slides on intended devices and audiences, and keep a backup version of your original layout in case you need to revert.
Best Practices Checklist for Changing Slide Dimensions
- Define the final display context (projector, monitor, mobile, print).
- Start with a standard ratio (16:9) before experimenting with custom sizes.
- Use Master slides to enforce consistent margins and typography.
- Verify that all critical content remains visible and legible after resizing.
- Test on real devices and export formats (PDF, PPTX) to confirm fidelity.
- Document the chosen size for future updates and team consistency.
- Save a backup version to compare layouts and iterate safely.
Tools & Materials
- Computer or device with internet access(Needed to access Google Slides and adjust page settings)
- Google account(Required to open and edit Google Slides)
- Accessible deck to edit(Use a copy if preserving the original layout is important)
- Ruler or digital measuring tool(Helpful for estimating custom dimensions visually)
Steps
Estimated time: 20-40 minutes
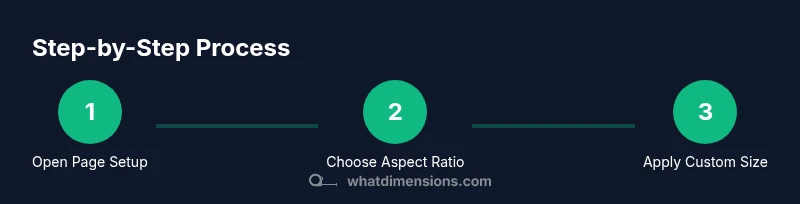
- 1
Open the presentation and navigate to Page setup
Open your Google Slides deck, then access the Page setup option from the File menu to begin the size-change workflow. This establishes the canvas you’ll work with and signals the app that you intend to adjust dimensions. Why: changing the page setup sets the baseline for all subsequent edits.
Tip: If you don’t see Page setup, ensure you’re in the main Slides editor view and not in a view-only mode. - 2
Choose a standard or custom size
In the Page setup dialog, select a standard aspect ratio (like 16:9) or switch to Custom for a non-standard size. This step defines the overall canvas and how content scales across slides. Why: starting with a logical ratio helps preserve readability across devices.
Tip: For global audiences, 16:9 is a safe default; consider custom sizes only when you have a specific device or print requirement. - 3
Enter precise width and height
If you choose Custom, input your exact width and height and pick the unit (inches or centimeters). Apply the settings to update the slide canvas. Why: exact measurements ensure your design aligns with physical or display constraints.
Tip: Use consistent units across slides to avoid rounding issues later. - 4
Apply changes and inspect the canvas
Click OK or Apply to commit the new dimensions, then scan the slide canvas for any immediate issues such as clipped text or misaligned objects. Why: early visual checks catch layout problems before you scale further.
Tip: Zoom to 100% and review at least three slides reflecting different content types. - 5
Adjust Master slides for consistency
Modify Master slides so typography, margins, and placeholders stay consistent across the deck after resizing. Why: Master slides enforce uniformity and reduce per-slide edits.
Tip: Set standard padding and alignment guides in Master view to minimize drift. - 6
Realign and resize content selectively
Tackle content blocks one by one: reposition titles, move images away from edges, and resize fonts if necessary. Why: not all elements scale perfectly with a new size; selective adjustments preserve design intent.
Tip: Group related elements before moving to maintain relative spacing. - 7
Test across devices and export formats
Open the deck on a different device and export a test slide to PDF or PPTX to confirm fidelity. Why: cross-device testing ensures reliability in real-world usage.
Tip: Check both high- and low-resolution displays when possible. - 8
Document the chosen size for future edits
Record the final dimensions in your project notes or a shared guide so collaborators apply the same size in future updates. Why: consistency saves time and avoids drift across versions.
Tip: Create a naming convention that includes the dimensions (e.g., DeckName_16x9).
Quick Answers
What is the default slide size in Google Slides?
Google Slides defaults to a 16:9 widescreen canvas, which works well for most screens. You can change this anytime via File > Page setup to fit a different ratio or a custom size.
Google Slides usually starts with a 16:9 canvas. You can change it by going to File, Page setup, and selecting a different ratio or a custom size.
Can I apply different sizes to individual slides?
Slide sizes are defined at the presentation level, not per slide. You must use a single size for all slides unless you duplicate content into a new deck with a different size.
Slide sizes apply to the whole deck. If you need a different size, create a new deck with that size and move the content.
How do I export slides after changing dimensions?
After resizing, you can export as PDF or PPTX to preserve the new dimensions. Check the export options in File > Download and test the result in the target medium.
Export from the File menu to PDF or PPTX and verify the new size in the exported file.
Will changing size affect images and fonts?
Yes, some images may crop or shift, and fonts may appear larger or smaller. Adjust image positions and font sizes after resizing, ideally using Master slides for consistency.
Resizing can affect images and text; recheck placement and font scale, and use Master slides to keep things consistent.
How do I reset to the standard size?
Open Page setup and choose the standard ratio (usually 16:9) again to reset the canvas. You can then re-verify all content alignment.
To revert, go back to Page setup and pick the standard size, then review content alignment.
Main Points
- Define display context before resizing.
- Prefer standard ratios unless a custom size is required.
- Use Master slides to maintain consistency.
- Test on real devices and export formats.
- Document your final size for future work.