How to Change Print Dimensions: A Step-by-Step Guide
Learn precise methods to adjust print dimensions across software and printers. This What Dimensions guide covers DPI, scaling, margins, and quality tips.

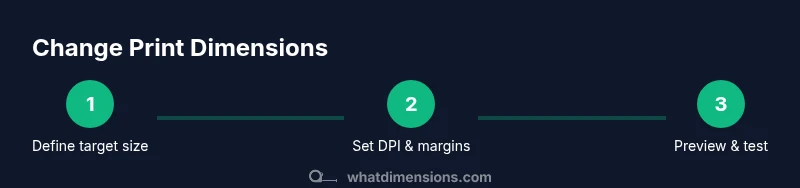
You can change print dimensions by adjusting the document’s scale in your software, choosing a custom page size, and tweaking margins. Start by confirming the exact width and height you need, then set an appropriate DPI and print quality. Preview your output, and run a test print on plain paper before the final run.
Why Print Dimensions Matter
Print dimensions determine how large your content appears on paper and affect legibility, alignment, and visual impact. When dimensions are off, text can become unreadable, images may be cropped, and colors can shift. According to What Dimensions, mastering the art of how to change dimensions when printing starts with a clear target: the media size, the viewing distance, and the printer’s capabilities. Define the exact width and height you want, then choose a method that preserves your aspect ratio to avoid distortion. In professional workflows, teams often begin with a high-resolution master and scale down for final print to maintain detail and minimize interpolation artifacts. This approach helps ensure that your final output looks intentional, not accidental, across different substrates and devices.
Understanding DPI, Resolution, and Calibration
DPI (dots per inch) is the primary driver of print clarity. A higher DPI means more detail, but it also requires more data and can print slower. PPI (pixels per inch) influences how an image from a screen maps to print. When you change dimensions, you must balance pixel data with the target print size to avoid pixelation or softness. Calibration ties your monitor, printer, and paper together so colors and brightness match the source. What Dimensions emphasizes that consistent calibration makes it possible to predict how a redesigned dimension will look when printed, reducing surprises in the final run. Keep a reference profile for the most common media you use and adjust as media or ink changes arise.
When to Scale, Crop, and Set Page Size
There are three primary approaches to changing print dimensions: scaling (resizing content uniformly), cropping (removing edge content to fit a new size), and changing the document’s page size while preserving original content. Scaling preserves aspect ratio to avoid distortion but may reduce detail if you shrink too much. Cropping ensures the exact target size but can cut important elements unless the composition is planned. Setting a new page size can maintain more of the original composition but may require reflowing text or repositioning images. Always consider the viewing distance and the intended display size when choosing which method to apply.
How to Change Dimensions in Common Software
Different tools call the same idea by different names: Page Size in desktop publishing, Image Size or Canvas Size in image editors, and Print Area in word processors. In a layout program, set the target width and height (in inches/mm) and lock the aspect ratio. In image editors, adjust the canvas or image size and ensure resolution remains appropriate for print (typically 300 DPI or higher for sharp results). If you’re working with text-heavy documents, reflow may be necessary after resizing to prevent awkward line breaks or margins. Always use the print preview to confirm how the final page will look before sending to the printer.
Printer Settings and Margins
Printer drivers add another layer of control. Ensure the paper size matches the document size exactly in the printer settings, and disable “fit to page” or any auto-scaling option unless you intend scaling at print time. Set margins to the target values, but remember printers have non-printable areas. Bleed settings are essential when printing to edge; include bleed if your design requires full-bleed printing. If your file contains color-managed elements, select an appropriate ICC profile to preserve color fidelity during printing. A small test print can catch misalignments between document and printer margins before running a full job.
Practical Workflows for Different Media
Poster-sized prints require more robust scaling and higher DPI to maintain legibility at distance; photos may benefit from color-managed profiles and a higher-quality media stock; documents might need careful typography reflow after resizing. For large-format projects, consider exporting a high-resolution master and performing a controlled downscale for final print. Always keep an unaltered master file in your archive so you can re-create altered dimensions without quality loss. Recording printer presets for each media type speeds future projects and reduces errors.
Troubleshooting and Quality Checks
If the print looks off, start with a preview check on screen and compare with a physical test page. Common issues include distortion from improper aspect ratio, color shifts due to missing ICC profiles, and unexpected cropping from margins. Verify that the document size matches the paper size exactly, confirm that the DPI matches the target media, and re-run a test print if needed. If results vary across printers, calibrate each device with a consistent color profile and media type. When in doubt, revert to the master file and re-apply dimension changes more gradually, then validate with another print test.
Quick-Start Checklist for Accurate Print Dimensions
- Define exact target width and height for your media.
- Verify document size and DPI before printing.
- Choose the right method (scale, crop, or page size) based on your content.
- Disable automatic scaling in printer settings unless you intend to scale.
- Include bleed and set margins to the safe zone.
- Preview at 100% scale and print a plain-paper test page.
- Save a preset for the project to ensure consistency next time.
Tools & Materials
- Printer with adjustable page size and DPI settings(Ensure the printer supports custom page sizes and high-quality print modes)
- Computer or device with the required software(Must access page setup and print preview features)
- Ruler or digital caliper(Helpful for confirming final print dimensions on test sheets)
- Quality printing paper appropriate for media(Consider bleed, color, and finish for best results)
- Ink or toner with adequate color fidelity(Ensure color management aligns with your ICC profile)
- Test print sheets (plain paper)(Used to verify size, margins, and alignment before final print)
- Color management profiles (ICC)(Useful for consistent color across devices)
Steps
Estimated time: 30-45 minutes
- 1
Define target output dimensions
Decide the exact width and height in inches or millimeters. Confirm the media size and aspect ratio to prevent distortion. This baseline determines all subsequent steps.
Tip: Use a ruler or design spec to lock dimensions before proceeding. - 2
Check document size and DPI
Open your file and inspect current pixel dimensions and DPI. For images, aim for 300 DPI at final print size; lower DPI can degrade sharpness especially after scaling.
Tip: If changing size substantially, consider creating a higher-resolution master. - 3
Choose the correct method
Decide whether to scale, crop, or adjust the document page size. Scaling is safest for maintaining composition; cropping preserves content but trims edges.
Tip: Always preserve aspect ratio unless composition demands otherwise. - 4
Set page size or scale in software
In the tool, input the target width/height or adjust the canvas/image size. Lock aspect ratio to avoid unintended stretching.
Tip: Verify units (inches vs millimeters) to prevent subtle errors. - 5
Adjust margins, bleed
Configure margins to avoid non-printable areas; add bleed if you need edge-to-edge printing. This ensures content isn’t clipped by the printer.
Tip: Bleed is typically 3 mm or 1/8 inch depending on media. - 6
Preview and run a test print
Use the print preview to check fit, margins, and color. Print a test page on plain stock to validate dimensions before final output.
Tip: Turn off fit-to-page unless you intend scaling at print time. - 7
Evaluate and finalize
Compare the test with your target. Make adjustments if necessary and print the final version. Save presets for consistency.
Tip: Keep a backup of the master file before altering dimensions.
Quick Answers
What does DPI stand for and why is it important when changing print dimensions?
DPI stands for dots per inch and measures print resolution. A higher DPI yields sharper detail but requires more data and may limit maximum print size. When resizing, maintain an appropriate DPI to avoid pixelation or blur.
DPI stands for dots per inch and affects print clarity. Keep it high enough to maintain detail when changing dimensions.
Can I change print size without altering the original image?
Yes. Resize output in software or printer settings, or crop content if necessary. Always save a new file so the original remains intact for future edits.
Yes, you can resize or crop, but save a new file so the original stays untouched.
What is bleed and when do I need it?
Bleed is extra image area beyond the final trim to account for minor misalignment. Include bleed when printing to the edge to prevent white margins.
Bleed provides extra image area beyond the trim to ensure full-bleed prints.
Why does my print look different from the screen?
Screens use light emission, prints rely on reflected light and color profiles. Calibrate devices and use ICC profiles to minimize color shifts between screen and print.
Because screens and printers handle color differently, use color profiles to align output.
Is it better to resize in software or printer settings?
Resizing in software gives you more control over composition; printer settings can be convenient for simple adjustments. Prefer software resize for accuracy and then print with no scaling in the printer.
Software gives you control; printers handle final scaling. For accuracy, resize in software and print without auto-scaling.
How can I verify print dimensions quickly?
Use print previews to check size and margins. Print a small test page and measure it with a ruler to confirm it matches your target dimensions.
Preview the print, then test on plain paper and measure to confirm sizes.
Watch Video
Main Points
- Define exact target dimensions before printing
- Verify document size and DPI prior to printing
- Preserve aspect ratio to avoid distortion
- Preview with proper margins and bleed
- Test print to catch errors early