Dimensions Not Showing in AutoCAD Print: Quick Troubleshooting
When dimensions fail to print in AutoCAD, use this urgent troubleshooting guide to identify common causes, apply quick fixes, and follow a step-by-step process to restore accurate dimensioning in plots and PDFs. Learn from What Dimensions and fix print-dimension issues fast.

Most often, dimensions fail to print because of a plot/viewport misconfiguration or annotative dimensions not enabled in the print setup. Quick fix: confirm layer visibility in the layout, verify the plot scale and printer configuration, and ensure dimensions have annotative property enabled and are within the active viewport. According to What Dimensions, these checks resolve the majority of print-dimension issues.
Common causes behind missing dimensions in AutoCAD prints
When dimensions refuse to appear on printed outputs, the root causes are usually not a single setting but a combination of plotting, layering, and annotative behaviors. First, confirm that the dimension layer is not turned off in the Layout tab or Plot Style table. If the drawing uses annotative dimensions, the actual display size can change depending on the annotation scale and the active viewport. A frequent oversight is assuming the on-screen view will automatically mirror the printed output; AutoCAD requires explicit configuration for print. According to What Dimensions analysis, the most reliable way to diagnose this is to review the layout, then test a minimal print to verify whether the issue is layer-based, scale-based, or annotative. After these checks, you’ll have a clearer path to the fix and can avoid repeating the same missteps in future projects.
Check layout, page setup, and plot styles before deep-dive
Plot configuration is the gatekeeper to accurate prints. Start with the active layout, choose Page Setup, and inspect the Plot Device and Paper Size. Ensure the correct plot style (Pen assignments) is selected and that the plot scale matches the intended drawing size. If you’re exporting to PDF, confirm that the PDF plot configuration captures all layers and annotations. A common mistake is to choose “Window” under Plot area but forget to select the viewport containing the dims. In this block, you’ll learn how to align all these settings so that dimensions render consistently across layouts and devices.
Verify layer visibility and dimension objects
Hidden layers are a sneaky culprit: you might see a dimension in model space but not in the layout or paper space. Open the Layer Properties Manager and verify that the layer containing the dimension objects is On, Thawed, and set to Plot. Also confirm the Dim and Text properties of each dimension object—some settings can suppress visibility when the drawing is printed. If dimensions reside on a non-plottable layer, they will vanish in the final output. This step is about guaranteeing the elements you expect to print are eligible to print.
Viewports and annotative scaling – a common pitfall
Viewports must be configured properly to display annotative dimensions in print. Check that the active viewport is indeed the one you intend to print from, and verify that the annotation scale for the dims matches the viewport’s scale. If the drawing uses multiple viewports, it’s easy to miss one with an incorrect scale. Annotative dimensions rely on correct tag alignment; a mismatch can cause dims to print too large, too small, or not at all. We’ll walk through aligning each viewport’s scale and ensuring dims are flagged as annotative where needed.
Dimension style, text height, and annotation settings
The dimension style controls how text and leaders render on paper. If the text height is set to a relative value or the style is not applied in the current layout, dimensions may fail to print properly. Check that your current dimension style is loaded in the layout and that the text height is appropriate for the paper size. Also review whether the “Annotative” checkbox is enabled for the dimension style; without it, changes in scale won’t reflect in print consistently. This block teaches you to align the style, text height, and annotation settings to ensure reliable prints.
Printer/Plotter drivers and software versions impact printing
Sometimes the issue isn’t in AutoCAD but in the printer driver or PDF engine. Confirm you’re using the latest driver compatible with your printer and CAD software version. If you frequently share files, test printing on a different device or driver to determine if the problem is local to a specific setup. What Dimensions Team notes that drivers can alter how dimensions are rasterized or vectorized in the final output, so driver updates and test prints are essential safeguards.
Minimal drawing test to isolate the issue
Create a tiny test drawing containing a single dimension and a simple layout. Print or plot this minimal file to a PDF and confirm whether the dim appears. If it does, the problem is specific to the original file’s complexity, layers, or viewports. If it does not, the issue is more deeply rooted in AutoCAD configuration, user permissions, or the print pipeline. This approach helps isolate whether the root cause is file-specific or system-wide.
Common version-related issues and service packs
AutoCAD updates can introduce changes to how dimensions are plotted or how annotation scales are interpreted. If you recently updated AutoCAD or the operating system, review the release notes for potential regression or compatibility issues related to plotting. Rolling back a recent patch or applying a hotfix from the vendor can sometimes restore expected printing behavior. In these scenarios, having a clean baseline drawing with a known-good setup helps you reproduce the problem and verify a fix quickly.
Quick-win steps you can apply now to avoid future issues
Maintain a standing checklist for print setups: confirm layout selection, verify viewport activity, check annotation scale, ensure layers are printable, and test with a simple draw. Establish a habit of saving a dedicated “print-check” copy of your drawing before major revisions. Consistent practice helps prevent dimensions from silently disappearing in future prints.
What Dimensions’ guidance means for practice
Real-world workflows require predictable prints. What Dimensions emphasizes replicable layout and dimension workflows, including standardized annotation scales and clear layer policies. By aligning print settings with dimension styles and ensuring driver compatibility, you minimize surprises. This actionable guidance helps homeowners, students, and designers achieve reliable outputs every time, enhancing both productivity and accuracy.
Steps
Estimated time: 15-25 minutes
- 1
Open the correct layout
Switch to the layout you intend to print (e.g., Layout1) and open Page Setup. Verify the paper size and plot area, then set the Plot to Window or Extend to ensure the area you expect is included. This first step avoids printing outside the intended region.
Tip: Create a dedicated “print-ready” layout for regular outputs. - 2
Check dimension layers and visibility
Open Layer Properties and confirm the layer containing your dimensions is On, Thawed, and set to Plot. If the dimensions sit on multiple layers, ensure all relevant layers are visible in the target layout.
Tip: Avoid mixing non-printable layers with print-ready layers. - 3
Inspect viewports and annotation scales
Make sure the active viewport is the one you want to print from and verify that the annotation scale on each viewport matches the intended print size. For annotative dims, ensure the Dim scale matches layout scale.
Tip: If needed, set a uniform annotation scale across viewports. - 4
Review dimension style and text height
Open Dimension Style Manager, confirm the correct style is applied to the drawing, and check that the Text height is appropriate for your paper size. Confirm the dimension text is not set to an off-screen height.
Tip: Choose a standard style for consistency across documents. - 5
Run a minimal test print
Create a copy of the drawing with a single dimension and a simple layout, then print to PDF or a local printer. If the test prints dims correctly, the issue is file-specific; if not, the problem is system-wide.
Tip: Always use a test file before adjusting the main project.
Diagnosis: Dimensions do not print in AutoCAD layouts or PDFs
Possible Causes
- highHidden or non-printable dimension layer
- highViewport misconfiguration or missing active viewport
- mediumAnnotative dimensions with mismatched scale
- mediumInaccurate page setup or plot style
- lowOutdated printer/plotter driver or PDF engine
Fixes
- easyEnable and verify the dimension layer is On, Thawed, and set to Plot in the Layer Manager
- easyEnsure the active viewport contains the dimensions and that the viewport scale matches printing needs
- easyCheck that dimension objects are annotative or have correct annotation scale for the target layout
- easyReview Page Setup: paper size, plot area, plot style, and plot device; re-run a test print
- easyUpdate printer/driver software or test with a different driver; retry printing to PDF
Quick Answers
Why are dimensions not printing in AutoCAD even though I can see them on screen?
On-screen visibility does not guarantee print visibility. The issue is usually due to layer visibility, viewport configuration, or annotative scaling not aligned with the print setup. System drivers or printer settings can also affect how dims are rendered in the final output.
Dims may not print because layers or viewports aren’t configured for printing, or because the annotation scale isn’t matched to the layout. Check layers, viewports, and the annotation scale first.
What is annotative scaling and how does it affect printing?
Annotative scaling allows dimensions to adjust size automatically based on viewport or paper size. If the scale isn’t set correctly, dims can appear in a wrong size or fail to print. Ensure each viewport uses a consistent annotation scale that matches your layout.
Annotative dims resize with the view; set a consistent annotation scale to fix printing issues.
Is it possible that a printer driver is causing missing dimensions?
Yes. Printer or PDF engine drivers can affect whether vector dimensions print or get rasterized. Update drivers or try a different printer/PDF engine to determine if the driver is the root cause.
Drivers can affect printing; updating or changing drivers might solve the problem.
How can I test whether the problem is file-specific or system-wide?
Create a minimal test drawing with one dimension and a simple layout. If the dimension prints, the issue is file-specific; otherwise, it’s system-wide and requires broader configuration checks.
A minimal test helps you tell if the issue is with the file or the system.
When should I escalate to support or IT?
If the issue persists after confirming layout, viewports, and drivers, or if you’re in a collaborative environment with file permissions, contact your CAD administrator or vendor support for deeper diagnostics.
If issues persist after checks, seek help from CAD support or your IT team.
Watch Video
Main Points
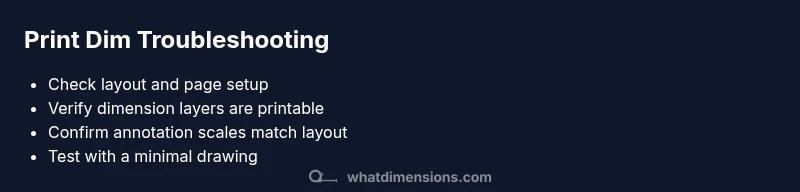
- Verify layout and plot settings first
- Ensure dimension layers are visible and printable
- Check viewport annotation scales for consistency
- Test with a simple drawing to isolate issues
- Keep a standard print workflow for reliability