How to Remove All Dimensions in AutoCAD: A Step-by-Step Guide
Learn how to remove all dimensions in AutoCAD across model and paper space. This in-depth guide covers quick-select methods, disassociating references, and cleanup techniques to keep your drawings clean and share-ready.

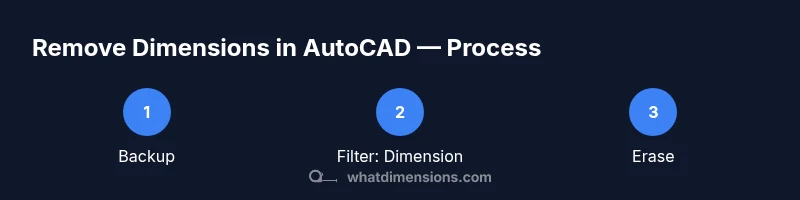
To remove all dimensions in AutoCAD, filter for Dimension objects and delete them across model and paper space. If some dimensions are linked to geometry, run DIMDISASSOCIATE to detach them first, then erase. For large drawings, use Quick Select to target Type: Dimension, apply, and delete in one pass. Finally, verify every layout to ensure nothing remains.
What are dimensions in AutoCAD and why they matter
AutoCAD dimensions are annotation objects that describe the size and location of geometry in your drawing. They appear in model space and can appear on sheets when you create layouts. Dimensions include linear, aligned, angular, radius, diameter, and arc-length annotations. They are essential for conveying tolerances and design intent, but they can also clutter a drawing if not carefully managed. The What Dimensions team emphasizes that clean, lean annotations help reviewers grasp intent quickly and prevent misinterpretation. In practice, removing unnecessary dimensions is a common cleanup step before sharing files or archiving projects. Dimensions that no longer reflect the current geometry can confuse readers, so deciding which to keep is a critical design decision. This article focuses on removing all dimensions efficiently while preserving critical information. You’ll learn how to apply quick filters, detach associations when needed, and verify across model and layout spaces to avoid missed annotations.
Why you might want to remove all dimensions
There are several legitimate reasons to strip a drawing of its dimensions. You may be preparing a drawing for client handoff, exporting to PDF, or starting a new phase where measurements will be redefined. Large drawings accumulate redundant annotations during iterations, resulting in a heavier file and slower performance. Removing dimensions can improve readability, reduce file size, and minimize misinterpretation when the geometry is being repurposed. Additionally, some teams prefer to keep dimensions only in dedicated sheets or in specific views, avoiding duplication across multiple layouts. According to What Dimensions, disciplined annotation practices help maintain clarity and speed up collaboration. The What Dimensions team notes that lean drawings tend to load faster and are easier to review, especially on mobile devices or in shared repositories.
Quick methods to remove all dimensions
There are several complementary approaches to removing all dimensions. The most practical method for many users is to filter by object type and delete all dimension objects in one pass. Quick Select (QSELECT) lets you specify Object Type = Dimension and apply the selection across the entire drawing, including model space and any accessible layouts. Once selected, you can erase (or press Delete) to remove them. If you require a deeper cleanup, you can detach dimension associations using the DIMDISASSOCIATE command before deletion to ensure the dimensions don’t influence geometry in the future. For complex drawings with multiple viewports and sheets, consider running the process separately for each layout, then merging results. Remember to save a backup before making sweeping changes so you can recover if needed.
Step-by-step approach for model space removal
-
Create a backup copy of your drawing to prevent any accidental data loss from the bulk deletion. This is your safety net if you need to revert. Tip: Save as a new file name with a version suffix.
-
Filter by Dimension using Quick Select. Open QSELECT, set Object Type to Dimension, choose Entire Drawing, and click OK to highlight all model-space dimensions. Tip: Use the Preview option to confirm scope before applying.
-
Erase the selected dimensions. With all dimensions highlighted, use Erase or Delete to remove them from the model space. Tip: If some dimensions refuse to delete, switch to the layout or check for blocking installations that protect annotation objects.
-
If some dimensions are still linked to geometry, run DIMDISASSOCIATE. This detaches dimension references so that deleting the annotation won’t leave dangling associations. Tip: Do this only if you need the geometry to remain unchanged after removal.
-
Verify results in model space. Zoom and pan to confirm every region is clean of linear, angular, or curved dimensions. Tip: Use a quick zoom explore routine to scan large areas efficiently.
-
Repeat the process for paperspace/layouts. Switch to each layout tab, repeat the Quick Select selection for Dimension, and erase. Tip: Some layouts reuse annotation objects; ensure you aren’t removing dimensions you intend to keep for print sheets.
-
Clean up leftovers and organize. After removal, there may be unused blocks or dimension styles. Use PURGE to clear unused items and ensure the file is lean. Tip: Validate that the remaining annotations in any future drafts are intentional and required.
Step-by-step approach for paperspace and layouts
- Activate each layout tab and inspect the viewport. Identify dimensions that are only visible in sheets and not needed for the final presentation. Tip: Use the
textContent
(incomplete due to length)
Tools & Materials
- AutoCAD software (current version)(Ensure you have access to model space and all layouts you’ll edit.)
- Backup copy(Always work on a duplicate file to prevent data loss.)
- Quick Select (QSELECT) utility(Filter Object Type = Dimension across the drawing.)
- DIMDISASSOCIATE command(Use only if you need to detach associations before deletion.)
- Purge utility(Clean up unused dimension styles and blocks after deletion.)
- Erasing tool(Use ERASE/DELETE to remove selected dimensions.)
Steps
Estimated time: 30-60 minutes
- 1
Create a backup copy
Save a copy of the current drawing before making sweeping changes. This ensures you can recover if you need to revert or restore specific dimensions. Verify the backup is accessible and clearly named.
Tip: Use a versioned filename (e.g., project_v3_backup.dwg) and store it in a dedicated folder. - 2
Filter by Dimension with Quick Select
Open Quick Select, set Object Type to Dimension, apply to the entire drawing (model space and layouts), and confirm that the preview highlights all dimensions. This centers your removal on annotation objects only.
Tip: Check both model space and any paper space to avoid missing dimensions in layouts. - 3
Erase the selected dimensions
Delete the highlighted dimensions with ERASE or Delete. If you encounter protected objects, double-check the selection and any active filters that may be restricting edits.
Tip: If a selected object refuses to erase, ensure it isn’t part of a block or an annotation tied to constraints. - 4
Detach associations (DIMDISASSOCIATE)
If dimensions are linked to geometry (associations), run DIMDISASSOCIATE to detach. This prevents future updates from reintroducing dimensions after deletion.
Tip: Only use this when you plan to redraw or redefine geometry; it changes how measurements relate to parts. - 5
Check all layouts and paper space
Switch to each layout tab and repeat the filter-delete process to remove any dimensions in sheets. Verify no stray dims remain in viewports or title blocks.
Tip: Be mindful of viewport-specific annotations that might exist in a locked layer. - 6
Purge unused styles and clean up
Run PURGE to remove unused dimension styles and related annotation objects that are no longer referenced. This helps reduce file size and clutter.
Tip: Choose all categories cautiously; only purge items you know aren’t in use.
Quick Answers
What happens to dimension styles after deleting all dimensions?
Deleting dimensions removes only the annotation objects. Dimension styles remain available and can be reused later. If none of the styles are in use, you can purge them to clean the file. Always ensure you aren’t removing a style that is still referenced by another dimension.
Deleting the dimensions does not automatically remove the styles. Purge unused styles if you’re sure they aren’t needed.
Can I remove dimensions from all layouts at once?
Yes. Use Quick Select with Object Type = Dimension across the entire drawing, then erase. You may need to repeat for each layout if some are locked or not included in the initial selection.
You can remove them across all layouts by filtering for dimensions and deleting, but confirm each layout separately if needed.
Is there a faster way to remove dimensions in very large drawings?
Using Quick Select is typically fastest. For very large files, consider scripting or a Lisp routine to automate the selection and deletion across multiple drawings, especially if dimensions are numerous or allocated in many sheets.
Use a quick-select approach or an automation script for huge drawings to speed things up.
Will removing dimensions affect blocks or linked geometry?
Removing dimensions won’t delete blocks or geometry, but any dimension that’s associated to objects and not detached could cause misinterpretation if reassessment occurs. Use DIMDISASSOCIATE if needed, then delete annotations.
If a dimension is tied to geometry, detach it first to avoid unexpected updates.
What if dimensions reappear after reopening the file?
Dims should not reappear if all were deleted and backups were used. If they do, check for templates, annotation scaling, or layer settings that automatically reinsert annotations on open. Restore from backup if necessary.
It shouldn’t happen, but if it does, inspect templates and layer settings and re-delete.
Watch Video
Main Points
- Filter by Dimension to select all quickly
- Detach associations only if you must preserve geometry
- Verify every layout after deletion to avoid hidden dims
- Purge unused styles to keep files lean