Dimensions Cross Stitch Stocking: A Designer’s Sizing Guide
A comprehensive guide to sizing and finishing dimensions cross stitch stocking designs, covering finished height and width, fabric counts, stitch counts, finishing options, and practical planning for display-ready stockings.

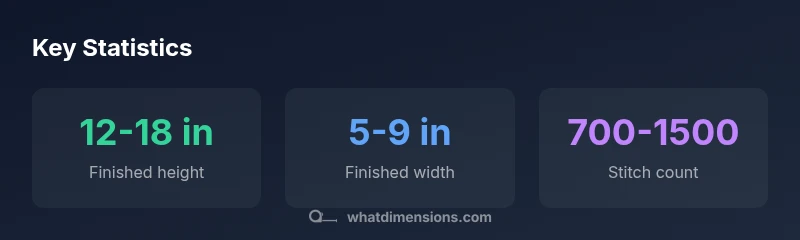
Dimensions for cross stitch stocking typically finish at 12–18 inches tall and 5–9 inches wide, depending on cuff style and fabric. For fabric counted stitches, plan roughly 700–1500 stitches for the main motif, with 14-count Aida delivering about 14 stitches per inch and finer counts offering more detail. This guide reflects industry standards and practical ranges.
Why precise dimensions matter for dimensions cross stitch stocking
In a project like a dimensions cross stitch stocking, precision in finished size matters for fit on a mantel, compatibility with standard display spaces, and overall visual balance. The What Dimensions team emphasizes starting with a clear size plan to minimize fabric waste and avoid rework. Accurate dimensions also help ensure your motif lines up with the cuff and any decorative trim, creating a polished final piece. Planning size upfront reduces surprises when you test-fit the finished stocking against your intended display area, and it helps you estimate thread usage and fabric requirements more reliably. By treating dimensions as the backbone of the project, you set yourself up for a smoother stitching process and a display-ready result that looks intentional and well-made.
How to plan your stocking size: height, width, and cuff style
Begin by measuring the display area where the stocking will live. Typical mantel spaces guide a finished height of 12–18 inches and a width of 5–9 inches. If you prefer a full cuff, subtract or add height based on cuff length. For symmetry, plan two stockings with equal width and account for seam allowances. Consider whether the stocking will be hung alone or paired with greenery or ornaments, and leave space for any edging or piping you intend to add. When you map these dimensions, you create a reliable framework for choosing fabric count and stitch density, ensuring that the final piece sits proportionally on your chosen display.
Fabric choices and stitch density
Your fabric count determines stitch density and the level of detail you can achieve. A 14-count Aida yields roughly 14 stitches per inch, while 18-count offers finer detail but increases finished size for the same stitch count. For a 12-inch tall stocking on 14-count fabric, you would need roughly 168 stitches high; adjust width accordingly for your motif. If you want museum-quality detail, moving to 18-count gives more defined edges at the cost of a larger pattern grid. Always translate your finished dimensions into stitch counts early so you can compare options without guessing.
Translating a design into stitches: grid planning and counting
Before stitching, map the design onto a grid. Use graph paper or a software pattern that shows each square as one stitch. Translate inches to stitches using your fabric count: stitches per inch × finished dimension. This helps you foresee the total stitch count and balance negative space. Create a quick mock-up on paper to confirm the proportion between motif area, borders, and the cuff. If your motif includes letters, test the letter height and spacing on the grid to maintain readability at final size.
Finishing considerations: seam allowances and mounting
Plan for seam allowances (commonly about 1/4 inch) when cutting fabric and mounting the stocking. Hooping and backing with lightweight interfacing can help maintain shape. If you plan to hang the piece, consider a fabric loop or a built-in hanger at the cuff. Finishing options include lining the stocking for extra structure, adding a decorative edge (piping, ribbon, or crochet trim), and choosing a backing fabric that complements the design. Proper finishing preserves the shape through handling and seasonal display.
A practical example project: sizing a simple motif stocking
Suppose you want a 16-inch tall stocking with a 6-inch cuff. On 14-count Aida, that translates to about 224 stitches tall (16 × 14) and 84 stitches wide (6 × 14) for the main motif. A simple border adds roughly 50–100 stitches depending on the pattern. This yields a total stitch count in the 300–500 range for a compact design. If you switch to 18-count fabric, the same finished dimensions would require more stitches per inch, increasing total counts but reducing the visible size of each motif. This example demonstrates how dimension planning directly informs stitch planning and fabric choice.
Tools and templates you’ll need
Gather measuring tape, graph paper or stitch-count grid, a pencil, scissors, an embroidery hoop, and some wash-away stabilizer. A ruler, marking pencil, and a simple grid guide help map dimensions for accuracy. Keep a small cutting mat to protect surfaces and a fabric pen to mark seam allowances. A basic finishing kit with coordinating thread, ribbon, and a quick-munpin or needle-threader makes assembly smoother. With these tools, you can translate finished dimensions into a precise stitching plan and a professionally mounted final piece.
Authority sources and further reading
For formal guidance on fabric counts and counting methods, see government/educational resources such as the University Extension pages and textile science publications. What Dimensions Analysis, 2026 provides sizing ranges and planning methods used in this article. See also: https://extension.illinois.edu, https://extension.umn.edu, and https://extension.oregonstate.edu for foundational cross-stitch and textile sizing guidance.
Quick-start sizing checklist
- Define the finished size you want based on your space (height and width).
- Select fabric count to match your desired detail.
- Map the motif onto a grid before starting.
- Add seam allowances into your plan.
- Do a dry-fit on your display area before final stitching.
Sizing guidelines for cross stitch stockings
| Aspect | Recommended range | Notes |
|---|---|---|
| Finished stocking height | 12-18 inches | Most common size; adjust for display space |
| Finished stocking width | 5-9 inches | Based on cuff style and leg space |
| Fabric count (stitch density) | 14-count to 18-count Aida | Higher counts give more detail but larger finished size |
| Estimated motif stitches | 700-1500 stitches | Depends on complexity and size |
| Needle size | 28-26 gauge | Standard cross stitch needles work |
Quick Answers
What is a typical finished stocking height?
A common finished height is 12–18 inches, with options for a shorter or taller look depending on display space and cuff design. Consider your mantel or shelf measurements before cutting.
Most stockings finish between 12 and 18 inches tall, with cuff choices affecting height.
What fabric counts are best for stockings?
14-count to 18-count Aida are typical; 14-count is faster with bolder stitches, while 18-count gives finer detail but increases finished size for the same stitch count.
14 to 18 count Aida is standard for stockings.
How many stitches will a simple motif stocking require?
A simple motif may range from 500 to 900 stitches, depending on the motif size and gaps around the design.
Simple motifs usually fall within 500–900 stitches.
Should I pre-size a pattern before cutting fabric?
Yes. Pre-sizing helps confirm proportions and ensures the motif will fit within the stocking dimensions while leaving room for seams and finishing.
Always pre-size to verify proportions.
How can I resize a design to fit a specific stocking height?
Scale both height and width proportionally using your fabric count as a guide. Recalculate stitches per row and columns to maintain the design’s aspect.
Resize by proportional scaling based on fabric count.
“Precise dimensions are the backbone of a well-proportioned cross stitch stocking. Start with a clear plan, and your finished piece will align with displays and gifts alike.”
Main Points
- Define the finished stocking size before stitching.
- Match fabric count to desired detail and effort.
- Include seam allowances in your plan.
- Layout the motif on a grid first.
- Dry-fit on display space to verify fit.