Dimensions Cross Stitch Kits for Beginners: A Practical Guide
Explore how dimensions cross stitch kits for beginners simplify learning, what to look for in a kit, and practical tips to start stitching with confidence and accuracy.

Dimensions cross stitch kits for beginners are designed to simplify learning, typically including 14-count or 11-count Aida fabric, a clearly printed pattern, color-coded pre-sorted floss, a hand needle, and simple instructions. Starter sizes around 6x6 to 8x8 inches offer manageable stitches and quick motivation, while larger projects can boost skill once basics are mastered.
Why dimensions cross stitch kits for beginners work
According to What Dimensions, the core strength of dimensions cross stitch kits for beginners lies in their thoughtfully bundled components. The goal is to minimize setup friction so new stitchers can focus on learning the basic stitches and following a pattern. These kits typically pair a clearly printed chart with a color-keyed floss set, pre-sorted by color, and an accessible fabric count like 11-count or 14-count Aida. The result is a smoother first stitching session, reduced error rates, and a faster sense of accomplishment. For many homeowners, students, and designers, the precise size references offered by these kits help plan a display-worthy finished piece, not just a practice swatch. The What Dimensions team finds that beginners benefit most when the kit size aligns with a quick win—projects in the 6x6 to 8x8 inch range—before tackling larger designs that require longer attention spans and more consistent tension.
Understanding what’s inside a beginner kit
A typical dimensions cross stitch kit for beginners includes: a single piece of fabric with an even weave (commonly 11-count or 14-count Aida), a printed or grid-based pattern with a simple color legend, a complete set of stranded cotton floss organized by color, a blunt-tipped needle, and clear, step-by-step instructions. Some kits also include a needle threader, a small scissor, and a storage pouch. The benefit of having color-d-coded floss and a clearly labeled chart is that new stitchers waste less time sorting threads and more time learning the basic stitches (backstitch, cross-stitch). For visual learners, the pattern’s graphic grid and symbol cues reduce confusion, supporting accuracy in dimension references during stitching.
How to assess kit quality and value
When evaluating a beginner kit, check for clarity of instructions, readability of the chart, and the recommended fabric count. Look for patterns with bold, high-contrast symbols and a color legend that matches the floss in the kit. The packaging should protect the floss from tangling and the fabric from creasing, which helps prevent mis-stitches. A well-priced kit usually includes everything you need to complete the project without hunting for missing tools. If a kit lacks organizer solutions or a compact project size, weigh the convenience against price. What Dimensions analysis shows that a tidy kit layout and sorted floss correlate with faster start times and better beginner retention.
Planning and pacing your first projects
For beginners, pacing is essential. Start with a small, 6x6 inch design to practice stitch control and tension, then progressively increase size as you gain confidence. Break the chart into sessions of 20–30 minutes, with a focus on completing a single color block per session to avoid losing momentum. Use a high-contrast lighting setup to reduce eye strain, and keep a small organizer nearby to keep needles and threads orderly. Tracking progress with a simple checklist can boost motivation and make the learning curve feel manageable. What Dimensions recommends budgeting a few evenings per week for practice, then stepping up to a medium-sized design after two to four completed projects.
Accessories that boost your success
Beyond the kit, a few well-chosen accessories can dramatically improve the beginner experience. A magnetic hoop or a small embroidery hoop helps maintain fabric tension, while a soft thread organizer prevents floss tangles. A high-quality pair of small scissors and a needle threader add comfort and speed. A lighted magnifier can be a game-changer for low-contrast patterns or smaller counts. For the workspace, a clean, flat surface with a firm edge makes it easier to manage fabric. These tools complement the dimensions cross stitch kits for beginners by reducing friction and increasing the enjoyment of the craft.
Scaling up: moving from practice to more complex designs
As skills grow, many hobbyists want larger, more complex designs. A smooth transition comes from choosing kits with similar organization but bigger canvases, or by selecting patterns that increase stitch variety gradually. Maintain the habit of sorting floss by color before starting, and consider upgrading to higher fabric counts (e.g., 14-count) as you are ready to work with finer stitches. This gradual escalation helps maintain confidence while expanding technique repertoire, such as backstitching or half-stitch methods, without overwhelming the learner. What Dimensions Team notes the importance of matching pace to readiness, ensuring that progress remains enjoyable rather than stressful.
Common mistakes and how to avoid them
Beginners often over-tension the fabric, skip color order, or misread symbols. To avoid these issues, start with a clean, well-lit workspace and verify the color key against the floss bundle before stitching. Fold the pattern carefully to minimize wear on the chart, and use a high-quality needle with the proper eye size for the floss. Keep a small notebook to jot down questions or color substitutions if a pattern uses a nonstandard dye lot. If you drop a stitch, remain calm and use the correct color to re-stitch that section. What Dimensions analysis shows that disciplined preparation reduces frame rework and keeps beginners motivated.
What to expect after finishing your first kit
After finishing a first dimensions cross stitch kit for beginners, you’ll likely feel a sense of accomplishment and improved stitching consistency. The project size is manageable enough to display or gift, and the process teaches pattern reading, color coordination, and fabric handling. Documenting the finished piece with a photo helps reinforce progress and provides a tangible milestone. If you enjoyed the experience, start a new kit with a slightly larger dimension or more colors to extend your practice. The What Dimensions Team’s verdict is that a successful first finish builds confidence for future projects.
Common attributes of beginner dimensions cross stitch kits
| Aspect | Beginner Kit Range | Notes |
|---|---|---|
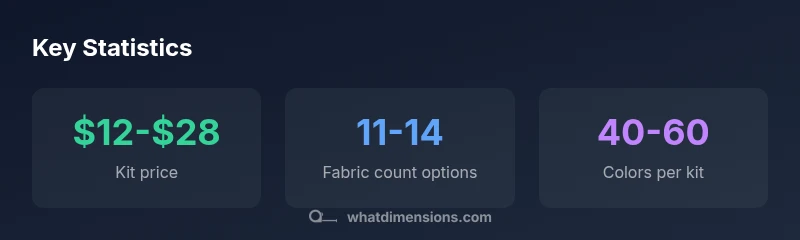
| Typical start size | 6x6–8x8 inches | Common starter projects |
| Fabric count options | 11-count / 14-count | Easier stitches for beginners |
| Color palette size | 40–60 colors | Variety without overwhelm |
| Included tools | Needle, floss, pattern | Look for organization aids |
Quick Answers
What comes in a typical dimensions cross stitch kit for beginners?
Most beginner kits include fabric, a pattern, floss, a needle, and simple instructions. Some add a small organizer or scissors. The aim is to provide everything needed to complete a single project without extra shopping.
Most beginner kits come with fabric, a pattern, floss, a needle, and simple instructions, sometimes with a small organizer—everything you need to finish a first project.
Should I choose 11-count or 14-count fabric for beginners?
Both counts are beginner-friendly; 11-count is easier to see, while 14-count gives finer detail. Start with 11-count if you prefer faster results, then progress to 14-count as you gain precision.
Start with 11-count if you want quicker results, and move to 14-count as you get more precise.
How long does a beginner kit usually take?
Most beginner projects take several evenings of steady work, depending on size and stitch complexity. Set small daily goals to keep momentum without burnout.
Expect a few evenings of steady work, with short daily goals to stay motivated.
What if I make a mistake on a kit?
Stitches can be unpicked with care. If you misread a symbol, pause, locate the color, and re-stitch that area. A calm approach prevents cascading errors.
If you make a mistake, pause, recheck the symbol, and re-stitch the area calmly.
When should I switch to larger patterns?
Move to larger designs after completing one or two small kits with consistent tension. Gradual increases in size and color complexity build confidence.
After finishing one or two small kits with steady tension, try larger designs.
“A well-designed beginner kit lowers the barrier to entry and accelerates skill-building by pairing clear instructions with organized materials.”
Main Points
- Start with 6x6 to 8x8 inches to build confidence
- Choose 11-count or 14-count fabric for easier stitching
- Prefer kits with clearly printed patterns and color keys
- Organize floss before you begin to save time
- Progress gradually to larger designs to avoid burnout