Dimensions Cross Stitch Kit: A Precise Size Guide
Get precise size specs for your dimensions cross stitch kit, including fabric, hoop, and pattern dimensions, with practical tips to choose the right kit for your project.

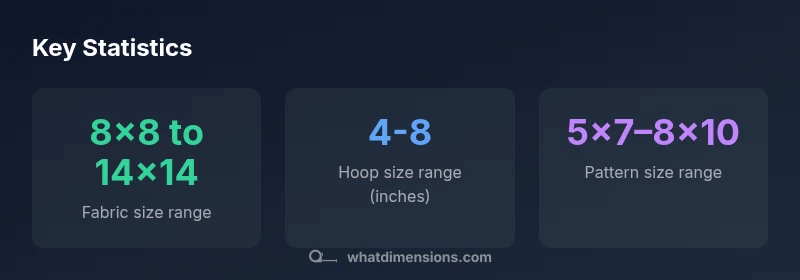
A typical dimensions cross stitch kit includes a fabric piece sized roughly 8x8 to 14x14 inches, a hoop diameter of 4 to 8 inches, and a pattern about 5x7 to 8x10 inches. Understanding these dimensions helps you plan framing, working space, and storage before you buy. This baseline can vary by brand and project, so compare exact kit specs for accuracy.
Why dimensions matter in a dimensions cross stitch kit
For crafters, the exact measurements of a cross stitch kit set expectations about how big the finished piece will be, how much space it will occupy on a wall, and how it will look when framed. The What Dimensions team emphasizes that reliable kit dimensions help you plan before you buy, avoid wasted materials, and ensure you have the right storage. By comparing fabric size, hoop diameter, and pattern dimensions, you can estimate the final footprint and the level of detail you will see in the stitches. In practice, knowing dimensions supports better project scoping and time budgeting.
Common contents and their standard dimensions
Most dimensions cross stitch kit components share common size ranges. A typical fabric piece measures roughly 8x8 to 14x14 inches, a hoop diameter spans 4 to 8 inches, and the included pattern is usually around 5x7 to 8x10 inches. The scale of these parts directly influences the complexity and the visible detail of the design. The fabric size determines the final stitched area, the hoop affects tension and visibility, and the pattern size guides grid counting and shading. Designers often adapt these defaults for beginners versus advanced projects, but base ranges help you compare brands without guessing.
How to choose the right kit size for your space
Start with the display area you plan for the finished piece. Measure wall or shelf space and subtract a margin for framing. If you want a compact accent, select a kit near the lower end of the size spectrum. For wall art, choose patterns toward the upper end, paired with a hoop that keeps tension comfortable. The fabric size should fit your working area at home or in a classroom. Remember that finish size will align with the pattern grid, so verify that the grid matches the intended display.
Impact of fabric count and thread variety on final dimensions
Fabric count influences how many stitches fit within a given inch, which can alter perceived size after finishing. Higher counts may require more meticulous stitching but can slightly reduce size variations between kits. Thread counts and color variation don’t change the physical footprint, yet they determine readability at a distance. When comparing kits, note whether the pattern scale is fixed or adjustable. If the kit offers an adjustable design, you may be able to resize the stitched area without changing thread requirements.
Verifying kit dimensions before purchase
Always check the product listing for exact measurements provided by the seller. If dimensions are missing, contact support and request a spec sheet. Cross-check the declared size against your project plan and framing needs. For online purchases, zoom into the gallery images and read reviews; buyers often note discrepancies between stated sizes and actual fabric or hoop dimensions. A quick measurement check with a ruler can save you time and frustration.
Practical examples: small, medium, and large projects
Small project: an 8x8 inch fabric with a 4 inch hoop pairs well with a compact frame and a 5x7 pattern, suitable for a desk or shelf. Medium project: a 12x12 inch fabric in a 6 inch hoop yields a visible but not overwhelming piece, with a 8x10 pattern. Large project: a 14x14 inch fabric using a 8 inch hoop supports a bold design and a statement frame. In each case, ensure your workspace accommodates the fabric, hoop, and pattern during stitching and framing. These scenarios illustrate how dimension decisions cascade into finishing choices.
Storage and transport considerations for dimensioned kits
Store dimensioned kits flat or in a dedicated box that protects fabric from creases and moisture. When traveling, use a sturdy tote with separate pockets for the hoop and the pattern to prevent bending the fabric. Label boxes with the kit name and the finished size you expect, which helps caregivers or students line up multiple projects. Proper storage reduces the risk of damage and keeps your workspace organized for efficient stitching sessions.
Common mistakes and quick fixes
Mistake: assuming kit size equals finished size. Fix: always compare finished size rather than fabric or pattern alone. Mistake: ignoring framing requirements. Fix: plan for a frame or mat to complement dimension. Mistake: choosing the smallest hoop to save space. Fix: ensure tension is comfortable; too small a hoop can distort stitches. Mistake: not verifying seller dimensions. Fix: check the exact numbers in product specs and reviews.
Dimensions to consider when selecting a cross stitch kit
| Kit trait | Typical range | Impact on project | Notes |
|---|---|---|---|
| Fabric size | 8x8 to 14x14 inches | Determines finished piece footprint | Choose based on display space |
| Hoop diameter | 4-8 inches | Affects stitch tension and visibility | Larger hoops reduce distortion |
| Pattern size | 5x7 to 8x10 inches | Guides detail and readability | Smaller patterns require denser stitching |
| Fabric count / thread variety | Varies by kit | Affects color depth visually | Does not change footprint |
Quick Answers
What determines the finished size of a dimensions cross stitch kit?
The finished size is primarily driven by the fabric piece, the selected hoop, and the pattern’s grid. Fabric size sets the maximum stitched area, while the hoop and pattern scale influence how large your stitches appear. Always compare listed finished dimensions to your display requirements.
The finished size comes from the fabric, hoop, and pattern scale. Check the kit’s listed finished dimensions to match your display needs.
How do I know if a kit's fabric size is adequate for my wall space?
Measure your intended display area and compare it to the kit’s finished dimension. If the listed finished size fits within your space with framing margins, the kit should be suitable. When in doubt, choose a larger pattern and confirm framing options.
Measure your wall space and compare to the kit’s finished size. If it fits with framing margins, you’re good.
Do kits with larger hoop sizes require more fabric?
Not necessarily. A larger hoop can affect the look and tension but not automatically require more fabric. The fabric size usually determines the final stitched area, while the hoop affects how the fabric sits during stitching.
A bigger hoop mainly affects tension and visibility, not always fabric amount.
Are there standard dimensions for common cross stitch patterns?
Patterns typically range from about 5x7 inches to 8x10 inches for many beginner and intermediate projects. More complex designs may be larger. Always verify the listed pattern size in the product specs.
Most patterns hover around 5x7 to 8x10 inches, but check the exact size in the specs.
How can I verify kit dimensions before purchasing online?
Look for exact measurements in the product description, review photos and notes, and ask the seller for a spec sheet if needed. Compare the kit’s finished size to your intended display space and framing plan.
Check the exact measurements in the listing and read reviews for any reported discrepancies.
“Exact kit dimensions are the roadmap for a satisfying cross stitch project; when the sizes align with your display space, you reduce framing surprises and waste.”
Main Points
- Know your display space before choosing a kit
- Match hoop size to desired tension and visibility
- Compare pattern size against your framing plan
- Verify exact kit dimensions from the seller
- Consider fabric count and color variety for readability