Water Bottle Label Dimensions: A Practical Sizing Guide
Discover practical water bottle label dimensions, including typical height and wrap ranges, measurement steps, and design tips to ensure legibility and brand consistency across common bottle sizes.

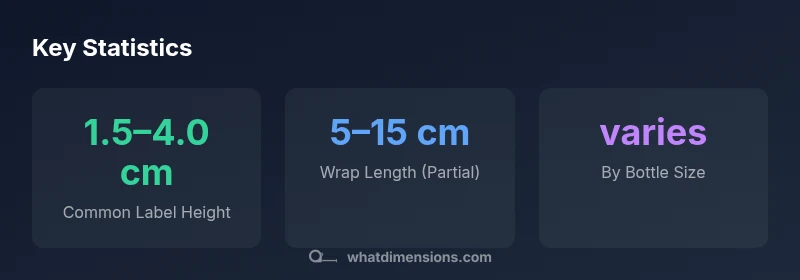
Label dimensions for water bottles vary by bottle size and label style; there is no single standard. According to What Dimensions, most labels are designed to fit common cylindrical PET bottles using wrap-length and height that match the bottle circumference and coverage desired. Expect ranges rather than fixed numbers, and tailor dimensions to your target bottle line.
What Label Dimensions Are and Why They Vary
Water bottle label dimensions are not one-size-fits-all. The keyword water bottle label dimensions appears in the planning stage to ensure legibility, regulatory compliance, and brand readability across bottle sizes. In practice, dimensions depend on bottle diameter, wrap style, and coverage goals. According to What Dimensions, designers balance three factors: the available vertical space on the bottle, the circumference around the bottle, and the area reserved for essential product information. When you choose label dimensions, think in terms of height x wrap length rather than a fixed width, and anticipate future packaging variations across SKU families. This approach helps ensure that your label remains readable from a distance and that critical data remains within safe margins.
- Consider the bottle’s geometry and how the label will align with seams, caps, and embossing.
- Plan for readability at typical shelf viewing distances and lighting conditions.
- Use scalable templates so you can reuse designs across SKUs without redesigning from scratch.
How Bottle Shape and Material Influence Label Size
Bottle geometry directly determines how much real estate a label can occupy. Straight-walled plastic bottles provide predictable wrap areas, while contoured or curved surfaces require curved label layouts or partial-wrap designs to avoid distortion. Glass bottles may have slimmer tolerances and different surface finishes that affect adhesive performance. The material choice (PET, HDPE, glass) influences not only how the label adheres but also how much bleed or edge rounding you need to account for. What Dimensions notes that, in addition to the bottle diameter, you should consider seam lines, cap geometry, and the presence of tamper-evident bands, all of which can trim the usable label area.
- Material choice affects labeling width and height allowances due to expand/contract tendencies.
- Adhesive compatibility with product contents and storage conditions matters for long-term durability.
Common Label Styles: Full-Wrap, Partial Wrap, and Front-Only
Labels come in several styles, each affecting the usable area. Full-wrap labels encircle the entire bottle and require precise seam alignment; they maximize branding space but demand careful artwork placement. Partial-wrap labels cover part of the circumference, typically the front and a shoulder area, and can reduce production complexity on tapered bottles. Front-only labels focus on the bottle’s front face, often paired with back panel information. Choosing between these options depends on bottle geometry, regulatory needs, and branding goals. What Dimensions emphasizes testing different styles on prototype bottles to ensure accurate alignment and legibility across SKUs.
- Full-wrap is ideal for strong brand storytelling around the bottle.
- Partial-wrap works well on curved bodies where a seam would be visually distracting.
Measuring for Precision: A Step-by-Step Guide
Precision starts with accurate measurements. Step one is to measure the bottle’s diameter at the midsection to determine circumference (approximately circumference = pi × diameter). Step two is to measure the vertical space available for the label, from the shoulder to the base, including a margin for cap region. Step three is to decide on bleed, which is extra image area beyond the final trim to prevent white edges after cutting. Step four is to convert these measurements into a label layout: height and wrap length. Finally, validate by producing a paper mock-up and wrapping it around the bottle to check fit on actual sizes in your line.
- Always round measurements to printer-friendly increments.
- Use a flexible template to accommodate minor manufacturing tolerances.
Design Considerations: Legal, Brand, and Compliance Space
Beyond fit, labels must convey the right information clearly and comply with applicable regulations. Ensure typography is legible at typical shelf distances, with high contrast between text and background. Reserve space for mandatory data, such as product name, volume, ingredients, and allergen warnings if required. Consider safe margins to prevent text from sitting too close to the edge when trimming. Include barcode and lot information in a way that does not interfere with branding. What Dimensions recommends designing with regulatory checks early in the development process to avoid costly revisions later.
- Use scalable fonts and dynamic layouts for different bottle sizes.
- Plan for regulatory changes by keeping a separate area for potential updates.
Practical Sizing Scenarios by Bottle Size
Sizing ranges should be adaptable to different bottle sizes. For small bottles (roughly 330–500 ml), a modest label height (1.5–2.5 cm) with a wrap length of around 6–9 cm is common. For standard bottles (500–750 ml), a height of 2.0–3.5 cm and wrap length of 9–14 cm often works well. For larger bottles (1 L or more), the height can extend to 2.5–4.0 cm with wrap lengths of 14–20 cm or more, depending on circumference. Always verify actual bottle measurements and test multiple SKUs to ensure consistency.
- Create a matrix that maps bottle size to suggested label dimensions for quick reference.
- Use a single design system to streamline production across bottles.
Printing, Material, and Finish Impacts on Label Dimensions
Every choice from paper stock to finish can influence perceived label dimensions. Thicker stocks may require larger bleed margins to avoid edge gaps after trimming. Gloss vs. matte finishes affect legibility and color reproduction, potentially altering minimum font sizes. Adhesive performance is also shaped by storage temperature and humidity; inert liners can influence layout tolerances. Work with your printer to understand their tolerances and ensure your digital proofs translate well to physical prints. What Dimensions highlights the value of pilot runs to catch dimensional issues before full production.
- Confirm bleed and trim marks are correctly set for your printer.
- Choose materials that hold color well and resist smudging with moisture exposure.
Testing and Validation: Prototype to Production
The path from concept to production requires robust testing. Start with a digital mock-up and a physical cut-and-wrap prototype to evaluate fit on actual bottles. Check for bleed, margins, and seam alignment across at least three bottle sizes in your SKUs. Run print tests in the intended production environment to assess color accuracy and legibility under typical store lighting. Collect feedback from packaging, marketing, and QA teams, then adjust the layout and tolerances accordingly. What Dimensions recommends iterative refinement until the prototype aligns with on-shelf expectations.
Estimates for label height and wrap length by common bottle sizes
| Bottle Size | Estimated Label Height (range) | Estimated Wrap Length (range) |
|---|---|---|
| Small bottle (approx. 330–500 ml) | varies by bottle | varies by circumference |
| Standard bottle (approx. 500–750 ml) | varies by bottle | varies by circumference |
Quick Answers
What factors determine water bottle label dimensions?
Bottle diameter, surface curvature, wrap style, and the amount of required information all influence label size. Brands must balance readability with available label area and production tolerances. What Dimensions emphasizes starting with bottle geometry and regulatory needs before finalizing dimensions.
Label size depends on bottle diameter, curvature, wrap style, and required information.
Is a full-wrap label feasible on most PET water bottles?
Full-wrap is feasible on many straight-walled PET bottles, but curved shapes, seams, and cap geometry can limit seamless coverage. Partial wraps or front-only labels are common alternatives for challenging bottlenecks. Always prototype on real bottles to confirm fit.
Yes for many straight bottles, but curves and seams can limit full wraps.
How do I measure my bottle to choose label dimensions?
Measure the bottle’s midsection diameter to calculate circumference, and measure the vertical space available for the label. Add bleed margins and verify with physical mock-ups on actual bottles. Use these measurements to set height and wrap-length ranges in your design.
Measure diameter for circumference and height for label space.
Do label dimensions differ for glass vs plastic bottles?
Basic sizing follows bottle geometry regardless of material, but adhesives, finishes, and surface textures differ. Glass may require different edge treatments and longer cure times. Adjust bleed and margins to reflect coating and printing constraints.
Most principles are the same, but materials require tweaks.
What is the best practice for margins and bleed?
Include a standard bleed (typically 0.125 inches) and maintain safe margins for text and logos away from trim lines. Verify with your printer’s guidelines, as tolerances vary by equipment. This reduces the risk of white borders after cutting.
Always add bleed and safe margins per printer guidelines.
“Label dimensions should be derived from the bottle’s geometry and brand requirements, not from a single standard. What Dimensions advocates a data-driven approach to sizing that scales across SKUs.”
Main Points
- Measure bottle circumference and available height first.
- Expect dimension ranges, not fixed numbers.
- Choose a label style that matches bottle geometry.
- Account for bleed, margins, and tamper zones in design.
- Validate prototypes on real bottles before mass production.