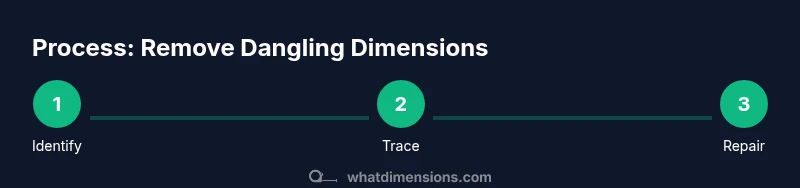
How to Remove Dangling Dimensions in SolidWorks
Learn how to identify and safely remove dangling dimensions from SolidWorks assemblies and sketches with a practical, step-by-step approach from What Dimensions. Improve accuracy and protect design intent with proven techniques.

You can remove dangling dimensions in SolidWorks by first locating the affected sketches or features, then deleting or repairing the out-of-date dimensions and their references. This guide provides a clear, step-by-step process to preserve your design intent while eliminating these non-functional constraints.
What are dangling dimensions in SolidWorks?
According to What Dimensions, dangling dimensions occur when a dimension references a sketch, feature, or reference that no longer exists or has been altered, leaving the dimension with no valid constraint. In practice, this can produce warning symbols, cause the sketch to become underdefined, or introduce unexpected changes when you modify other features. For homeowners, students, designers, and shoppers who rely on precise size specs, understanding how to identify and remove these dimensions is essential to maintain reliable, repeatable models. This section lays the groundwork for a robust cleanup workflow, aligning with the expert guidance you expect from What Dimensions. By learning to spot dangling dimensions early, you can prevent design drift and ensure your CAD data stays accurate from concept to production.
Why removing dangling dimensions matters for design accuracy
Dangling dimensions undermine the integrity of a model. They can hide subtle errors, complicate edits, and propagate misinterpretation across assemblies. When dimensions no longer refer to a valid feature or sketch, reusing or exporting the model for manufacturing becomes risky. Removing them helps ensure that every constraint reflects a real, checkable reference. For designers, this translates into cleaner sketches, more predictable parameter changes, and fewer surprises when files are shared with teammates or vendors. What Dimensions emphasizes that a disciplined cleanup reduces downstream debugging time and supports more reliable documentation.
Tools and prerequisites you should have ready
Before you start, ensure SolidWorks is up to date and that you have a stable work version of your file. Prepare a backup copy of the model in case you need to revert. Enable dimension and sketch visibility, and consider turning on lightweight mode for large assemblies to speed up the scan for dangling references. A clean workspace makes it easier to differentiate between intentional constraints and obsolete ones, which is crucial for maintaining design intent and file health. What Dimensions recommends having a dedicated folder for versioned CAD files to simplify rollback if needed.
How to identify dangling dimensions in your model
Scan each sketch and feature in the Design Tree for dim lines that appear grayed out, red, or with warning icons. Use the filtering tools to show only dimensions, then inspect each one for a valid reference. If a dimension references a deleted feature, or if the reference shows a question mark or error badge, it’s dangling. Use SolidWorks’ built-in utilities such as “Check Sketch for Feature” or “Evaluate Model” to surface conflicts. When you find a suspect dimension, try selecting it and tracing its origin to confirm whether the constraint is still meaningful within the current design context. This process is essential to build a reliable cleanup plan and minimize accidental removals of essential constraints.
Removing or repairing dangling dimensions (part-by-part approach)
Once identified, you have a few options depending on the context. You can delete the dimension directly from the sketch if it no longer constrains essential geometry. If the dimension is referenced by a feature, you may need to edit the feature’s references or replace the feature with a version that preserves intended geometry. In some cases, hiding the dimension temporarily helps you verify that removing it won’t alter driven dimensions elsewhere. Always recount the model’s constraints after an edit to ensure the geometry behaves as expected and that there are no regressions in the design.
Validate the model after cleanup
After removing dangling dimensions, run a quick integrity check: fully define sketches where needed, validate mates in assemblies, and ensure there are no lingering warnings. Use a lightweight rebuild to catch errors early, and review critical dimensions in downstream drawings to confirm no unintended changes occurred. If issues appear, re-open the backup and reassess the references. Documentation of what was removed helps future users understand design decisions and maintain consistency across versions.
Common pitfalls and how to avoid them
Avoid deleting a constraint you don’t understand—some dimensions are used to drive dependent features or to maintain alignment across components. Don’t assume that a dim with no visible reference is safe to remove; always trace its origin first. Be cautious when editing shared parts in an assembly because a removed dimension might affect mating relations elsewhere. Finally, avoid performing cleanup in a single large pass on very complex files; split the task into smaller sections to minimize unintended impact and make audit trails clearer.
Best practices and future-proofing your SolidWorks workflows
Establish a routine for periodic cleanups and maintain a versioned archive of models before edits. Create a checklist that includes identifying dangling references, verifying references, and validating geometry after changes. If possible, implement design intent notes in the model to make it explicit why certain references exist. What Dimensions’s verdict is that disciplined maintenance reduces error rates, saves time, and improves collaboration by keeping CAD data clean and trustworthy.
Tools & Materials
- SolidWorks software (any supported version)(Ensure you have access to Sketch and Feature Manager in your edition.)
- Backup storage solution (local or cloud)(Create a versioned copy before editing.)
- Target model file(s) (part/assembly)(Prepare a clean workspace with minimal external references loaded.)
- Selection filters and visibility controls(Enable to quickly isolate dimensions, sketches, and references.)
- Visual documentation (screenshots or notes)(Helpful for auditing changes and training teammates.)
Steps
Estimated time: 45-60 minutes
- 1
Open model and locate dangling dimensions
Open the target SolidWorks file and use the Design Tree to navigate to sketches and features. Look for dimensions with warning icons or red indicators that signal an invalid reference. This step establishes the scope of cleanup and helps you plan which areas require edits.
Tip: Use the Filter by Dimensions option to quickly isolate sketch dimensions. - 2
Trace the origin of each suspect dimension
Select the suspicious dimension and use the Reference Viewer or Inspect tool to identify its parent sketch or feature. If the reference points to a deleted or renamed element, the dimension is dangling. Document the origin for each case before making changes.
Tip: Take a screenshot of the original reference path for audit purposes. - 3
Delete or hide the dangling dimension
If the dimension no longer constrains critical geometry, delete it from the sketch. If it’s shared across components, consider temporarily hiding it to verify that dependent geometry remains intact.
Tip: Always perform a local save after removing each dimension to keep changes incremental. - 4
Repair or update references
If a dimension is needed but its reference is invalid, edit the feature to replace the reference with a valid one. Reattach to a surviving sketch or feature, or redefine the constraint to reflect current design intent.
Tip: Prefer reusing existing, stable references rather than creating new, untracked constraints. - 5
Run a quick rebuild and check for warnings
Rebuild the model to surface any remaining issues. Look for warning icons in the FeatureManager and verify that all essential dimensions remain defined. Use fully defined sketches where appropriate.
Tip: If warnings persist, re-check the impacted areas before continuing. - 6
Document changes and save versions
Record what was removed, why, and which references were updated. Save a new version of the file and compare with the backup to confirm only intended edits occurred.
Tip: Maintaining a changelog simplifies future debugging and collaboration.
Quick Answers
What exactly are dangling dimensions in SolidWorks, and how do I spot them?
Dangling dimensions reference features or sketches that no longer exist or are invalid. Look for red warnings or missing references in Sketch mode or the FeatureManager. Use the Reference Viewer to confirm each dimension's origin.
Dangling dimensions point to deleted or invalid references. Check the dimension's origin using the Reference Viewer to spot them quickly.
Can deleting a dangling dimension affect my model?
If the dimension does not constrain critical geometry, deletion is safe. Always verify by rebuilding the model and checking related features for unintended changes.
Deleting a non-critical dimension is usually safe, but always rebuild and review dependent features afterward.
Is there an automatic way to detect dangling references in SolidWorks?
SolidWorks offers diagnostic tools to surface conflicts, but dangling references often require manual inspection of sketches and references. Use Rebuild and Check Sketch tools to aid discovery.
SolidWorks provides diagnostics, but you’ll typically identify dangling references by inspecting sketches and using rebuild checks.
What should I do if removing a dimension changes the design intent?
If removing a dimension alters intent, revert to the backup and reattach a valid constraint that preserves the original intent. Document why the change was necessary.
If the change alters intent, revert to the backup and reattach a proper constraint. Document the reason.
Should I clean up dangling dimensions in assemblies, parts, or drawings differently?
Procedures are similar, but assemblies may require checking mates and references across components. Parts often involve sketch-level cleanup. Always validate in the context of the whole model.
In assemblies, check mates; in parts, focus on sketches. Validate across the whole model afterward.
Watch Video
Main Points
- Identify dangling dimensions before edits begin
- Trace each reference to avoid removing essential constraints
- Validate by rebuilding and checking for warnings
- Document changes for future maintenance
- Maintain versioned backups for safety