How to Lock Dimensions When Scaling in AutoCAD
Learn how to preserve exact dimensions when scaling AutoCAD drawings. This guide covers annotative dimensions, constraints, and best practices to prevent dimensional drift across scales, with step-by-step instructions and practical tips.

By the end of this guide, you will be able to keep dimension values stable when you scale AutoCAD drawings. Key ideas: use annotative dimensions, apply dimensional/geometric constraints, and leverage annotation scales to preserve readability while resizing. The approach reduces drift and ensures prints reflect intended sizes, even at multiple scales.
Why locking dimensions matters when scaling in AutoCAD
In AutoCAD, scaling drawings can subtly alter dimension display and accuracy unless you adopt a discipline for preserving dimensions. The phrase how to lock dimensions when scaling in autocad captures the core goal: keep measurements true while you resize. By combining annotation strategies, constraints, and careful scaling practices, you maintain design intent across scales. In real-world workflows—whether designing a kitchen layout, a furniture план, or a product component—dimension drift can undermine fit, tolerancing, and client communication. This section lays the foundation for why a robust approach matters for homeowners, students, and professionals who rely on precise size references in CAD outputs.
Understanding annotation vs. model space and the role of constraints
Dimensions can be either annotation objects or model space geometry. An annotation-dimension lives at a chosen annotation scale, while model geometry scales with the view. When you scale, dims may drift if not managed. By understanding annotation scales and constraints, you set up a workflow that reduces drift. Constraints (geometric or dimensional) let you define relationships that AutoCAD preserves when you modify geometry or scale the drawing. This understanding is crucial for anyone who wants predictable outcomes when moving between design stages or print sizes. What Dimensions recommends aligning your workflow around annotation-first thinking and constraint-aware edits.
Practical method: adopting annotative dimensions
Annotative dimensions are built to stay legible across scales. To lock dimension behavior during scaling, start by turning on annotation formatting for dimensions and setting a consistent annotation scale across layouts. Create or convert dimensions to Annotative, then fix their text height in the Dimension Style Manager so prints remain readable at every size. Pair annotative dims with a stable DIMSCALE (often 1) and ensure the target annotation scales are loaded in each layout. This method minimizes drift when you resize or reorient the drawing, and it keeps the visual language consistent for clients and manufacturers.
Practical method: using dimensional and geometric constraints
Parametric constraints let you lock specific distances and relationships between geometry. Apply dimensional constraints to key lengths (e.g., overall width, height, or gap between features) and use geometric constraints to preserve alignments and perpendicularity. When you later scale the model, CAD software preserves these relationships, reducing the chance that critical dimensions drift. Start with a small, representative subset of constraints, verify them, and expand as needed. What Dimensions notes that constraint-based workflows often yield the most reliable results when scaling is frequent.
Practical method: working with blocks, layers, and scales
Isolate the parts you want to scale without affecting dimensions by using blocks and dedicated layers. Place non-dimension geometry on one layer and all annotative dimensions on another. Lock the dimension layer during large-scale edits to prevent accidental modification, then re-enable after scaling. Use a consistent block insertion strategy so that instances scale uniformly. This approach helps maintain the relative relationships you specified while allowing you to resize the design for different outputs (e.g., fabrication plans, assembly drawings).
Verification and best practices
After scaling, verify all critical dimensions with MEASUREGEOM or DIMREASSOCIATE to confirm that the constraints and annotation relationships survived the transformation. Save a backup before major scale changes, test in a controlled workspace (e.g., a smaller subset of the drawing), and gradually apply the scaling across the project. Document the workflow in your design notes so teammates reuse the same approach, minimizing drift in future revisions.
Common pitfalls and mistakes
Rushing to scale without checking annotation scales often leads to unreadable text or misrepresented dimensions. Relying solely on the default dimension style without defining a fixed text height can cause variability across prints. Finally, mixing annotative and non-annotative dimensions without a consistent plan frequently results in inconsistent outputs. Planning, testing, and documentation are your best defenses against these issues.
Tools & Materials
- AutoCAD software(Use the latest stable release and ensure the toolset for CAD design is installed.)
- Drawing file (.dwg)(Have a backup copy before large scaling operations.)
- Annotation scale references (layout/paper space)(Prepare scales that match your print sizes.)
- Backup copy of original file(Create before major edits to compare results.)
- Reference guides or CAD standards document(Optional but helpful for consistent styles.)
Steps
Estimated time: 30-45 minutes
- 1
Enable annotative dimensions
Open the Dimension Style Manager and ensure the Dimensional objects you create are Annotative. This ensures the dimension size responds to the correct annotation scale rather than the current model space scale. This step creates a stable baseline for scaling operations.
Tip: Double-check the active annotation scales on each layout and align them with your printing requirements. - 2
Set fixed text height in the dimension style
Modify the dimension style to use a fixed text height instead of letting height scale with the drawing. Fixed text height preserves readability across scales and helps prevent text from appearing too large or small when you resize.
Tip: Choose a text height that remains legible on both screen and print. - 3
Apply dimensional constraints to key distances
Select critical distances and assign dimensional constraints to lock these values. This approach preserves relationships even when the geometry is scaled, guarding essential dimensions against drift.
Tip: Start with one or two critical constraints before expanding to a full set. - 4
Organize dims on a dedicated, non-dim layer
Place dimensions on a separate layer and consider locking that layer during scaling. This minimizes accidental edits while you adjust geometry on other layers.
Tip: Lock the layer only during scaling to avoid hindering subsequent edits. - 5
Scale non-dimension geometry first, then verify
Use the Scale command on non-dimension geometry, then re-check the affected dimensions to confirm they remained true or were re-associated correctly.
Tip: Avoid scaling dimensions themselves; scale the parts and re-validate. - 6
Validate results with measurement tools
After scaling, use MEASUREGEOM or similar tools to confirm the critical distances match the intended values. If needed, re-run DIMREASSOCIATE to reattach associations.
Tip: Document the results so teammates trust the outputs.
Quick Answers
Can AutoCAD truly lock a dimension during a global scale?
AutoCAD does not offer a single universal 'lock' toggle for dimensions during scaling. A robust workflow uses annotative dimensions, dimensional/geometric constraints, and careful scale management to preserve essential distances.
There isn’t one button to lock a dimension during scaling. Use annotative dimensions and constraints to keep critical distances stable.
What is the role of annotation scales when scaling drawings?
Annotation scales keep text and dimensions readable across different view sizes. They help maintain consistent appearance and legibility when you print or publish at various scales.
Annotation scales ensure your dimensions stay legible across prints and screens.
How do I enable annotative dimensions in AutoCAD?
Create or modify a dimension style and mark it as Annotative. Then apply appropriate annotation scales to ensure the dimension responds to layout or viewport scales.
Make the dimension style Annotative and set the correct annotation scales.
Should I use parametric constraints for locking distances?
Yes. Geometric and dimensional constraints lock relationships between geometry, helping preserve distances during edits or scaling.
Yes—constraints lock the relationships so distances stay fixed when you adjust the drawing.
What should I check after scaling?
Verify critical dimensions with measurement tools and re-attach associations if needed to ensure accuracy for fabrication or documentation.
After scaling, measure the key distances to confirm they match what you intended.
Are there risks to relying on constraints?
Constraints can complicate edits if overused or tangled. Keep a lean constraint set and document dependencies for teammates.
Constraints are powerful but can get complex—document and keep dependencies clear.
Watch Video
Main Points
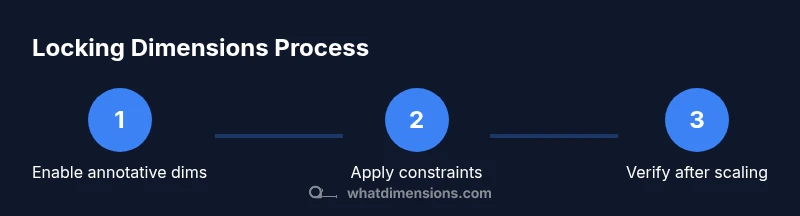
- Enable annotative dimensions for multi-scale readability
- Apply dimensional constraints to lock key lengths
- Scale non-dimension geometry, then verify dimensions
- Use a backup and document the workflow for consistency