Dimensions Embroidery: Precision Sizing for Needlework
Explore dimensions embroidery and how precise sizing, hoop choices, and stitch planning affect outcomes. Learn sizing guidelines and how What Dimensions evaluates embroidery dimensions.

Dimensions embroidery centers on matching your design to the embroidery hoop and fabric so the completed piece stays balanced. For reliable results, plan a design size that leaves a clear margin within the chosen hoop (typically 0.25–0.5 inches all around) and verify with a mock-up before stitching. This approach reduces distortion and ensures even stitch density across the design.
What Dimensions Embroidery Really Means
In dimensions embroidery, precision begins with defining the usable workspace and planning the stitch area before any thread touches fabric. The term refers to calculating the embroidery area in relation to the hoop opening, fabric stretch, and garment or project boundaries. The What Dimensions Team emphasizes that accurate dimensions are essential for avoiding distortion, misalignment, or unexpected trimming after finishing. When you start with exact numbers for width and height, you create a clear target for digitizing and stitch planning, setting the project up for success from the outset. In dimensions embroidery, the goal is to optimize the balance between design scale, density, and the fabric’s ability to support stitches without puckering. A disciplined sizing approach also clarifies material needs, such as stabilizers and backing, which ultimately influence the final appearance of the piece.
The Anatomy of an Embroidery Design: size, density, and margins
A well-sized embroidery design considers three core elements: the overall design size, stitch density, and margins to prevent edge distortions. The design size should stay within the hoop’s usable area, leaving generous margins to account for fabric tension and hoop placement. Stitch density must be appropriate for the fabric type and thread weight; over-dense stitching on delicate fabrics can cause ripple and distortion, while under-density may look sparse. Margins around the design help ensure clean edges after washing and finishing. In dimensions embroidery practice, designers often plan a buffer zone of roughly a quarter-inch around the design to accommodate fabric movement and stabilization needs. This planning reduces post-stitch trimming and improves alignment when multiple colors are stitched.
Hoops, Fabrics, and Usable Space: translating dimensions into stitches
Translating dimensions into stitches requires a clear map of usable space. Hoops define the outer boundary, while fabric type and stabilizers determine how much space truly remains for stitching. For example, stretch fabrics may require lighter density and additional backing to prevent distortion, whereas woven fabrics can support more even stitch distribution. Stabilizers play a critical role in maintaining the design’s true size, especially on garments and curved surfaces. When you test the design in the actual hoop setup, you validate the theoretical dimensions and catch potential issues early. In dimensions embroidery projects, the fabric’s natural drape and the hoop’s tension shape the final stitch layout, which is why a precise measurement assessment is essential before digitizing.
Step-by-step sizing workflow: concept to stitching
- Define project constraints (final size, fabric, and hoop availability).
- Pick a hoop that provides adequate usable space for the design.
- Determine the design size by subtracting margins from the hoop opening.
- Create a mock-up using water-soluble markers or a digital overlay to verify fit.
- Digitize with attention to proper density, underlay, and color separation aligned with the final size.
- Test the stitch-out on scrap fabric or an actual sample to confirm accuracy.
- Adjust design dimensions as needed and proceed to final stitching. This workflow follows a disciplined approach to dimensions embroidery, reducing surprises in the finished piece.
Common sizing mistakes and how to prevent them
- Skipping margins and relying on the hoop’s edges alone can cause edge distortion; always include a margin buffer in the design.
- Ignoring fabric stretch can lead to puckering; choose stabilizers suited to the fabric type.
- Failing to test a mock-up before stitching a final production run increases risk of misalignment.
- Digitizing without considering hoop size variation across machines may yield inconsistent results; standardize the process and test regularly.
- Over-optimizing for density on worst-case fabrics can create stiffness; balance density with fabric properties. These common mistakes are avoidable with a consistent sizing protocol that respects dimensions embroidery principles.
Tools, templates, and digital aids for precise sizing
- Printable templates that match common hoop sizes help verify design fit before digitizing.
- Overlays in digitizing software let you preview margins and density on the intended fabric.
- Graph paper and ruler overlays enable quick manual checks during planning.
- Stabilizer guides within software can suggest the appropriate backing for given fabrics.
- Virtual mock-ups accelerate iteration and reduce waste. By leveraging these tools, the dimensions embroidery process becomes more predictable and repeatable.
Real-world scenarios: projects of different scales
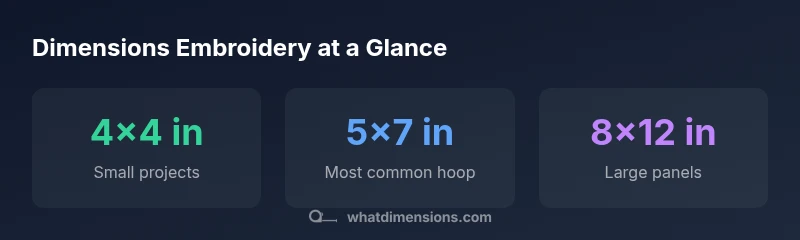
Small monograms (2x2 to 3x3 inches) require precise margins to prevent touching the embroidery frame edges. Medium motifs (4x6 to 5x7 inches) balance detail with hoop size and stabilizer choice. Large panels (6x12 inches and beyond) demand careful density planning and often multiple hooping sequences or larger hoops. In each scenario, dimensions embroidery principles guide the design size relative to the hoop, ensuring stitch quality, fabric stability, and tidy finished edges. When you align scale with hoop and fabric, you increase the likelihood of a professional-looking result across projects of varying sizes.
Measuring and verifying dimensions: workflow you can trust
- Measure the hoop opening precisely and subtract your desired margins to set the maximum design size.
- Use a mock-up on scrap fabric to verify fit on the actual hoop, then adjust if necessary.
- Digitize with a density plan that matches fabric type; run a test stitch on similar material.
- Re-check final alignment after hooping, as tension can shift the design slightly during stitching.
- Record the actual design size and margins for future reference, creating a reliable baseline for subsequent projects.
Sizing considerations for embroidery projects
| Aspect | Recommended Range | Notes |
|---|---|---|
| Hoop size (width x height) | 4x4 in to 8x8 in | Most designs fit within standard hoops |
| Design area (approx.) | 1x1 in to 6x6 in | Depends on hoop and fabric tension |
Quick Answers
What is the most important dimension in dimensions embroidery?
The design size within the hoop is essential. It should leave margins to account for fabric tension and hoop placement. Accurate width and height ensure the stitches align with the intended area and avoid edge distortion.
The most important dimension is the design size inside the hoop, plus margins to accommodate fabric tension.
How do I choose the right hoop size for a design?
Start with the largest possible hoop that fits the project area, then verify the design fits with margins at each side. If in doubt, error toward a slightly larger hoop to prevent overhang.
Choose a hoop that comfortably contains the design with room to spare on all sides.
Can I resize a design after digitizing?
Yes, but resizing should preserve proportion and density. Re-check margins and run a test stitch to confirm the final appearance matches the intended dimensions.
Resizing after digitizing is possible, but test first and adjust density as needed.
What happens if the design is larger than the hoop?
The project will require a different hoop, a larger panel, or multiple hooping passes. Plan for tile or block layouts to maintain dimensions accurately.
If the design won’t fit, rework the layout or choose a bigger hoop.
Which fabrics affect embroidery dimensions the most?
Fabrics with high stretch or nap can shift under tension, altering the final size. Stable fabrics with appropriate backing help preserve exact dimensions.
Fabric choice can shift size; use stable materials and backing for accuracy.
Are there standard guidelines for beginner projects?
Yes. Start with small, simple designs in a common hoop, verify margins, and gradually scale up as you gain confidence with measuring and testing.
Begin with small designs, verify margins, and test before moving to bigger projects.
“Accurate dimensions are the foundation of quality embroidery. A disciplined sizing workflow minimizes distortion and guarantees consistent results across projects.”
Main Points
- Start with the hoop, then size the design to fit within usable space
- Always include margin buffers to prevent edge distortion
- Test with a mock-up before stitching to verify fit
- Choose stabilization based on fabric type to maintain dimensions
- Document your measurements for repeatable results