Can You Add Dimensions in Rhino? A Step-by-Step Guide
Learn how to add precise dimensions in Rhino with step-by-step commands, best practices for model space and layouts, and tips to ensure clear, printable measurements.

Yes. You can add precise dimensions in Rhino using the Dim family of commands, placed in either model space or layout sheets. This guide walks you through the core tools, where to place dimensions, and how to keep measurements clear for fabrication and collaboration.
Can you add dimensions in Rhino? A practical overview
If you’re asking can you add dimensions in Rhino, the short answer is yes. In Rhino you can place dimensional annotations to specify distances, radii, angles, and diameters directly on your 3D model or on a printed sheet. The practice helps teammates, clients, and fabricators understand exact sizes without guesswork. According to What Dimensions, adding precise size references early in the design process reduces back-and-forth during reviews and speeds up approvals. The What Dimensions Team finds that designers who incorporate dimensions into their Rhino workflows report clearer communication and fewer interpretations of intent, especially when moving from concept models to fabrication drawings.
Rhino’s annotation toolkit includes a family of Dim commands that handle common measurement scenarios. You can measure a straight distance between two points, an arc length, the radius of a circle, or the angle between two lines. Dimensions can be created in model space for on-screen editing, or placed in a layout to appear on printed sheets. The choice depends on your workflow: if you’re preparing construction drawings for a shop, layout-based dimensions often look most professional; for quick checks or in-progress models, model-space dimensions are convenient. In all cases, keeping units, scale, and text size consistent is essential for legibility and precision.
note”:null,
Tools & Materials
- Rhino 7 or later software(Install the latest stable release to ensure full Dim command support (Dim, DimAligned, DimAngular, DimRadius, etc.).)
- Proper units configured(Set model units (mm, cm, inches) before adding dimensions to avoid conversion errors.)
- Reference drawings or a layout sheet(Useful for printing dimensions on a sheet with title block and borders.)
- Test model with simple geometry(Practice on a clean object to verify distances and tolerances.)
- Printer or PDF export capability(Optional for sharing dimensioned drawings with stakeholders.)
Steps
Estimated time: 15-25 minutes
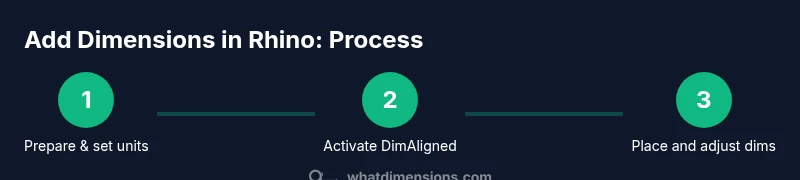
- 1
Prepare workspace and units
Open your Rhino project and decide whether you’ll annotate in model space or switch to a layout for printing. Set the document units (millimeters, inches, etc.) to match your fabrication or design requirements to ensure dimension values read correctly.
Tip: Fix the unit system early to prevent mismatches later in the workflow. - 2
Activate the appropriate dimension tool
Choose DimAligned for measurements that follow a particular alignment, or Dim for a simple distance between two points. You can also use DimAngular for angles or DimRadius/DimDiameter for circular features. Each tool is accessed from the Annotate menu or via the command line.
Tip: Start with DimAligned for most edge-to-edge measurements to avoid skewed reads. - 3
Select reference geometry
Click or pick the two points, edges, or objects you want to dimension. The dimension line will attach to the chosen references and project a leader toward the measured feature.
Tip: Place the cursor away from clutter to keep the dimension readable. - 4
Place and adjust the dimension
Click to place the dimension in the desired location. If needed, drag endpoints or dimension text to fine-tune readability and avoid overlap with other geometry.
Tip: Use snap and ortho modes to stabilize endpoints when precision matters. - 5
Format the dimension
Adjust the text height, font, and arrow style in the Properties panel. Ensure the units and decimal places match your project’s standards for consistency across sheets.
Tip: Apply a consistent dimension style across the entire project. - 6
Review and export
Review all dimensions for clarity, check for overlapping leaders, and export to your preferred format (PDF or DWG) for sharing with teammates or for fabrication.
Tip: Do a final check in layout view to confirm legibility on printouts.
Quick Answers
Can I add dimensions directly in the 3D view or should I use a layout for documentation?
Both options are valid. Add dimensions in the 3D view for quick checks, then switch to a layout for formal drawings and presentations. Layouts are generally preferred for final prints because they support title blocks and standard sheet formatting.
You can annotate in 3D space, but layouts are best for printed drawings.
How do I change the units for existing dimensions in Rhino?
Open the document properties and set the desired units, then update the dimension display to reflect the new unit system. If some dimensions don’t update automatically, refresh the viewport or re-create them after the unit change.
Change the units in document properties, then refresh the view.
Are Rhino dimensions linked to the geometry they reference?
Rhino dimensions reference geometry, but most dimension objects are not fully associative like parametric CAD packages. If you move the referenced geometry significantly, you may need to re-position or re-create the dimensions for accuracy.
Dimensions point to geometry, but may need adjustment after major edits.
Can I print or export dimensioned drawings to PDF or DWG?
Yes. Dimensioned layouts can be printed directly or exported as PDFs or DWG files. Ensure the layout is correctly scaled and that your print settings preserve dimension readability.
Dimensions can be included in PDFs and DWG exports.
How can I keep multiple dimensions aligned and tidy on a sheet?
Use a consistent dimension style across the sheet, align dimensions along common edges, and avoid overcrowding by spacing dim leaders and using multiple detail views.
Align and space dimensions evenly for a clean sheet.
Is there a shortcut to quickly add standard dimensions?
Rhino supports command-line shortcuts for dimension tools. Learn the common commands (Dim, DimAligned, DimAngular) and assign hotkeys if your workflow requires speed.
Use command-line shortcuts to speed up dimensioning.
Watch Video
Main Points
- Add dimensions in Rhino to communicate precise sizes clearly
- Choose model space or layout based on print needs
- Use the Dim family of commands for different measurement types
- Maintain consistent units and styles for readability
- Proof dimensions on layout before exporting drawings