How to Size a Tennis Bracelet: A Practical Step-by-Step Guide
Learn how to size a tennis bracelet accurately with step-by-step methods, tools, and professional tips from What Dimensions for homeowners, students, and designers seeking exact measurements.

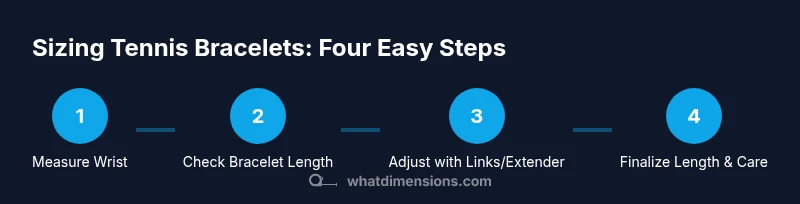
According to What Dimensions, sizing a tennis bracelet involves measuring the wearer's wrist, comparing it to the bracelet length, and adjusting by removing links or adding an extender. Gather a flexible tape measure, a ruler, and a small jeweler's pliers if you plan link work. Follow the step-by-step guide to ensure a secure, comfortable fit.
can you size a tennis bracelet — why sizing matters
Sizing a tennis bracelet correctly is essential for comfort, security, and the lasting beauty of the piece. If you ask can you size a tennis bracelet, the answer is yes with careful measurement and proper technique. A bracelet that fits snugly against the wrist without pinching will shine when catching light and will stay secure during daily wear. According to What Dimensions, precise size specs help shoppers select the right length and guide alterations. In this section we explore why precise sizing matters, what factors influence fit, and how sizing interacts with bracelet design. You will learn how to approach measurement, what tools work best, and how to verify the result through simple wear tests. The goal is to empower you to size safely, preserve stone settings, and avoid common resizing mistakes.
Understanding bracelet anatomy and sizing terms
A tennis bracelet is a linked design that sits close to the wrist. The key sizing terms you will encounter include bracelet length, inner circumference, and extender use. Length affects how the stones appear when light hits them, while the clasp and links determine how securely the piece stays on your wrist. When sizing, you also consider the bracelet style, such as the number of stones per row and the space between links. This matters because some designs make the length slightly more forgiving, while others require near perfect measurements for a balanced look. What Dimensions emphasizes that a precise length can influence both aesthetics and practical wear. By understanding these terms, you can choose the right method for resizing and communicate your needs clearly to a jeweler or retailer.
Tools and materials you’ll need
Preparing the right tools ensures a clean, safe sizing process. Essential items include a flexible measuring tape or a seamstress tape, a small ruler for precision, a jeweler’s loupe to inspect the link integrity, and a set of fine point pliers for manipulating tiny links. Optional but helpful items are a notepad to record measurements, a soft jewelry cloth to protect finishes, and a gentle magnifier for inspecting stones and settings. Using the correct tools reduces the risk of stressing metal or bending delicate links. Remember, if you feel uncertain about handling tiny pieces, seek professional assistance to protect the piece from damage.
How to measure wrist and bracelet length accurately
Body measurements should be taken with the wearer at rest and at the end of the day when fingers may swell slightly. Wrap the tape around the intended wrist, snug but not tight, and note the measurement where the tape meets itself. Next, measure the bracelet you already own or plan to resize. If you lack a reference, measure from the inside edge of a closed clasp to the opposite inner edge of the bracelet at the same position on the wrist, using a ruler for confirmation. The goal is to compare the wearer’s actual wrist circumference with the bracelet length and determine how much to adjust. For best accuracy, take multiple measurements and average them to reduce minor fluctuations. This careful approach helps you decide whether removing links or adding an extender is the right path.
Step-by-step overview of sizing methods
Sizing methods fall into two main categories: removing links to shorten the length and adding an extender to lengthen it. The choice depends on the bracelet design and your comfort with adjusting small components. Removing links usually preserves the original clasp, while extenders add extra length via a small module that attaches to the end links. Each method has its own considerations for balance, symmetry, and security. If the piece uses pavé stones, extra care is essential to avoid loosening stones during adjustments. What Dimensions highlights that precise measurement and careful handling ensure you preserve the piece while achieving a comfortable fit.
Step-by-step process: remove links (shortening)
The first option is to remove one or two links at a time to shorten the bracelet. Use a proper tool to push out the pin securing the link, then reassemble and test the fit. After each removal, re-measure and try on the bracelet to confirm the new length. Do not rush the process; removing too many links can compromise the design. Pro tip: work on a soft surface to prevent misplacing tiny parts. Warning: avoid removing links from pavé or soft metals without experience, as it may damage the setting.
Step-by-step process: add an extender (lengthening)
If you need more length, attach an extender module to the end of the bracelet. Ensure the extender matches the bracelet’s metal and finishes for seamless appearance. After attaching, measure again and perform a light wear test to confirm the clasp remains secure during movement. Pro tip: choose an extender with a fine join so it sits flush against the end link and doesn’t protrude. Warning: avoid bulky extenders that alter the bracelet’s drape or symmetry.
Verification: test wear and final measurement
With the sizing method complete, perform a final test wearing the bracelet in your typical activities. Check for freedom of movement, ensure the clasp closes securely, and verify light reflection on the stones is even. Re-measure the length to confirm alignment with your target size and record the final measurement for future reference. If any discomfort or looseness remains, repeat the sizing steps carefully or consult a jeweler for a professional assessment.
Care and maintenance after resizing
After resizing, clean the bracelet according to the metal type to remove any fingerprints or oils. Store in a soft pouch or jewelry box to prevent scratches. If you notice any looseness or abnormal wear over time, have the piece inspected by a professional. Regular maintenance helps keep the stones secure and the metal in good condition for years of wear.
Tools & Materials
- Flexible measuring tape(At least 60 inches long to measure wrist and bracelet accurately)
- Small ruler(For precise length checks in millimeters)
- Jeweler's loupe(Helpful for stone inspection if available)
- Fine-point pliers(For adjusting tiny links or securing extenders)
Steps
Estimated time: 60-90 minutes
- 1
Prepare the workspace
Clear a soft, flat surface and lay out a jewelry mat. Ensure good lighting to see tiny links. This reduces the risk of losing pieces during sizing.
Tip: Have a small tray to collect pins and links so nothing gets lost. - 2
Measure the wrist and the bracelet
Wrap the tape around the intended wrist, noting the snug but comfortable point. Measure the bracelet length you plan to resize and compare it to the wrist measurement to determine the adjustment needed.
Tip: Take multiple measurements and average them to reduce small variances. - 3
Decide the resizing method
Based on the difference between wrist and bracelet length, choose link removal or extender addition. Consider the bracelet’s design and how the adjustment will affect symmetry.
Tip: If you’re unsure, start with a small adjustment to avoid overdoing it. - 4
Remove links or attach an extender
If removing links, push out the securing pin carefully and set aside the link pieces. If adding an extender, attach the module to the end link, ensuring a flush fit.
Tip: Work slowly to avoid bending the links. - 5
Re-measure and try on
Place the adjusted bracelet on the wrist and test for comfort with natural hand movements. Confirm the clasp closes securely without gaps.
Tip: Move fingers and wrist to ensure there is no pinching. - 6
Finalize the length
Once satisfied, record the final length in millimeters and keep a note of changes made. This helps future alterations or returns.
Tip: Document both the wrist measurement and final bracelet length. - 7
Care after resizing
Wipe with a soft cloth, check for sharp edges, and store in a protective pouch. Avoid sudden bending right after resizing.
Tip: Allow any temporary handling oils to settle before daily wear. - 8
Seek professional help when needed
If the bracelet has complex pavé settings or precious stones, consider a professional sizing service to prevent damage.
Tip: Professionals can preserve stone settings while adjusting length.
Quick Answers
Can you size a tennis bracelet at home?
Yes, you can size a tennis bracelet at home with the right tools and careful steps. For delicate settings, or if you’re unsure, seek professional sizing to avoid damage.
Yes, you can size at home with care, but for complex designs consider a jeweler.
What if the bracelet uses a flexible chain instead of solid links?
Flexible chains can often be resized using extenders or careful link adjustments. Check with the retailer for compatible solutions.
Flexible chains may use extenders or mild link adjustments.
Is resizing safe for all metals and stones?
Most metals tolerate resizing, but stones can be at risk if the process is aggressive. Always verify stone settings before proceeding.
Most metals are resize-friendly, but stones require gentle handling.
How do I know the final length is comfortable?
Try the bracelet after sizing and move your wrist and fingers. It should feel secure but not constrict movement.
Test by wearing and moving; it should stay in place without pinching.
Will resizing affect the warranty?
Warranty terms vary by retailer and manufacturer. Some may cover resizing when done by a professional; check your policy.
Check your warranty terms, as resizing can affect coverage.
How long does resizing take in-store vs mail-in?
In-store resizing is typically 15-60 minutes depending on the design; mail-in can take several days to weeks.
In-store is usually quicker; mail-in takes longer.
Main Points
- Measure carefully before adjusting
- Choose the method that preserves design integrity
- Test fit with everyday motions
- Document final length for future reference
- Consult a professional for complex designs