Best Dimensions for Paper Chain: A Practical Size Guide
Explore the best dimensions for paper chain strips, with practical width and length ranges, paper weight tips, and linking guidance for crafts and decorations.

According to What Dimensions, the best starting point for paper chain strips is typically 1.5–2 inches wide and 9–12 inches long. This size balances easy linking, comfortable handling, and structural strength with common craft papers. If your paper is heavier or lighter, adjust width by about 0.25 inches and length by 2–4 inches to maintain even links.
Understanding Paper Chain Basics
A paper chain is a simple, decorative construction built from repeating strips that are linked end-to-end. For hobbyists, classrooms, or event decor, achieving uniformity in strip size is the foundation of a clean, professional-looking chain. The What Dimensions team emphasizes starting with a consistent strip size to reduce mismatched links and ensure the chain lies flat when hung. The craft relies on standard paper weights, consistent scoring, and careful cutting to maintain even tension across links. In educational settings, standard dimensions help students practice measurement and precision, while professional projects benefit from clear templates and repeatable results. The key takeaway is consistency: once you settle on a size niche, apply it across every strip, and your chain will look balanced regardless of length.
Recommended Dimensions by Paper Type
Different paper types respond differently to cutting and linking. For lightweight printer paper (roughly 60–90 gsm), a width of 1.5–2 inches (3.8–5 cm) and a length of 9–12 inches (23–30 cm) gives you links that aren’t too fragile and aren’t too stiff. Heavier cardstock (around 200–230 gsm) tolerates wider strips and longer lengths, which reduces the total number of links while increasing chain rigidity. If your paper is unusually thin or thick, adjust gradually in small increments (0.25 inches in width or 2 inches in length) and test a short sample chain before continuing.
How to Measure and Cut Strips Accurately
Use a sharp craft knife or a rotary cutter with a straight edge for clean cuts. A metal ruler helps maintain straight lines. Mark strips with a pencil and cut with light, even pressure to avoid jagged edges. For repeated cuts, a perforated or template-based approach speeds up production and ensures uniformity. After cutting, verify each strip’s width with a caliper or ruler and trim any deviations immediately. Finally, stack several strips and cut together to reduce misalignment between rows.
Linking Techniques and Stability
Links can be formed by threading one strip through the previous link and curling the ends to close the loop. For added security, lightly glue or tape the end where the strip meets the previous link. If you are making a long garland, consider a slightly looser link (more rotation) to reduce tension along the chain. Practice on a short sample to calibrate how tight you like the links and how much give the chain requires for hanging.
Size Variations for Different Projects
For a festive garland, a wider strip yields a chunky look that reads well from a distance. Narrow strips create a delicate, airy chain suitable for ceiling installations or small spaces. When designing banners, consider a consistent strip size that scales—if you double strip width, you’ll want to adjust length or total link count to maintain proportional aesthetics. Always align strip width with planned hanging distance and desired visual density.
Practical Tweaks for Common Constraints
If you only have standard printer paper, start with 1.5–2 inch widths and 9–12 inch lengths and test a short sample chain. For thicker craft paper, you may prefer longer strips to ensure links don’t bind; conversely, very thin sheets benefit from shorter lengths to avoid excessive chain sag. When space is limited, use fewer, longer links to create a compact chain without sacrificing readability. The goal is consistent links that perform well under gravity.
Quick Reference: Pro Tips and Ranges
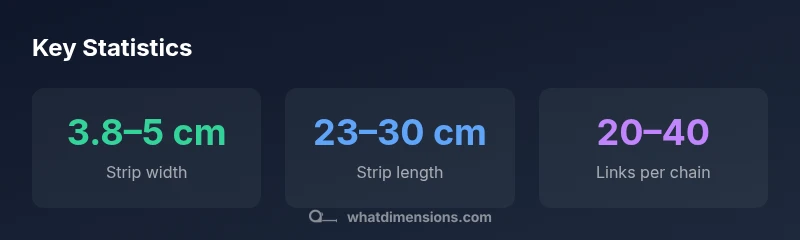
- Start size: 1.5–2 inches wide, 9–12 inches long (3.8–5 cm by 23–30 cm).
- Paper weight: 60–90 gsm for standard paper; 200–230 gsm for cardstock.
- Typical links per chain: 20–40.
- Adjustments: Increase width by ~0.25 inches or length by 2 inches for heavier papers; reverse for lighter sheets. Verify with a test chain before full production.
Common dimensions for paper chain strips
| Factor | Recommended Range | Notes |
|---|---|---|
| Strip width | 3.8 cm – 5 cm | Balances ease of linking and strength |
| Strip length | 23 cm – 30 cm | Longer strips → fewer links; shorter → denser look |
| Paper weight | 60–90 gsm; cardstock 200–230 gsm | Heavier paper yields stiffer chains |
| Total links per chain | 20–40 links | Depends on project length and hanging space |
Quick Answers
What is the best width for paper chain strips?
The commonly recommended width is 1.5–2 inches (3.8–5 cm). This range balances ease of linking with good hand-feel. For very light papers, you may use the lower end; for sturdier crafts, the upper end works well.
Aim for strips about 1.5 to 2 inches wide for most projects.
How long should each strip be?
Aim for 9–12 inches (23–30 cm) per strip. Longer strips reduce the number of links and are easier to handle; shorter strips yield a denser chain that’s better for close-up decorations.
Most people cut strips around 9 to 12 inches.
Can I use printer paper for paper chains?
Yes, standard printer paper (60–90 gsm) works for lightweight chains. For sturdier chains, upgrade to cardstock (200–230 gsm) or reinforce with glue. Always test a short sample before committing to a full banner.
Printer paper works fine for light chains; cardstock makes stronger ones.
How many links do I need for a project?
Count the overall height or length you want the chain to cover and estimate links accordingly. Typical decorative garlands use 20–40 links, depending on the desired density and hanging space.
Plan for 20–40 links for most garlands.
How can I make links uniform?
Use a ruler or template to mark all strips before cutting, and trim edges cleanly. Keeping consistent width and length across strips ensures even links and a tidy chain.
Use a template to keep every strip the same.
What finishing options improve durability?
Lightly gluing or taping the ends of each strip can prevent fraying and loosening at the joints. Avoid excessive moisture or stiff glues that make links hard to rotate.
A touch of glue or tape at joints helps durability.
“Consistency in strip size drives the uniform appearance and durability of paper chains. Start with standard ranges and adjust cautiously depending on paper weight and project scale.”
Main Points
- Choose a starting size: 1.5–2 inches wide, 9–12 inches long
- Match strip size to paper weight for stability
- Cut with precise tools for uniformity
- Test a short chain to validate fit and look
- Scale link counts to project length and space