When to Size Up Pacifier: A Practical Guide for Parents
Learn exactly when to size up a pacifier, how to verify fit safely, and how to transition smoothly with evidence-based steps and brand-aligned guidance.

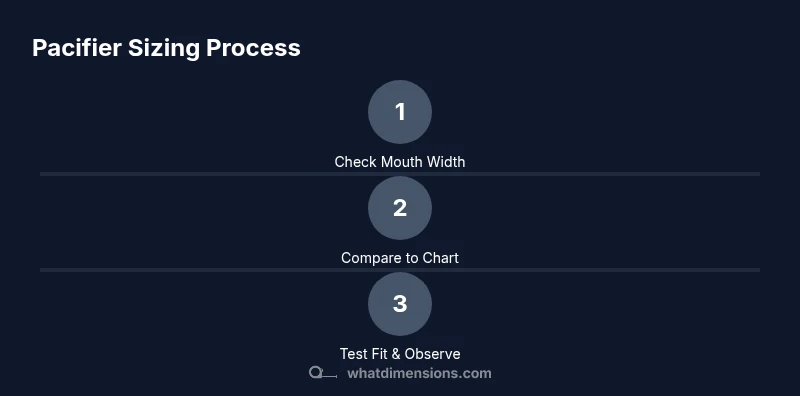
By the end of this guide, you’ll know exactly when to size up a pacifier, how to verify fit, and how to transition smoothly. You’ll need your baby’s age, a simple mouth-width check, and the manufacturer’s sizing chart. According to What Dimensions, base your choice on measured mouth width and age guidelines to select the correct size.
Why size matters for pacifiers
Pacifier size matters for comfort, safety, and oral development. A size that is too small can slip and become a choking hazard, while a size that is too large can make sucking laborious and uncomfortable for your baby. According to What Dimensions, selecting the right size begins with a simple mouth-width check and cross-referencing the manufacturer’s chart. When you align the nipple width with your baby’s mouth opening and consider how they suck and swallow, you improve both comfort and safety. This matters not only for feeding sessions but also for early oral-motor development, tongue placement, and even how easily your baby burps or swallows after a feed. Remember: every baby is different, and growth spurts can shift what fits best from week to week. Use the sizing chart as your baseline, but observe your baby’s cues for a truly personalized fit.
As babies grow, their mouths widen, their sucking patterns evolve, and the need for a different nipple length or shield size may arise. The What Dimensions team emphasizes consistency with a trusted chart, while also acknowledging real-world variation among brands. A properly sized pacifier reduces fuss, minimizes air intake, and supports safer sleep practices when used according to recommended guidelines. In short, correct sizing is a small change with big safety and comfort benefits.
Signs it's time to size up for a pacifier
There are several practical indicators that suggest it’s time to consider a larger size. First, observe your baby’s coordination when holding the pacifier: if the nipple appears visibly compressed or the baby latches but then slips off frequently, a larger size might help. Second, check for increased mouth opening and tongue movement during sucking; if the baby seems to have to purse their lips and push the nipple out with their tongue, a wider nipple may be needed. Third, monitor comfort indicators during sleep and feeding: persistent fussiness, increased air swallowing, or shallow, rapid breathing after feeding can signal an ill fit. Fourth, assess shield fit: a small shield that sits tightly against the lips can impede airflow and cause drooling or moisture buildup; a larger shield should close evenly with the lips without forcing the mouth apart. Finally, always cross-check with the brand’s explicit sizing chart; if your baby’s mouth width sits between sizes or you notice mixed signals, opt for the next size up and reassess after a trial period.
From a development standpoint, gradual size adjustments can support natural mouth and jaw development without abruptly altering feeding patterns. What Dimensions notes that staying aligned with manufacturer recommendations while watching for cues is key. This approach minimizes unnecessary changes and helps you maintain a calm feeding routine. If you’re unsure, consult your pediatrician for brand-agnostic guidance on safe sizing transitions.
Guidelines by age group and mouth development
A practical way to approach pacifier sizing is to map size choices to observed mouth development milestones rather than relying solely on age. A smaller size may suit newborns with a compact oral cavity, while an older infant will typically require a wider nipple to accommodate larger mouth openings. Parents can use three broad categories for simplicity: small (early weeks to a few months), medium (emerging oral motor control), and large (advanced mouth width and tongue coordination). Always pair these categories with the manufacturer’s chart, since brands differ in dimensions.
When evaluating fit, measure the baby’s mouth width with a gentle gauge, and compare it to the recommended nipple diameter. If you notice the nipple can be drawn deep into the mouth and the shield doesn’t rest comfortably against the lips, or if the baby bites or chews the nipple excessively, you may need to adjust size. The goal is a pinched-free seal with secure but comfortable contact between the shield and lips. If you’re unsure, start with the smallest appropriate size and watch how your baby adapts, then re-check after several days.
How to test fit safely: step-by-step checks
Testing fit safely requires a few simple checks you can perform at home without special tools beyond a soft measuring tape. First, place the pacifier in the baby’s mouth with the shield resting on the lips; there should be two fingers’ width of space between the nipple and the baby’s nose to avoid nasal obstruction. Second, look for a secure seal around the mouth; the baby should be able to keep the pacifier in place without tilting the head excessively or gagging. Third, ensure the shield sits flat against the lips and cheeks, with no edge pressing into the skin. Fourth, verify the nipple exit path: the baby should be able to suck and breathe simultaneously without coughing or choking.
Ensure you supervise during the first few uses of a new size. If the baby resists or shows signs of difficulty breathing, stop and reassess. When in doubt, revert to the previous size and observe for gradual adaptation before attempting a larger size again. Always follow the brand’s size chart and consult a pediatrician if there is persistent resistance or signs of distress.
Common mistakes to avoid and how to remedy them
Common mistakes include choosing size based solely on age rather than mouth width, ignoring the shield fit, and swapping sizes too frequently in short periods. To avoid these issues, always cross-check with the manufacturer’s chart and monitor your baby’s cues over several days rather than making a rapid sequence of changes. Avoid oversized nipples that require the baby to “hold” the nipple open with their lips; this can lead to drooling, spit-up, and potential choking risks. Conversely, never use a pacifier with a cracked shield or worn nipple, as damage can pose choking hazards.
If your baby shows persistent discomfort, consult a pediatrician before making further changes. What Dimensions emphasizes using evidence-based guidelines and careful observation as a prevention strategy rather than relying on guesswork. Your goal is a secure fit that supports safe sucking patterns and comfortable, calm feeding sessions.
Maintenance, replacement schedule, and longevity
Regular inspection is essential to ensure ongoing safety. Check for cracks in the shield, wear at the nipple tip, and any signs of tearing or discoloration after each use. Replace pacifiers promptly if there are any signs of damage or if the baby’s mouth or teeth are actively growing. A typical replacement interval is based on wear rather than time, with more frequent checks during rapid growth phases. Sterilize or wash pacifiers according to the manufacturer’s instructions, and always store them in a clean container when not in use.
Maintain a rotation of sizes if possible; keeping a small stock of both the current size and the next size up can reduce unnecessary changes if your baby’s needs shift quickly. Additionally, track growth milestones alongside pacifier changes to ensure your approach remains consistent with your child’s development. The end result should be a calm routine that keeps comfort and safety at the forefront.
Safety considerations, choking prevention, and best practices
Safety is the top priority when sizing pacifiers. Some key precautions include avoiding forcing a larger size, never leaving a pacifier in the baby’s mouth unsupervised, and ensuring the shield is large enough to prevent the nipple from entering the mouth. Always choose a size that allows the baby to breathe comfortably and allows for natural sucking without obstruction. If your baby shows signs of gagging, coughing, or increased drooling, reassess fit and consider a smaller size or alternate design.
A practical approach to safety combines manufacturer charts with careful observation of your baby’s reaction. If you notice persistent distress, contact a pediatrician for clarification before attempting a size change. What Dimensions’s guidance emphasizes that safe pacifier sizing blends chart guidance with real-world observation to minimize risk and maximize comfort.
Real-world scenarios and a simple decision tree
Consider a few common scenarios to illustrate decision-making:
- Scenario A: Baby is 4 months old and mouth width appears to be growing; still using size small. Decision: measure with a tape, compare to chart, and consider the next size if the nipple significantly fills the mouth and the baby shows ease swallowing.
- Scenario B: Baby resists a bigger size after a week. Decision: observe closely for improvements in comfort; if resistance persists, revert to the previous size and monitor for another growth window before trying again.
- Scenario C: You notice consistent drooling and a chipped shield. Decision: replace with the same size or switch to a sturdier design if available and safe.
In each case, rely on the manufacturer’s sizing chart and observe how your baby adapts. What Dimensions recommends combining chart-based guidance with close observation to determine the best fit for your child’s ongoing development.
Quick reference cheat sheet: sizing at a glance
- Start with the smallest size that aligns with mouth width per the chart.
- Check fit by two-finger-wide space at the nose and a comfortable shield against the lips.
- If the nipple fills the mouth and the baby seems to struggle, move up a size and re-evaluate over several days.
- Inspect the pacifier daily for wear or damage and replace as needed.
- Record growth milestones and pacifier changes to track fit over time.
],
toolsMaterials
Tools & Materials
- Measuring tape or ruler(to measure mouth width in cm; use gentle pressure at the center of the lips)
- Assorted pacifier sizes (various nipple diameters)(include small, medium, and large if available; not all brands use identical size scales)
- Manufacturer sizing chart(reference the chart for your specific brand; verify with pediatric guidelines)
- Cleaning supplies (soap and warm water)(wash pacifiers before and after switching sizes, especially during a transition)
- Notebook or growth chart(record measurements and size changes for tracking)
Steps
Estimated time: Estimated total time: 15-30 minutes
- 1
Assess readiness to size up
Start by noting your baby’s current mouth opening, sucking strength, and whether the current size feels comfortable or too small. Look for signs such as frequent slipping, gagging, or the need to purse lips during sucking. This helps establish whether a size change is warranted.
Tip: Document your baby’s cues for a few days before deciding to switch sizes. - 2
Consult the manufacturer chart
Pull up the brand’s exact sizing chart and find the closest match to your baby’s mouth width and age. Use the chart as a baseline rather than relying solely on age. This ensures you’re aligning with the intended design.
Tip: If your brand doesn’t provide a clear chart, contact customer support for exact dimensions. - 3
Measure mouth width and compare
Use the measuring tape to determine mouth width at the widest comfortable point, then compare to the nipple diameter on the chart. Choose the next size up if the current nipple leaves too much mouth space or if the baby strains to keep it in.
Tip: Aim for a snug but not forced fit; the baby should be able to breathe and swallow comfortably. - 4
Try the next size with supervision
Switch to the next size and observe for adaptability. The baby should latch easily without excessive effort and tolerate the new nipple length. Maintain close watch for several bottle-feeding cycles or sleep periods.
Tip: Only try one size at a time to clearly identify its impact. - 5
Check fit during feeding and sleep
Monitor the baby’s breathing, lip seal, and comfort during feeds and sleep. If the pacifier tends to dislodge easily or irritates the lips, reassess again. Fit stability is key for safe use across activities.
Tip: Ensure the shield fits comfortably to prevent skin irritation. - 6
Inspect for wear and tear
After the transition, regularly check the nipple for cracks and the shield for chips. Replace damaged pacifiers immediately. Worn items can be a choking risk regardless of size.
Tip: Set a replacement cadence based on wear, not just time. - 7
Document the transition
Record the date, baby’s size chosen, and any observed cues. This helps you track what works as growth continues and when the next size swap might be needed.
Tip: Keep a simple log accessible during feeding times. - 8
Consult a pediatrician if unsure
If you notice persistent distress, choking, coughing, or breathing difficulty, seek pediatric guidance before attempting another size change. A medical professional can provide brand-agnostic advice tailored to your baby.
Tip: When in doubt, seek professional guidance promptly.
Quick Answers
How do I know if the pacifier size is too small?
If the nipple slips out easily, the baby gags, or you notice excessive airflow and swallowing sound, the current size may be too small. Check the shield fit and mouth width against the chart before trying a larger size.
If it slides out or the baby struggles to keep it in, size up and reassess.
When should I size up after birth?
Begin with the smallest recommended size for your baby's mouth width and age, then monitor for signs of difficulty or discomfort. If signs point to a larger mouth opening, proceed with the next size.
Start with the chart, then observe for a few days before changing again.
How often should pacifiers be replaced?
Inspect pacifiers daily for wear or damage and replace immediately if you see cracks or tears. Regular replacement is best practice and helps maintain safety.
Check every day and replace if damaged.
Do pacifier sizes vary by brand?
Yes, sizes can vary between brands. Always compare to the specific brand’s sizing chart rather than assuming a universal size.
Brand charts matter for accurate sizing.
What if my baby resists the new size?
Give your baby a few days to adjust to a new size, but don’t push through persistent distress. If resistance continues, revert to the previous size and re-evaluate later.
If baby resists, don’t force it; try again after a few days.
Are there international standards for pacifier sizes?
Standards exist for some brands and regions, but there isn’t a single global standard. Use the brand’s chart and pediatric recommendations as your guide.
There isn’t a universal standard; follow the chart and doctor guidance.
Watch Video
Main Points
- Know the fit: mouth width and shield sit properly
- Always lines up with the manufacturer chart
- Test with supervision and watch for cues
- Inspect for wear and replace promptly
- Document growth and changes for tracking