How to Dimension in Onshape: A Complete How-To
Learn how to dimension in Onshape with a complete, practical guide. From sketching to tolerances and assembly sizing, master precise CAD measurements for parts and manufacturing-ready designs.

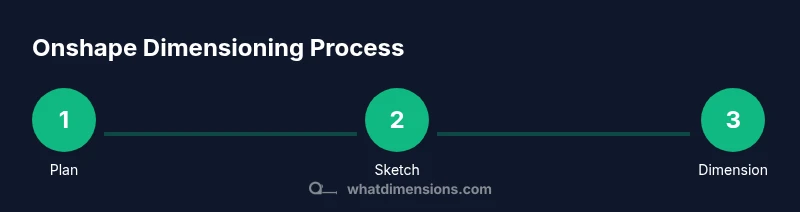
In this guide, you will learn how to dimension in Onshape by adding sketch and feature dimensions, placing constraints, and exporting accurate measurements for parts and assemblies. You'll need an Onshape account, a browser with internet access, and a clear reference drawing. The steps cover from creating a sketch to applying tolerances and verifying dimensions.
What dimensioning means in CAD and why it matters
In CAD programs like Onshape, dimensioning is the explicit declaration of size, location, and tolerances for every feature. For designers, homeowners, and students, accurate dimensions are the bridge between an idea and a manufacturable part. According to What Dimensions, dimensioning in CAD is not just about numbers; it’s about defining intent, ensuring interoperability between parts, and reducing the risk of misinterpretation during fabrication. The What Dimensions team found that well-dimensioned models lead to faster revisions, fewer back-and-forth questions, and clearer communication with suppliers. In Onshape, you dimension by selecting geometry and applying measurements that drive constraints, relationships, and geometry updates. Mastery comes from a mix of sketch-based dimensions, feature dimensions, and proper unit and tolerance management. Throughout this guide you’ll see practical examples that you can apply to furniture, prototypes, or any project requiring precise sizing. As you proceed, keep your target tolerances in mind and design with manufacturability as a core goal.
Quick-start: open Onshape and set up a sketch
To begin, sign into Onshape or create a new account. Open a new document and start a sketch on a standard plane or face. Before placing any dimensions, check your document units (millimeters or inches) and enable the grid if your workflow benefits from alignment precision. Set up a simple geometry first—two lines, a rectangle, or a circle—to demonstrate dimension placement. As What Dimensions notes, establishing a clear reference frame at the outset helps prevent cascading changes later. Keep your references organized with layers or separate sketches for different features, so you can dimension with confidence as your model evolves.
Defining base units and tolerances
Unit selection drives all subsequent dimensions. Choose a base unit (mm or in) that matches your manufacturing plan, and decide on a tolerance strategy (bilateral, unilateral, or none) early. Onshape tolerances can be configured at the sketch or feature level; consistent tolerances across related features reduce surprises during fabrication. The What Dimensions team emphasizes documenting tolerances near critical dimensions to communicate intent to machinists and suppliers. If your design crosses departments, use a single standard reference for all dimensions to avoid inconsistent measurements and misinterpretations.
Placing linear dimensions in a sketch
Linear dimensions define length, width, and height. Start by selecting the geometry you want to measure—an edge, line, or segment—and then click to place the dimension. Use the context menu to switch units or to constrain the dimension with a reference value. In Onshape, you can toggle between direct dimension input and value-editing after placement. Pro tip: place the most influential dimensions first, then add secondary ones to preserve clean geometry and minimize rework when edits occur.
Adding diameter and radius dimensions
Circular features require diameter or radius dimensions. Select the circle or arc, then choose diameter or radius from the dimension options. If you dimension multiple circles that share a center, Onshape’s constraints can help you align them to a common datum. Remember to document clearly whether a dimension represents an inner bore, outer diameter, or a pocket depth. Inconsistent labeling can lead to confusion in manufacturing or assembly.
Angular and reference-dimensioning techniques
Angular dimensions define the relationship between two lines or between a line and a base axis. To add an angle, select two lines or one line and a datum, then input the desired angle. Reference dimensions (not driving geometry) are valuable for documentation but should be used sparingly to avoid over-constraining the model. The goal is a dimension plan that communicates intent without restricting future edits or design exploration.
Working with constraints and relations
Dimensional constraints are powerful when combined with geometric relations like parallelism, perpendicularity, and tangency. Use coincident, parallel, and equal-length constraints to lock essential features in place while leaving others adjustable. Consistent constraints reduce rebuild time and help maintain relationships during iterative design. Practice grouping tightly related dimensions to keep your sketches readable and maintainable.
Dimensioning in assemblies and multi-part models
Dimensioning isn’t limited to a single part. In assemblies, dimension references may come from mates and assembly constraints. Ensure that each part’s dimensions reflect its role in the overall assembly and that tolerances align across interfaces. When dimensions must be compatible between parts, use datum features or shared references to ensure consistent fit and function. Onshape’s assembly environment makes it feasible to verify clearances and interference early in the design.
Referencing datum geometry and construction geometry
Datum features provide stable references for dimensions and constraints. Use datum planes, points, and axes to anchor dimensions in a predictable way, especially in complex geometries. Construction geometry is useful for guiding dimension placement without affecting actual geometry. By separating construction references from final geometry, you can adjust dimensioning without altering the core shape.
Best practices for clean, maintainable dimensioning
Organization matters. Name sketches and dimensions logically, group related features, and avoid over-constraining. Use consistent units and clearly label all tolerances. When sharing models, add a brief note or legend explaining the dimensioning approach, so future collaborators understand the design intent. What Dimensions recommends documenting the decision rationale behind critical tolerances to support manufacturing and quality control.
Common mistakes and troubleshooting
Common pitfalls include unit mix-ups, inconsistent tolerances, and ambiguous dimension labels. If a dimension suddenly changes after geometry edits, re-check constraints and references to ensure they still reflect the intended design. Regularly run through a quick sanity check: export a snapshot, review critical dimensions, and confirm the geometry maintains intended relationships. If dimensions don’t behave as expected, consider breaking complex sketches into simpler parts to isolate the issue.
Exporting, sharing, and documenting dimensions for manufacturing
When you’re ready to share or manufacture, export drawings or STEP files with annotated dimensions. Include a bill of materials (BOM) and a clear tolerance table for the shop floor. Document any design decisions that influence how dimensions are interpreted, such as surface finishes or machining allowances. What Dimensions clients often find helpful is a one-page summary of key dimensions and tolerances attached to the CAD file for easy reference.
Tools & Materials
- Onshape account (free or paid)(Set up a workspace and projects for dimensioning practice)
- Web browser with internet access(Chrome or Edge recommended for best performance)
- Computer or tablet with reliable performance(Adequate RAM and graphics handling improve sketching)
- Mouse or drafting tablet(Precise pointing improves accuracy when placing dimensions)
- Notes or reference drawings(Optional, useful for recording target dimensions and tolerances)
Steps
Estimated time: Estimated total time: 90-120 minutes
- 1
Open Onshape and start a new document
Log into Onshape, create a new document, and name it for your dimensioning exercise. Open a new sketch on a chosen plane to begin defining dimensions. This first step establishes the workspace and ensures you are using consistent units throughout the process.
Tip: Tip: Create a backup copy of your initial sketch before adding many dimensions. - 2
Set units and grid preferences
In the document settings, choose your base units (mm or inches) and configure tolerances if needed. A consistent grid and snapping options can help you align geometry precisely as you place dimensions.
Tip: Tip: Align the unit system with the part’s intended manufacturing process. - 3
Create base geometry for dimensioning
Draw basic shapes (lines, rectangles, circles) that will receive dimensions. Focus on creating clean geometry with intent, as this reduces the need for later edits when tightening tolerances.
Tip: Tip: Keep construction geometry separate from final geometry to simplify edits. - 4
Add linear dimensions
Select the geometry to measure (a line or segment) and place a linear dimension. Input the precise value and, if needed, attach it to a reference feature to maintain alignment during edits.
Tip: Tip: Place the most critical dimensions first to guide subsequent features. - 5
Dimension circles and arcs
Choose the circle or arc, then specify diameter or radius as appropriate. Use a consistent labeling scheme to avoid ambiguity when measuring bore diameters or pocket radii.
Tip: Tip: Use diameter for outer features and radius for rounded internal corners. - 6
Add angular dimensions
Select two lines or a line and a datum to define an angle. Onshape will lock the angle value and update geometry if related features move.
Tip: Tip: Use angles to constrain mating faces in assemblies for predictable fits. - 7
Apply constraints and relations
Use constraints like parallel, perpendicular, and equal length to maintain intended relationships. These constraints reduce the number of independent dimensions and stabilize the design during edits.
Tip: Tip: Regularly check that constraints remain valid after geometry changes. - 8
Work with datum and construction geometry
Create datum planes, axes, and points to anchor dimensions. Distinguish construction lines from final geometry to keep the model editable and understandable.
Tip: Tip: Datum references improve rebuild speed and accuracy in complex models. - 9
Dimension in assemblies and parts
Apply consistent dimensions across parts, using shared datum references where possible. Validate clearances and fits by simulating assembly movement and checking for interferences.
Tip: Tip: Document the intended assembly constraints so future designers can verify correct behavior. - 10
Review tolerances and finalize
Review all critical dimensions, check unit consistency, and ensure tolerances reflect manufacturing feasibility. Update annotations or notes to clarify intent for the shop floor.
Tip: Tip: Export a summary sheet with key dimensions and tolerances for manufacturing. - 11
Save, share, and export
Save your work and export as STEP or DXF as needed. Include dimension notes or a BOM to streamline production and quality checks.
Tip: Tip: Maintain version control by saving incremental versions during major revisions.
Quick Answers
How do I change units in Onshape?
Open the document settings and select Units to switch between metric and imperial. Apply changes to the current document or template to maintain consistency across your project.
Open the document settings, choose Units, and switch between metric and imperial. Apply the change to the current document to keep all dimensions consistent.
Can I dimension in both sketches and features?
Yes. You can place dimensions in sketches or attach dimensions to features after they are created. This allows for precise control while keeping geometry editable for future iterations.
You can dimension both sketches and features. This lets you lock in measurements while keeping shape editable for changes.
What happens if I change a dimension after an assembly is built?
Changing a dimension can affect mating parts and clearances. Re-check the assembly to ensure no unintended interference and update related dimensions if needed.
If you change a dimension, check the assembly for interference and adjust related dimensions to maintain proper fits.
How do I dimension diameter versus radius?
Choose diameter when measuring a circle’s external size and radius for internal curves or fillets. Be consistent in labeling and ensure the chosen value matches manufacturing needs.
Use diameter for outer circles and radius for inner curves; keep labeling consistent with your manufacturing requirements.
How can I export dimensions for manufacturing?
Export CAD data as STEP or DXF with dimension annotations. Include a tolerances table and a brief note on measurement intent for the shop.
Export your model with annotations in STEP or DXF and include a tolerances table for manufacturing.
Do dimensions stay linked to references after edits?
Dimensions typically stay linked to their references, but major geometry edits can require revalidating constraints. Periodic checks help ensure long-term accuracy.
Dimensions usually stay linked, but significant edits may require a quick re-check of constraints.
Watch Video
Main Points
- Define units and tolerances early before sketching.
- Prioritize critical dimensions to guide the design.
- Use datum features to anchor dimensions for consistency.
- Review and annotate dimensions for manufacturing clarity.