Dimensions Needlepoint Kits: A Size-Savvy Guide for Crafter Display
Explore precise size guidance for dimensions needlepoint kits, including finished size ranges, canvas counts, framing options, and space planning tips from What Dimensions. Learn how to read size labels and choose kit dimensions that fit your display needs.

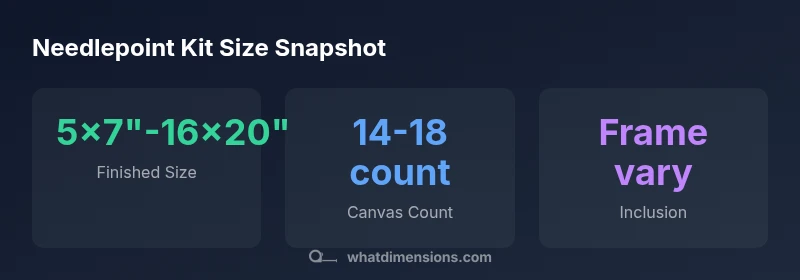
Dimensions needlepoint kits typically list finished size and canvas count, making size planning the most actionable data point for buyers. Common finished sizes range from about 5x7 to 16x20 inches, with 14-count or 18-count canvases most often offered. Always check the kit’s size chart to determine frame compatibility and whether finishing supplies are included or must be purchased separately.
Understanding kit sizes and dimensions
According to What Dimensions, precise sizing is essential for planning display, framing, and budgeting for your needlepoint projects. When you buy dimensions needlepoint kits, you are essentially purchasing a compact blueprint of your future artwork. The kit should clearly state the finished size, the density of the canvas (the count), and whether extra materials are included. Knowing these dimensions helps you measure wall space, select a compatible frame, and estimate thread and needle consumption. If you’re redesigning a space or choosing a gift, this data becomes a practical constraint that guides your decision rather than a vague aspirational target. The size label is not just a number; it foresees the entire assembly process—from mounting to display—so you can plan with confidence.
- Finished size matters for display space and proportions
- Canvas count affects stitch density and final visual texture
- Frame compatibility depends on both finished size and mounting method
Reading size specifications on dimensions needlepoint kits
Size labels on these kits typically show two key figures: the finished size (how big the piece will be when completed) and the canvas count (the grid density). The finished size tells you how much wall or table space the piece will occupy, while the canvas count influences how many stitches are required and how tight the final fabric will appear. Some kits also list the unframed size, which helps when planning a mat or frame. Always compare the listed dimensions against your available display area, and don’t forget to account for borders, framing, and any protective glass.
- Look for “finished size” and “canvas count” first
- Compare against your display area before purchasing
- Check if frame or matting is included or needs separate purchase
Standard size ranges you’ll encounter
In the world of dimensions needlepoint kits, there are conventional size buckets. Common finished sizes span from small, 5x7 inches, through mid-sized, 8x10 or 11x14 inches, to larger formats like 16x20 inches. The canvas counts most frequently offered are 14-count and 18-count, with higher counts available for intricate detail and smaller stitches. Some kits may provide a “trimmed” option (slightly smaller) or a “framed” version that includes hardware. Being aware of these ranges helps you filter options quickly during shopping trips or online browsing.
- 5x7 to 16x20 inches is a practical coverage area for home displays
- 14-count and 18-count canvases dominate the market
- Framing and finishing items can materially affect final presentation
How canvas count affects finished size and texture
Canvas count indicates the number of threads per inch. A higher count yields finer detail and a smoother finish, but it also increases the total stitch count and, therefore, the project duration. When you see a kit labeled as 14-count, the finished size in inches will typically be larger than the same design on an 18-count canvas if the stitch pattern is kept constant, because more stitches fit into the same area with a higher count. Conversely, a lower count can produce a chunkier texture but may require more space due to visible gaps at scale. Always align your expectations for texture with the canvas count listed for dimensions needlepoint kits.
- Higher counts = finer detail but longer work time
- Lower counts = chunkier texture and typically faster completion
- Matching frame and matting with canvas count yields the best results
Practical planning: fit your space and framing
Before selecting a dimensions needlepoint kit, map out the intended display environment. Measure wall or shelf space, account for any frames, mats, or glass, and consider viewing distance. If you’re gifting, opt for a size that doesn’t require immediate rearrangement of furniture or art hanging plans. It’s also wise to plan for a margin around the finished piece so it doesn’t feel cramped in its frame. If you’re unsure, start with a mid-range size (8x10 to 11x14) and scale up or down after you’ve assessed your space. This approach minimizes costly mistakes and keeps your project on track.
- Measure display space first
- Anticipate frame and matting dimensions
- Start with a mid-range size to test fit and framing
Common needlepoint kit size and framing considerations
| Aspect | Typical Range | Notes |
|---|---|---|
| Finished size | "5x7" to "16x20" | Common range for home display |
| Canvas count | "14-count" to "18-count" | Affects detail and stitch density |
| Frame inclusion | varies by kit | Check if frame is included |
| Project time | "8-20 hours" | Depends on count and design |
Quick Answers
What is the most important dimension to check when buying a dimensions needlepoint kit?
The finished size is the most important dimension to verify first. It determines display space, framing needs, and whether your project will fit in the intended location. Canvas count also matters for texture, but size should guide most purchasing decisions.
The finished size is what you’ll be displaying, so start there, then check the canvas count for texture.
Do dimensions needlepoint kits include finishing materials or frames?
Finishing materials and frames vary by kit. Some kits include a basic frame or mounting hardware, while others require separate purchases. Always read the kit details for included items and budget accordingly.
Check the kit details to see what’s included and plan for any extra framing or finishing needs.
How can I convert kit sizes to wall space if I’m unsure about framing?
Measure your wall space and subtract room for matting and framing. Use the kit’s finished size as a baseline, then add space for a mat (typically 0.5-1 inch per side) and the frame. This helps you avoid crowding or gaps in display.
Measure the wall, account for matting and frame size, and compare with the kit’s finished size.
Are there travel-friendly needlepoint kit sizes?
Yes, some kits are designed smaller for travel, typically in the 5x7 to 8x10 range. They still specify the canvas count and materials needed, so you can estimate progress during trips.
Look for small-format kits designed for portability and note the canvas count.
What should I do if the finished size doesn’t fit my frame?
If the finished size doesn’t fit, you can choose a different frame or alterframing, or select a kit with an alternative finish size. Some kits offer option for trim or re-stitching at a denser count to fit.
Consider switching to a kit with the right size, or adjust the frame setup to accommodate.
Is there a quick way to estimate total stitches based on size and count?
Total stitches depend on both finished size and canvas count. A rough method is (width in inches × count per inch) × (height in inches × count per inch). This gives a ballpark, but check the kit’s stitch count from the manufacturer for accuracy.
You can approximate stitches using width, height, and count per inch; verify with the kit details.
“Accurate kit dimensions simplify framing and space planning, ensuring your project looks as intended from first stitch to final display.”
Main Points
- Check finished size before buying to ensure fit
- Understand canvas count to gauge detail and effort
- Frame inclusion varies—confirm what’s included
- Plan space and framing early to avoid surprises
- When in doubt, start with a mid-range size for flexibility